How to Fix ImportError: No Module Named Sklearn in Python
-
Causes of
ImportError: No module named sklearnin Python -
Fix
ImportError: No module named sklearnin Python -
Installation of
sklearnModule UsingPIPin Python -
Installation of
sklearnModule UsingConda -
Import
sklearnand Check Its Version in Python - Conclusion

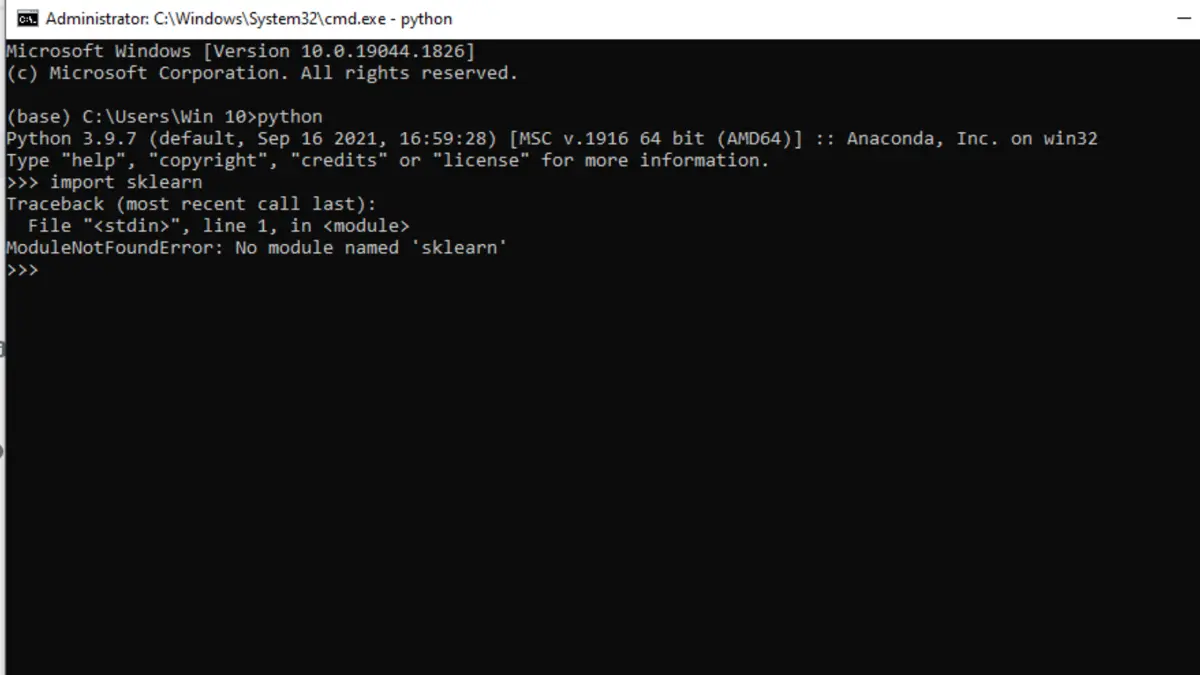
In Python, sklearn is used as a machine learning tool for creating programs on regression, cluster, etc. A lot of times, importing it throws an error - No module named sklearn.
This means the system cannot find it due to a bad installation, invalid Python or pip version, or other problems.
Causes of ImportError: No module named sklearn in Python
Suppose we install sklearn or any Python library into the system. The system says that the library has been installed successfully.
But when we import the library, we see the error - No module named 'sklearn'.
This can happen for mainly two reasons.
- The library did not get installed successfully.
- It was installed into an unknown directory that the system cannot find.
This article explains how to install sklearn into the system correctly.
Fix ImportError: No module named sklearn in Python
Installing sklearn into the Windows system is one of the methods through which we can solve the ImportError: No module named sklearn error in Python. There are two prerequisites for it.
- Python
pip
Knowing the pip and Python versions beforehand is not only helpful but advantageous. Bad installation happens when the Python version does not match the pip version inside the system.
There are three different ways to install Python on Windows, whichever seems suitable.
- Installing from an executable (
.exe) installer - Getting it from the Microsoft store
- Getting a subsystem Linux distro inside Windows
Only the first two alternatives, the most common installation techniques in a Windows system, will be the subject of this section. There are differences between the two official Python installers for Windows and some significant restrictions on the Microsoft Store bundle.
Installation From the Microsoft Store
The Microsoft Store bundle is the greatest option for a hassle-free setup. This has two main steps.
-
Search for Python
Search for Python through the Microsoft Store application. Several versions will likely be encountered that can be installed.
To access the installation screen, choose Python 3.8 or the highest version number found in the installer.
Another way is to launch PowerShell and enter the following command.
C:\> pythonPressing Enter will launch the Microsoft Store and direct the browser to the most recent version of Python available if it is not installed on the computer.
-
Install the Python app.
Once the version is chosen, the steps to finish the installation are as follows.
-
Select
Get. -
Await the download of the application. The
Install on my devicesbutton will appear in place of theGetbutton once the download is complete. -
Select the devices you want to finish installing, then click
Install on my devices. -
To begin the installation, click
Install Nowand thenOK. -
If the installation was successful, the Microsoft Store page will display
"This product is installed"at the top.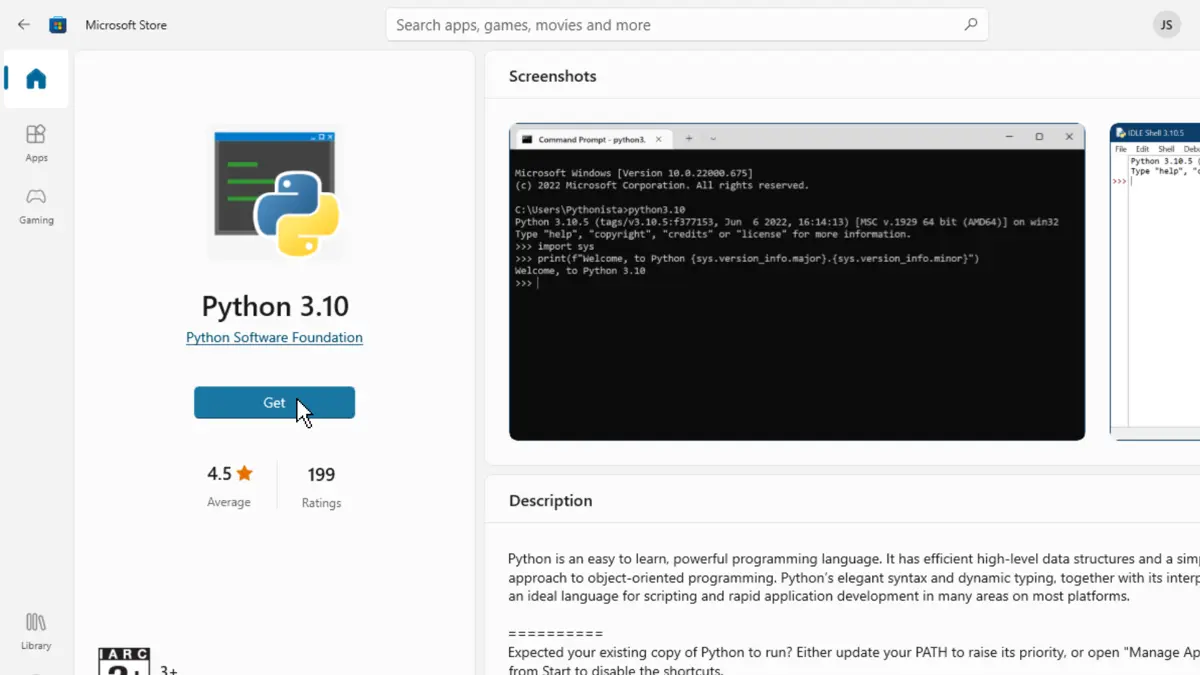
Installation Using an Executable Installer
- Download the Full Installer
To download the whole installer, adhere to the following steps.
- Go to the Python.org Downloads page for Windows by opening a browser window.
- Click the link for the Most Recent Python 3 Release - Python 3.x.x under the “Python Releases for Windows” category. Python 3.10.5 was the most recent version as of this writing.
- Either choose Windows x86-64 executable installer for 64-bit or Windows x86 executable installer for 32-bit by scrolling to the bottom.
Go to the next step after the installer has finished downloading.
- Run the installer
After selecting and downloading an installer, double-click the downloaded file to launch it. You’ll see a dialogue box similar to the one below.
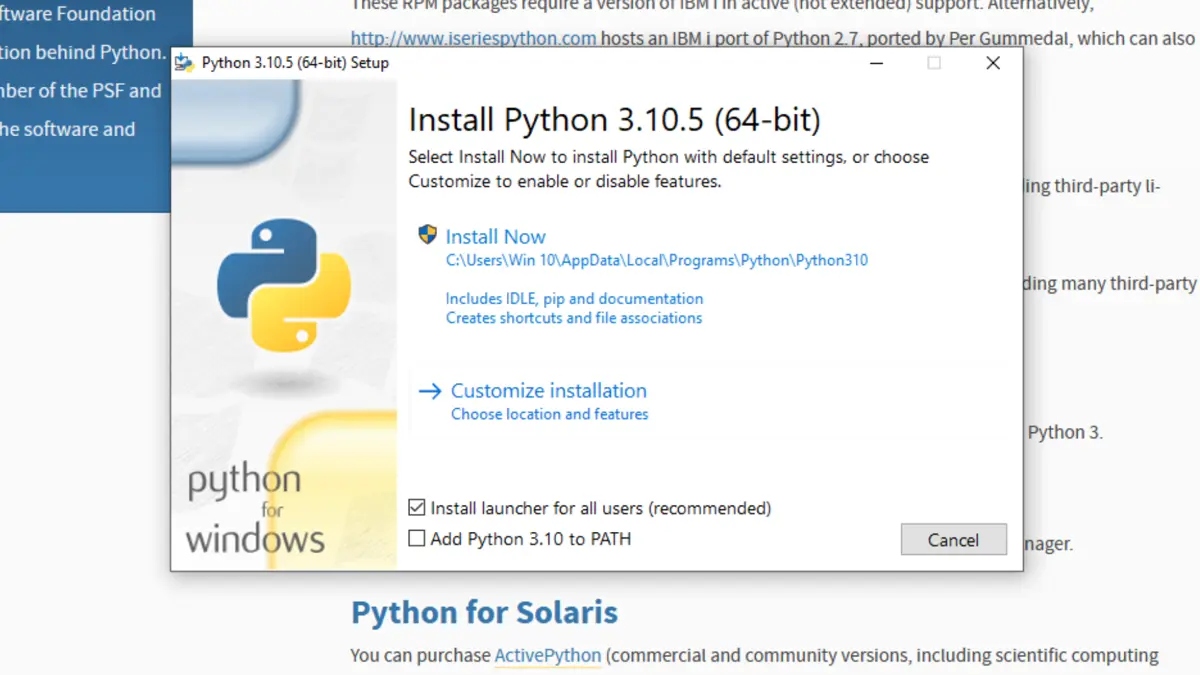
There are four things to notice about this dialog box.
-
The standard Windows user’s
AppData/directory contains the default install path. -
The
pipand IDLE installation locations and extra features can be altered using theCustomize installationbutton. -
The default checkbox next to
Install launcher for all users (recommended)is selected. This implies that thepy.exelauncher will be accessible to all users on the system.To make the installation available just for the current user, uncheck the option.
-
The
Add Python 3.10 to PATHcheckbox is not selected. Make sure you understand the ramifications before checking this box because there are several reasons why you would not want Python onPATH.
The installation process using the full installer gives complete control over it. Following these steps will install Python on the system.
Now the installation of sklearn can be initiated to solve the No module named 'sklearn' error.
Installation of sklearn Module Using PIP in Python
Launch a command-line runner like PowerShell or the command prompt to install sklearn this way.
How to start PowerShell is as follows:
- Go to start by hitting the Windows button.
- Type
PowerShell(or Command prompt/cmd, if PowerShell is not installed). - Click on it or press the Enter key.
PowerShell can be accessed as an alternative by right-clicking and selecting Open here as an administrator.
Inside the command line runner, the first step is to install pip.
Pip is a Python package manager that downloads and installs Python libraries inside the system. To install pip, type the command:
python get-pip.py
Once Python and pip are set up, sklearn can be installed. Type the command:
pip3 install scikit-learn
This will install the scikit-learn directory from the pip repositories.
If the system already has an older version of Python, or sklearn is required for a previous version like Python2, use the command:
pip2 install scikit-learn
If all the steps are executed correctly, the No module named 'sklearn' error would be resolved.
Once it is installed successfully, we can check its version by using:
pip show scikit-learn

It can be seen in the above image that the system can detect sklearn, which means our error - No module named 'sklearn' now stands resolved, and now it can be imported.
Installation of sklearn Module Using Conda
Anaconda is a Python distribution that executes Python scripts inside a virtual environment. It can also install and manage Python library packages using conda, an alternative to pip.
This is an alternative method to install sklearn into the system in a targeted environment to resolve the No module named 'sklearn' issue.
To install sklearn in Anaconda, open Anaconda3 in an administrative mode. After Anaconda is launched, open a command line prompt like cmd or PowerShell from inside Anaconda.
Opening a command line runner will load it inside a virtual environment of Anaconda, and all the packages installed will be made exclusively available for Anaconda only.
There are a few checkpoints that need to be ensured to install sklearn, which are:
- Checking
conda’s version - Updating
conda - Installing
sklearn - Creating and activating a
sklearnvirtual environment.
Inside the prompt, write the command:
conda -V
This will display the current version of conda. Then it needs to be updated using the command:
conda update conda
It asks for a y/n after displaying the list of packages that need to be installed. To proceed, type y and press Enter.
Conda will update itself with all the necessary packages.
Now, to install sklearn, use the command:
conda create -n sklearn-env -c conda-forge scikit-learn
The above command directs the prompt to create a virtual environment named sklearn-env and install scikit learn and all the dependencies within its virtual environment.
In Python, a virtual environment is simply an isolated directory that stores specific libraries and a version of Python so that it does not interfere with other libraries and other Python versions.
Entering the above command will display a list of available packages with sklearn that must be downloaded and installed. It asks for a y/n prompt, and entering y will install all the displayed packages.
After completing it, scikit learn gets downloaded and installed into the Anaconda.
Note: A
condaHTTP error might occur while installing one of the above packages if the download timeouts from the server. This specifically happens while Python gets downloaded.
The prompt displays the file path of the bad installation; go to the file path, delete the directory with the faulty download, and retry the above command.
This time it will get completed successfully.
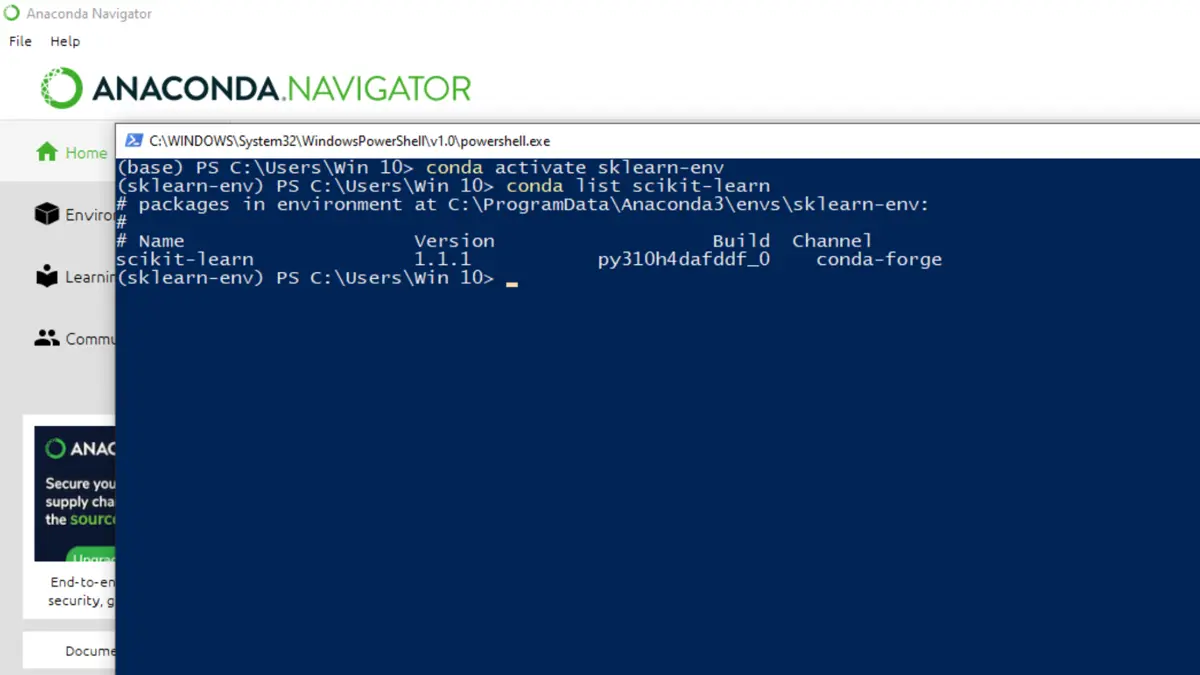
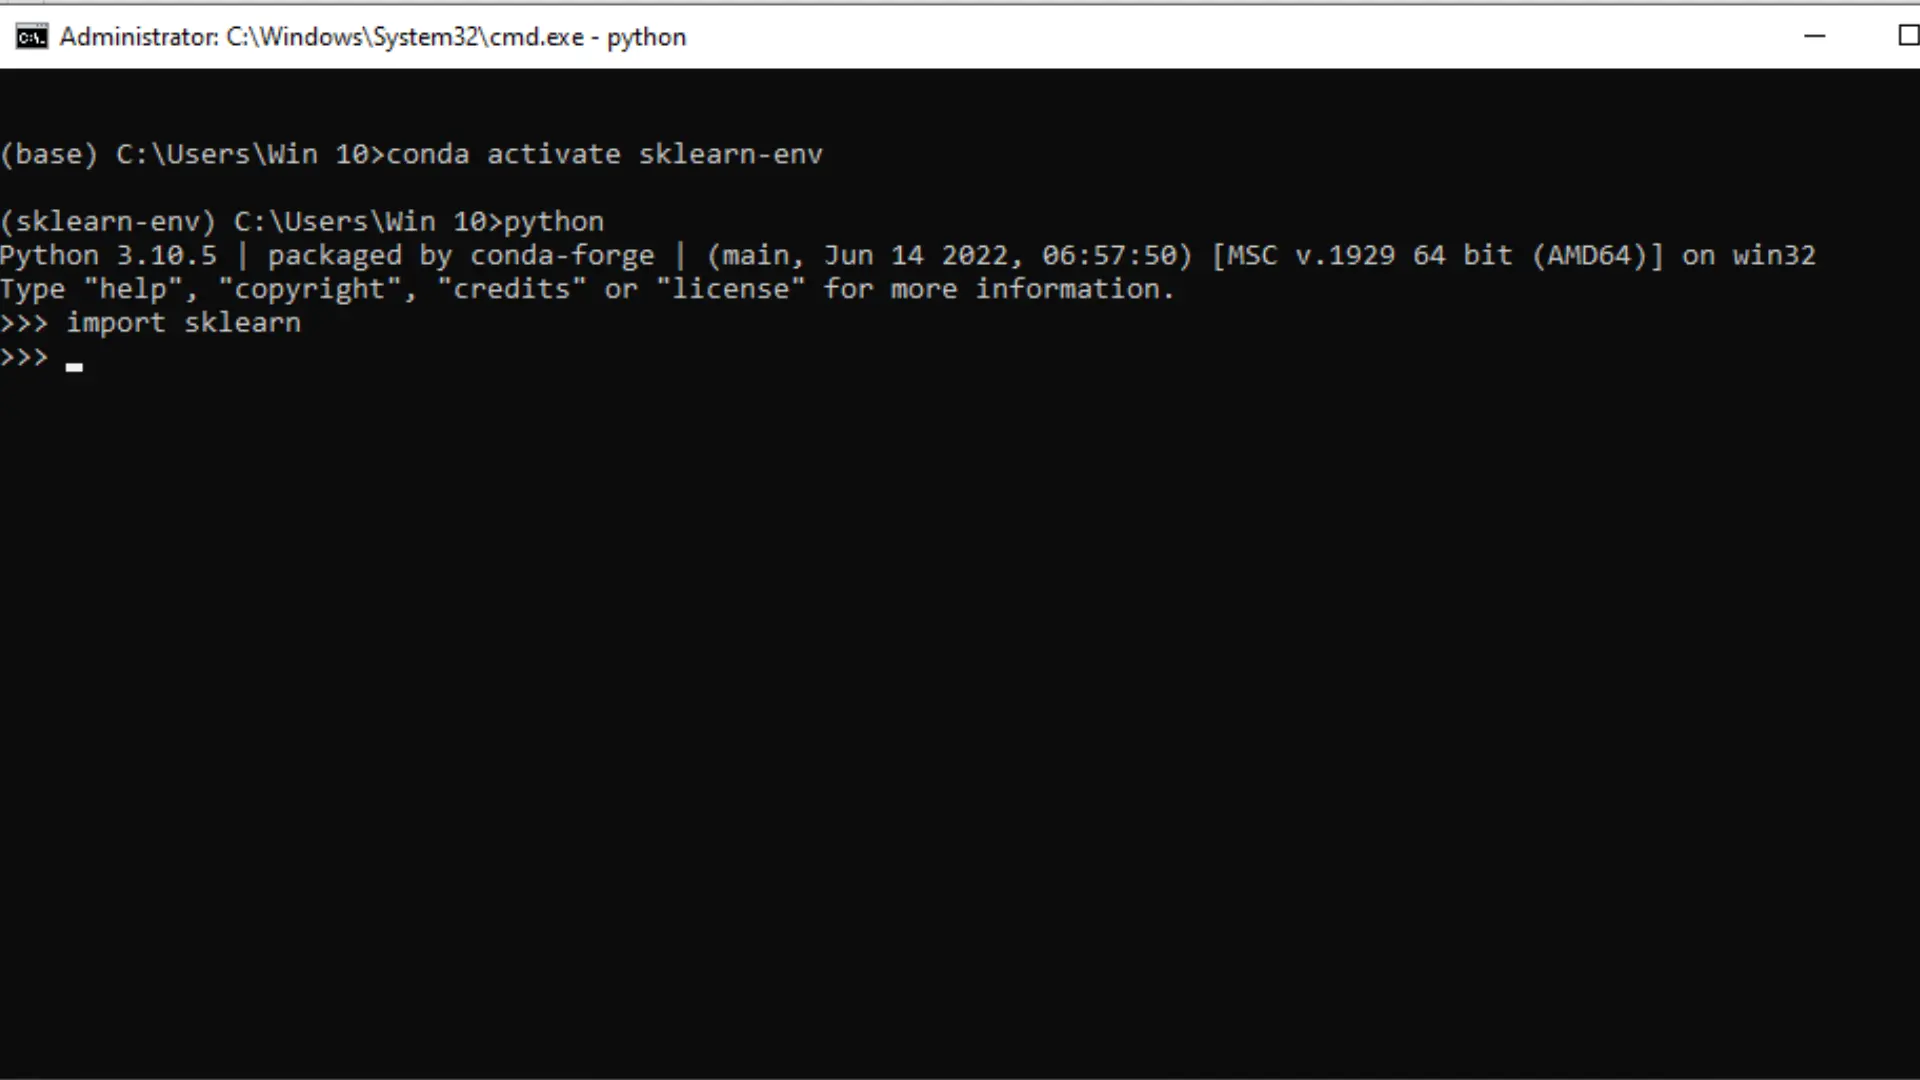
Though sklearn is installed, it cannot be directly used. The reason behind it is that it was installed inside a virtual environment that needs to be activated before.
Type the command:
conda activate sklearn-env
This will activate the sklearn virtual environment, and now sklearn can be imported and used. If all the steps are correctly followed, the No module named 'sklearn' error would be resolved by now.
In the next section, we will check sklearn’s version and import it.
Import sklearn and Check Its Version in Python
To check the version of sklearn, type the command:
conda list scikit-learn
To check all the installed packages, use the command:
conda list
To check the version of sklearn along with its dependencies, type:
python -c "import sklearn; sklearn.show_versions()"
Now we know that sklearn is installed and working successfully, we can import it by:
import sklearn
If it shows no errors, that means sklearn is working correctly.
If you again get the error - No module named 'sklearn', remove the virtual environment and packages, restart your system and repeat the above steps once again to get it installed correctly.
Conclusion
This article explains various methods to install sklearn into the system and resolve the No module named 'sklearn' error in Python. After reading this article, the reader will be able to install sklearn easily in different kinds of systems and setups.
It is hoped that this article helped in your learning journey.
Related Article - Python ImportError
- How to Fix ImportError: No Module Named mysql.connector
- How to Fix ImportError: Missing Required Dependencies Numpy
- How to Fix Python ImportError: No Module Named Requests
Related Article - Python Error
- Can Only Concatenate List (Not Int) to List in Python
- How to Fix Value Error Need More Than One Value to Unpack in Python
- How to Fix ValueError Arrays Must All Be the Same Length in Python
- Invalid Syntax in Python
- How to Fix the TypeError: Object of Type 'Int64' Is Not JSON Serializable
- How to Fix the TypeError: 'float' Object Cannot Be Interpreted as an Integer in Python