How to Set Date and Time on Raspberry Pi OS
- Set Date and Time on Raspberry Pi OS
- Use the Raspberry Pi Configuration Tool
-
Use the
raspi-config -
Install
ntpPackage -
Use the
dateCommand -
Install
fake-hwclock - Conclusion

This tutorial demonstrates how to set the date and time on Raspberry Pi OS using the command-line interface and the GUI.
Set Date and Time on Raspberry Pi OS
In Raspberry Pi or Raspbian OS, the system automatically sets the date and time during installation. In some cases, due to the lack of an internet connection, the date and time may not be set.
But it can be set manually by the users using the command-line interface or the GUI.
NTP, or Network Time Protocol, is responsible for computer clock synchronization. It requires an internet connection to set the date and time.
By default, it is enabled on the Raspbian OS. Most computers have a hardware clock that stores the date and time.
Raspberry Pi does not come with a hardware clock though it can be added to the Pi using the GPIO pins.
Alternatively, you can add a package called fake-hwclock that stores the current date and time in the system files and restores it after the reboot when there is no internet connection.
Let’s discuss different ways to set the date and time on the Raspbian OS with and without an internet connection.
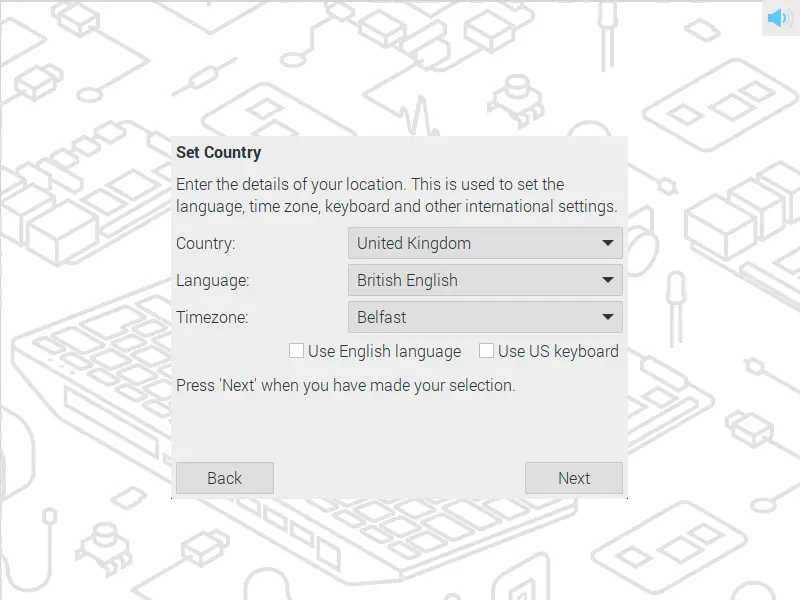
Welcome Wizard
When Raspberry Pi OS is installed for the first time, it shows the welcome wizard, which shows various options for setting up your Pi. At first, it will ask for your location, language and timezone, as shown in the figure below.
Choosing the appropriate options syncs the date and time from the internet server. However, if you choose the wrong options or want to change the location or timezone, it can be done through the Raspberry Pi configuration tool (GUI) or raspi-config (CLI).
We will discuss both methods in detail.
Use the Raspberry Pi Configuration Tool
This method can only be used to set the timezone. You can’t set the date and time manually using the GUI.
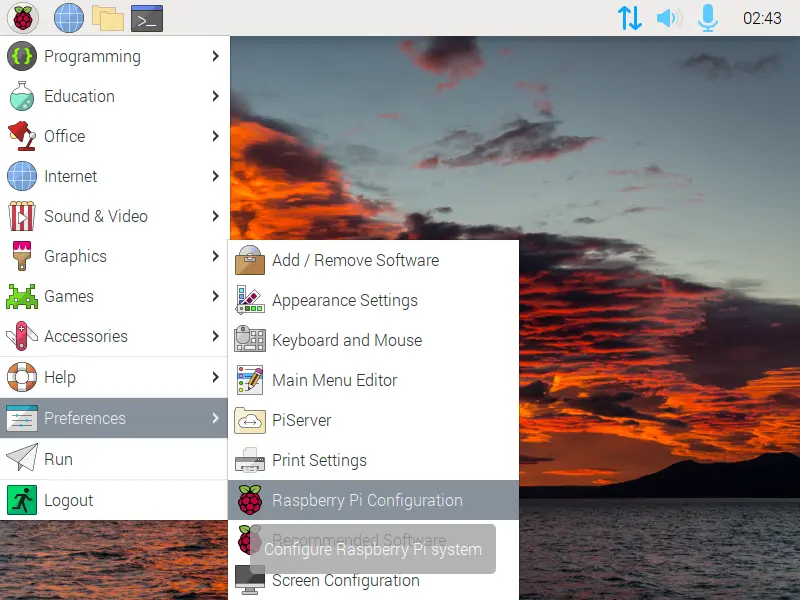
To open the Raspberry Pi Configuration Tool, open the main menu and under the Preferences, select Raspberry Pi Configuration, as shown below.
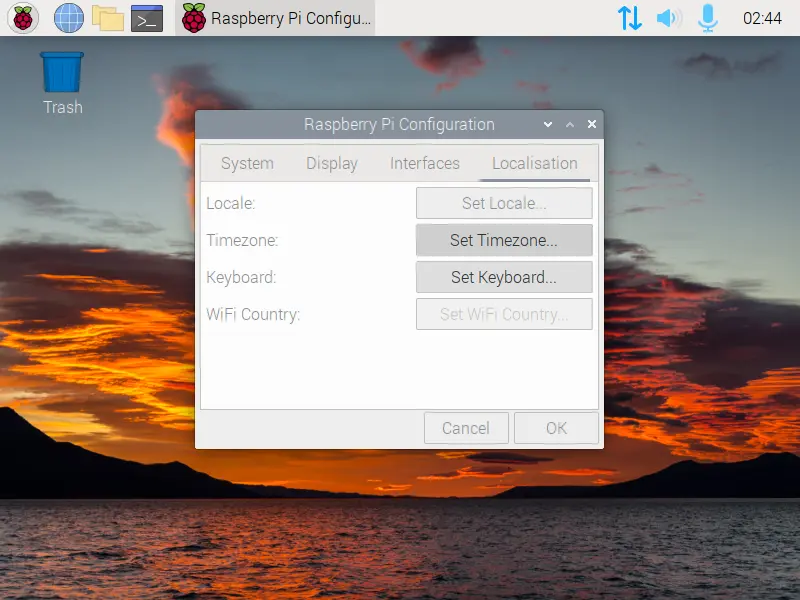
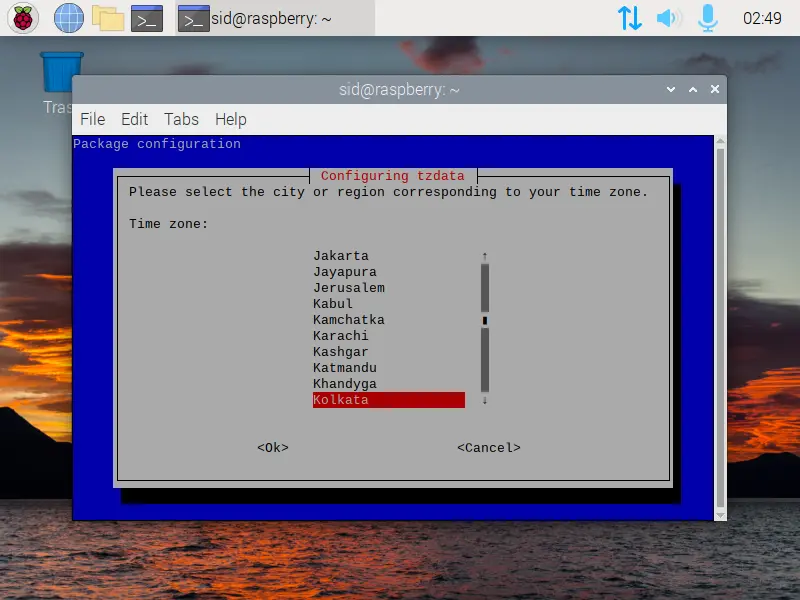
Now under the Localisation tab, click on Set Timezone.
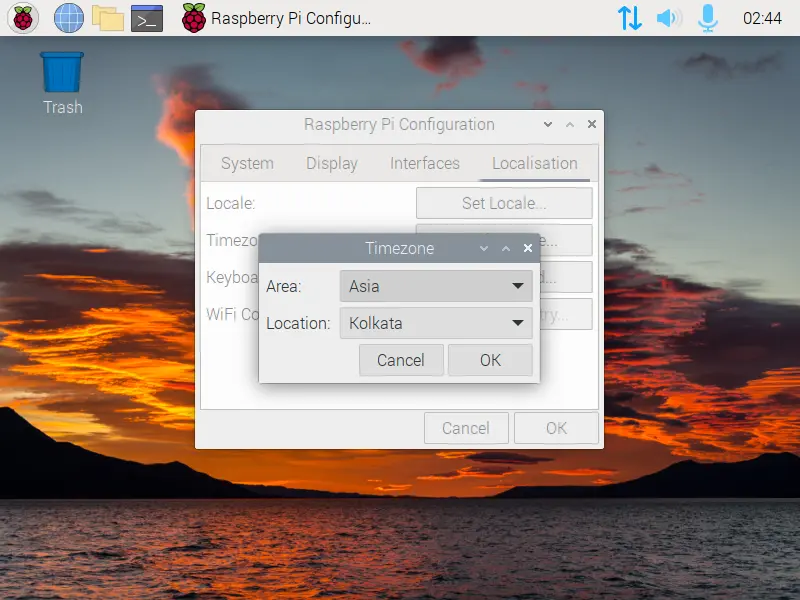
A pop-up will appear. Choose the Area and Location and click on Ok. Again click on Ok to save the changes.
Use the raspi-config
The raspi-config is a command-line tool that can be used to configure various settings of the system. It can be used to change the timezone.
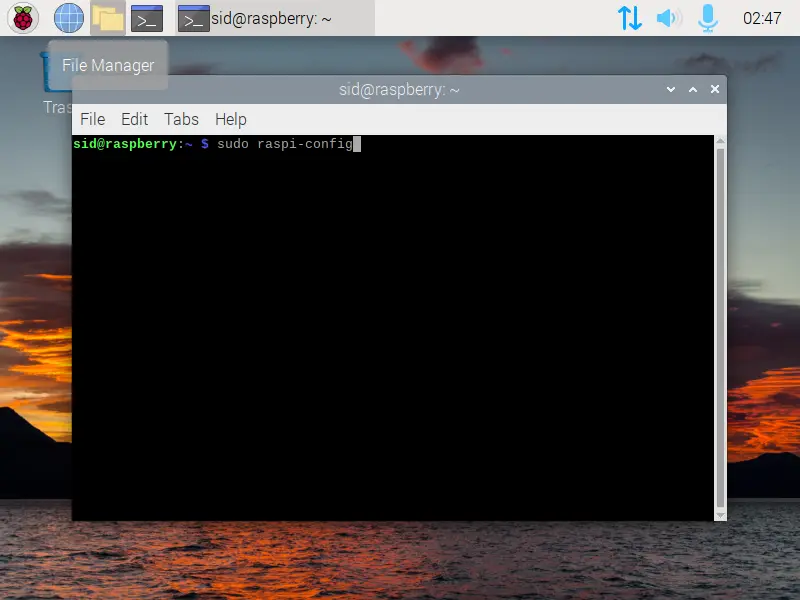
This method is useful when connected to the Raspberry Pi using SSH or the Raspberry Pi OS Lite. To begin, open a terminal window through the main-menu or by pressing Ctrl+Alt+T and executing the following command:
sudo raspi-config
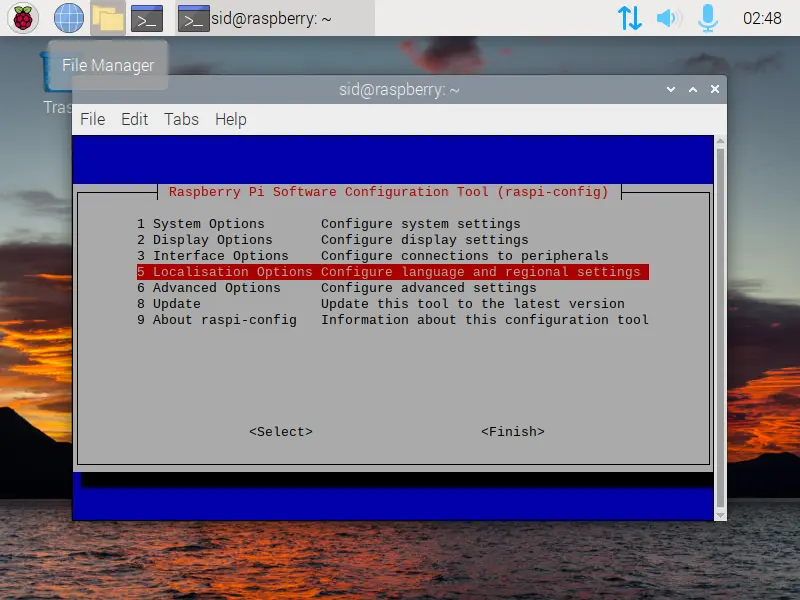
Now, navigate to the Localization Options using the arrow keys and press Enter.
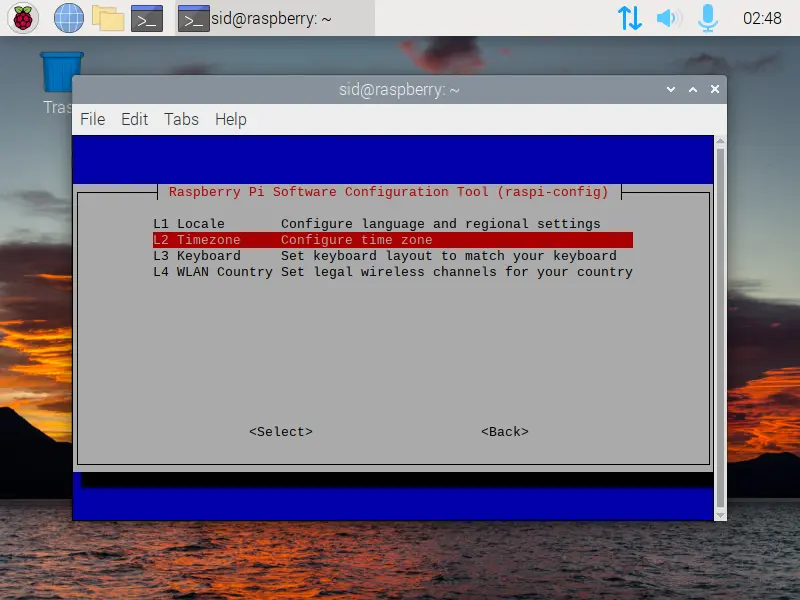
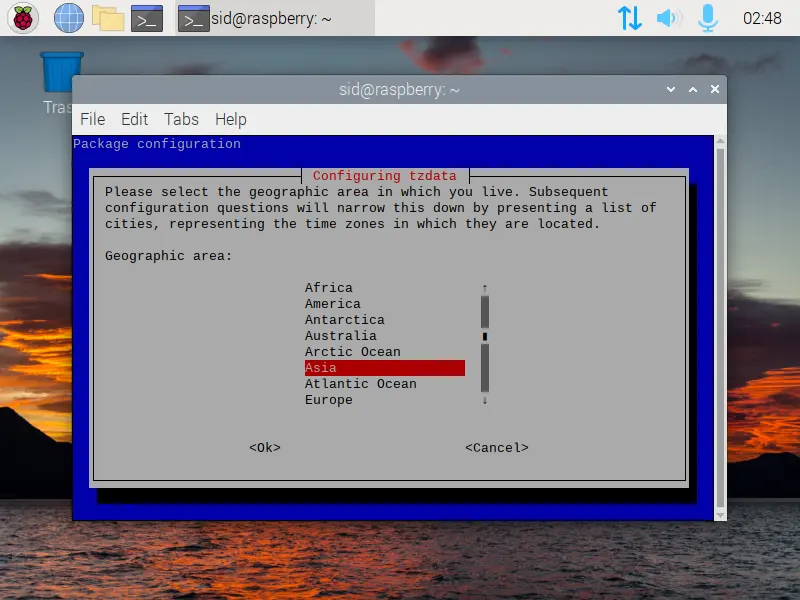
Now select Timezone and choose the geographical area and timezone for your region and press Enter.
Now, navigate to finish using the Tab key and press Enter.
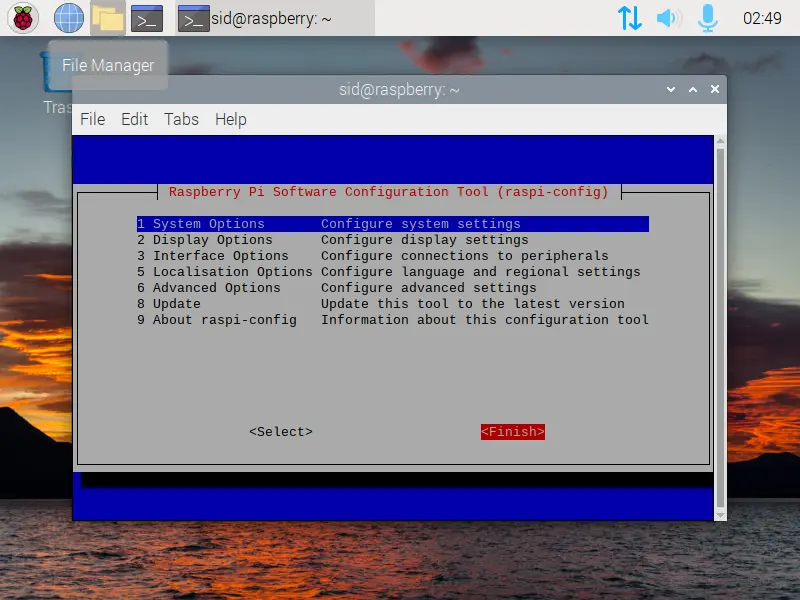
That’s all, the timezone is changed successfully, and the date and time will change accordingly after a few seconds. Alternatively, manually change the date and time using the date command.
The above methods will work only when the internet connection is available. If there is no internet connection, you can still manually set the date and time by using the methods discussed below.

Install ntp Package
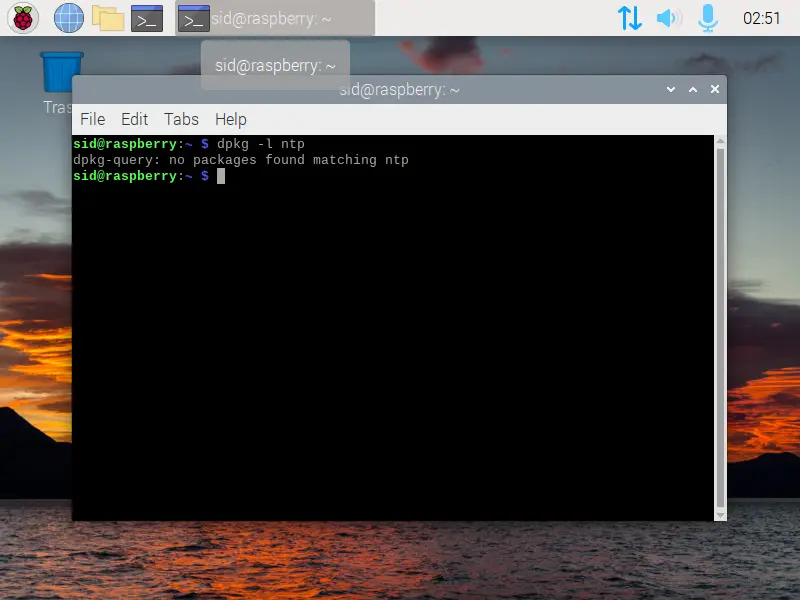
If the raspi-config does not work, it may be possible that the ntp is disabled or not installed on your system. To check whether ntp is installed on your system or not, execute the following command in a terminal window.
dpkg -l ntp
If it is not installed, it will show the output below.
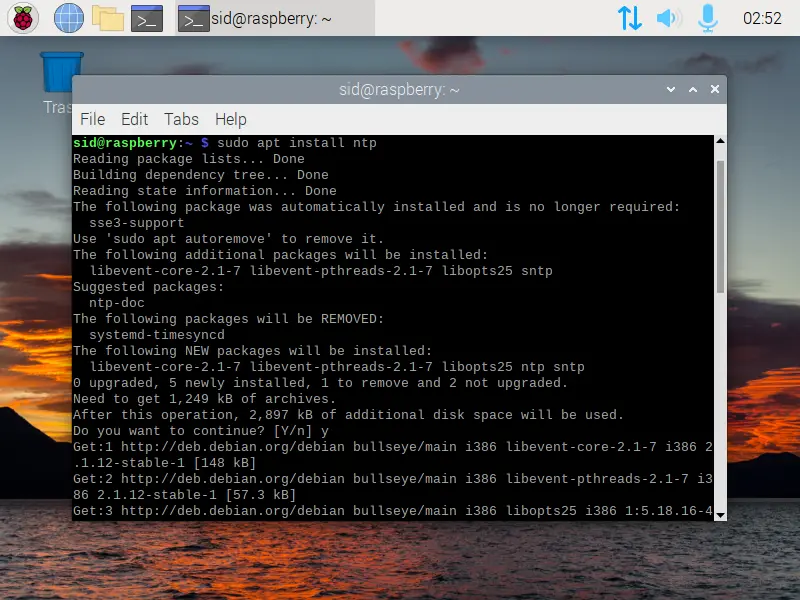
Then, execute the following command to install the ntp package on your system.
sudo apt install ntp
Use the date Command
The date command is used to display the date and time. Using the -s parameter, you can also manually change the date and time, which requires sudo privileges.
The syntax of the date command is below.
sudo date -s 'YYYY-MM-DD HH:MM:SS'
The following example shows how to change the date and time using the date command.
sudo date -s '2022-10-06 02:00:00'
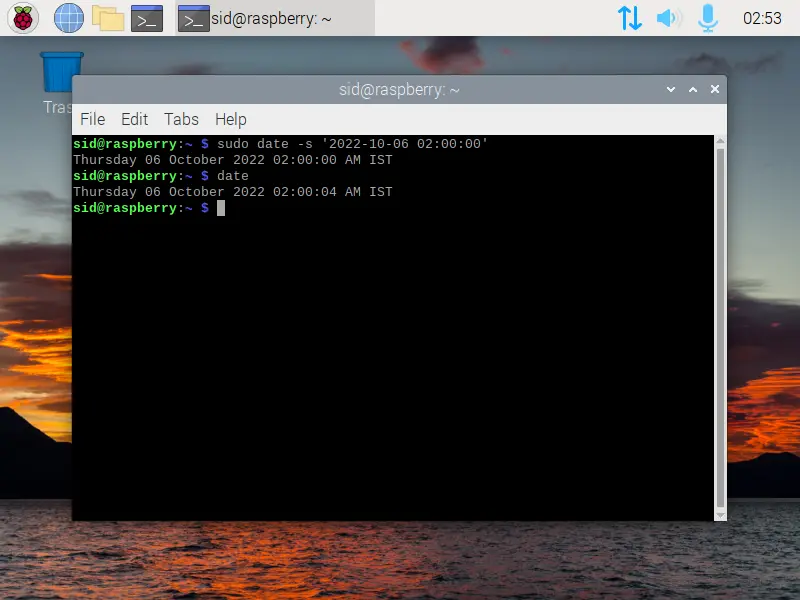
If you only want to change the time, execute the above command in the following manner.
sudo date -s '04:30:00'

Install fake-hwclock
The program fake-hwclock is used to set a fake hardware clock for systems that do not have a hardware clock or battery. It stores the date and time in system files and restores it on boot.
It works similarly to a functional hardware clock. To install the fake-hwclock, execute the following command in a terminal window.
sudo apt install fake-hwclock
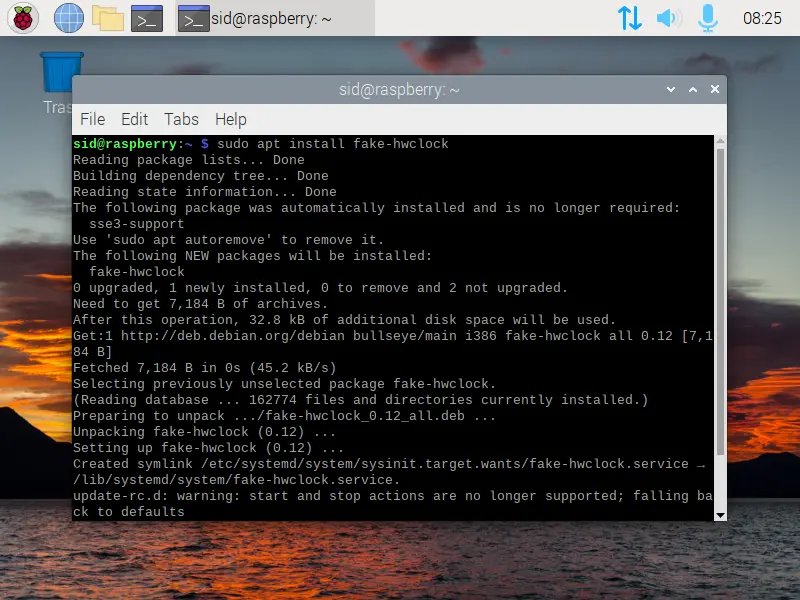
That’s all! The program will work automatically upon installation.
Conclusion
So, we discussed different ways to set the date and time using the graphical interface and the command line. However, it is recommended to use ntp instead of the fake-hwclock program for better accuracy.