How to Use Dropbox on Raspberry Pi

This tutorial will discuss using the Dropbox-Uploader package from github to upload files to Dropbox on Raspberry Pi.
Dropbox on Raspberry Pi
Dropbox is a cloud storage service that can be used to upload and share files. The files can be videos, images, and documents, which can be uploaded on Dropbox and later, we can access them through the internet.
People use Dropbox to store data because there are chances that their data will be lost if it’s on a mobile phone or computer, and the other benefit is that we can access our files from anywhere in the world using the internet. To use Dropbox, we can go to their site and signup.
To upload and share files, we usually use the website or mobile app of Dropbox, but we can also upload files on our Dropbox using the Dropbox-Uploader package on Raspberry Pi. Follow this video or the steps mentioned below to use Dropbox on Raspberry Pi.
We can install the package using git, but before that, we need to install git on our Raspberry Pi if it’s not already installed.
Before installing git, we also have to update the installed packages of Raspberry Pi OS. We can use the below commands to update packages and to install git.
sudo apt update
sudo apt upgrade
sudo apt install curl git
We have to write the above commands one by one in the terminal of Raspberry Pi OS, and if permission is required to install a package, we need to enter y to install it. After installing git, we can install Dropbox-Uploader using the below command.
git clone https://github.com/andreafabrizi/Dropbox-Uploader.git
After running the above line of code, the Dropbox-Uploader will be installed, and we can go to the Dropbox-Uploader directory using the below command on the terminal.
cd ~/Dropbox-Uploader/
After that, we need to provide access to the dropbox_uploader.sh script using the below command.
sudo chmod +x dropbox_uploader.sh
The dropbox_uploader.sh script is a Bash script used to upload files. We can run it using the below command.
./dropbox_uploader.sh
Make sure to run the command after the cd command because the script file is inside the Dropbox-Uploader directory and cannot be run directly from the home directory.
If we run the above command, it will guide us to go to the Dropbox website, make an app, and enter that app’s information inside the terminal to link Dropbox with the uploader.
Getting Information From Dropbox Site
We have to go to the below webpage to create a Dropbox app from which we can get the information we need to enter into the terminal to link the Dropbox-Uploader with our Dropbox account.
We have to create an account to access the above page. We can click the Create app button on the website to create a new app, and the next page will show up, shown below.
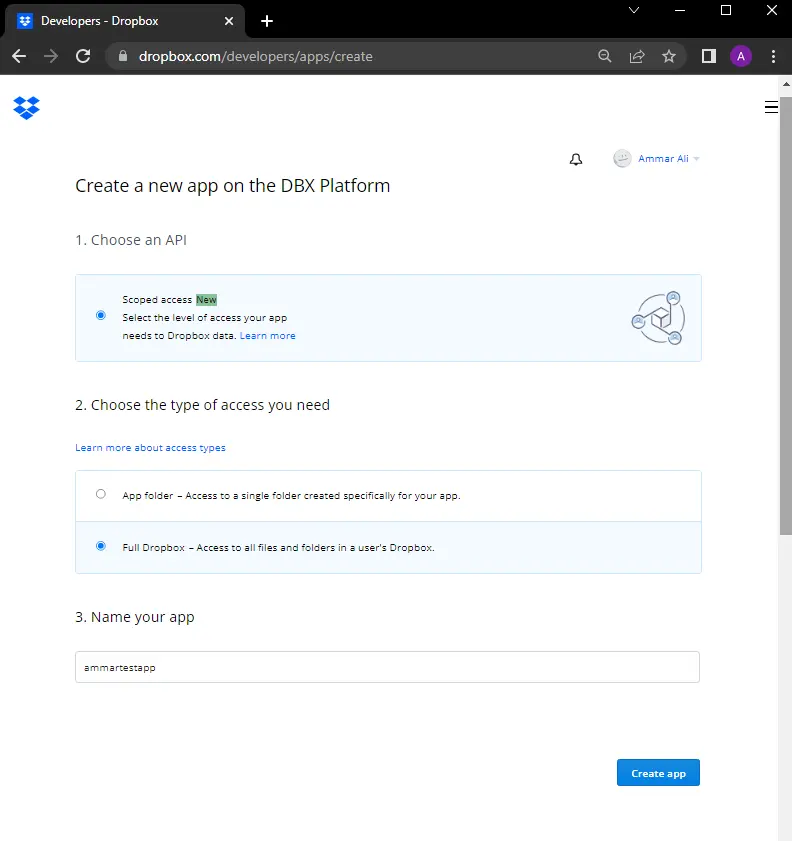
On the above page, we have to select different options like the API and type of access, and we can also give a unique name to our app. After that, we have to press the Create app button to create it, and it will take us to the below page.
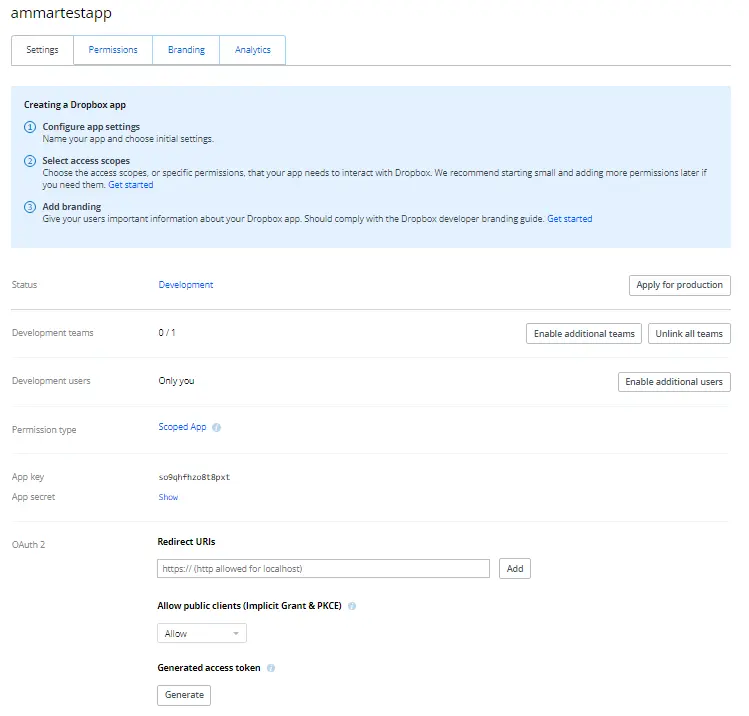
We also have to give file permissions to the uploader, which we can give by clicking on the Permissions tab shown in the above image, and the below page will show up.
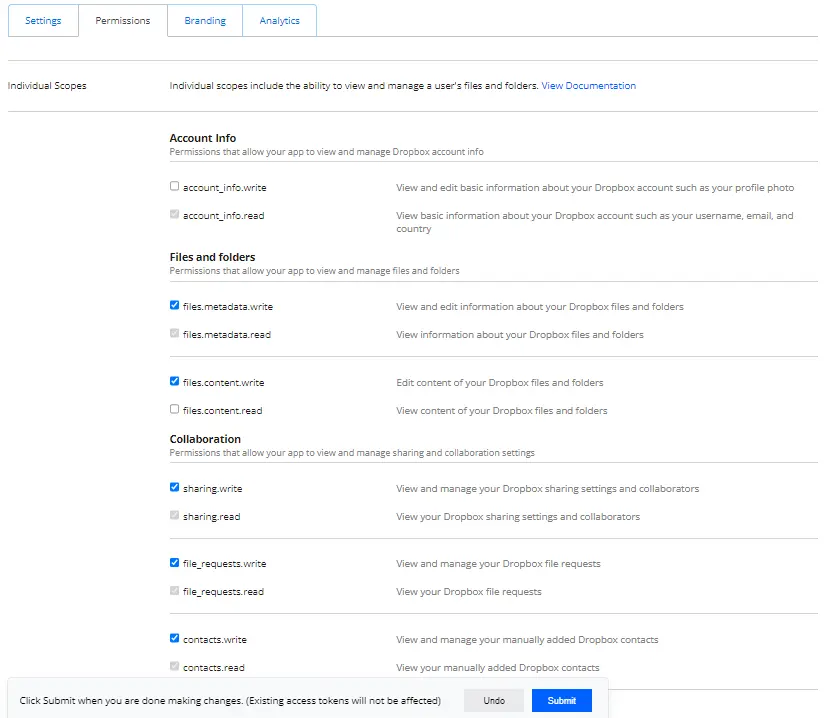
The above page shows a lot of permission, but we only need to click the Files and folders permissions and we have to press the Submit button to save the changes.
Entering Information into Terminal
We can copy the App key and App secret from the Settings page and paste them inside the terminal, as shown below.
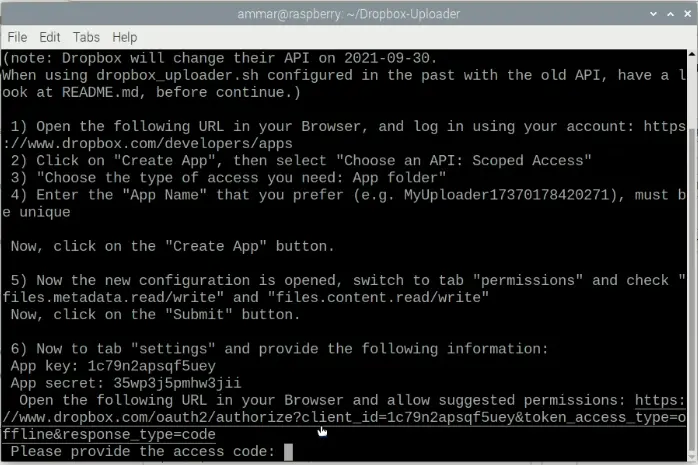
After entering the App key and App secret, the terminal will generate a link that we have to copy and paste into the browser, and it will give us the Access code, which we have to copy and paste inside the terminal again, as shown below.
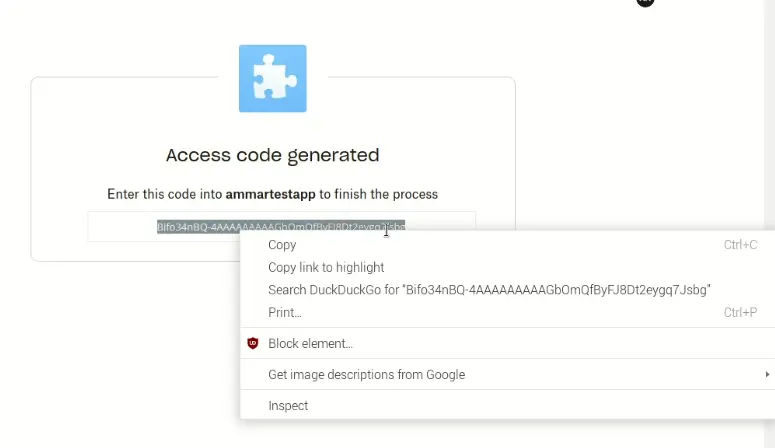
We can copy the above code and paste it inside the terminal, and the terminal will ask us if the information is correct, which we can check again, and if it is correct, we can enter y and the process will be finished, and if it is not correct, we can enter n and do the above procedure again.
See the example below.
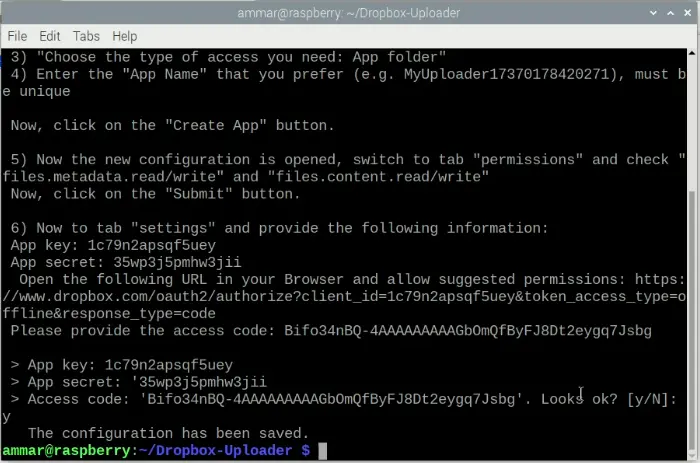
We can see in the above image that the terminal has saved the configurations. After that, we can type the below command again in the terminal, and it will give us some information about the script and how we can use it to perform different tasks.
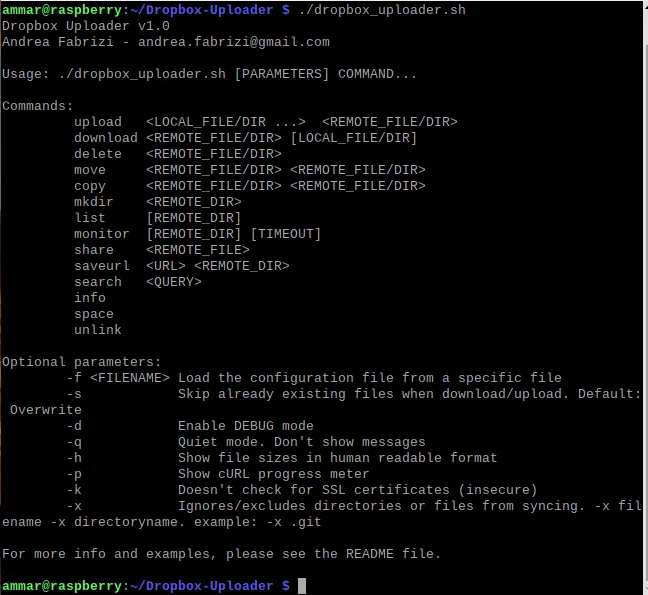
The above image shows the commands we can use to perform different tasks, like uploading a file to Dropbox using the upload command. We have to enter the file name along with its directory after the upload command and then enter the Dropbox directory on which we want to upload the file.
For example, let’s upload a picture to Dropbox. As shown below, we can go to the file manager and copy the file path by right-clicking on a file.

Using the above method, we don’t have to write long names of files to upload them to Dropbox. We can paste the file’s path by right-clicking on the terminal and clicking paste.
After that, we also have to enter the directory path of Dropbox on which we want to upload it, and we can enter / if we want to upload the file to the home directory, and if the entered directory does not exist, the uploader will create the directory first and then upload the file. The example line of code for the upload command is shown below.
./dropbox_uploader.sh upload /home/ammar/image.png. /newDirectory
We can also use other commands shown above to perform different tasks, like downloading a file using the download command and deleting a file using the delete command. Check this video tutorial for more detailed steps.
Check the official documentation link for more details about the Dropbox uploader.
