How to Solve ModuleNotFoundError: No Module Named '_Ctypes' in Python
-
Understanding the Error
ModuleNotFoundError: No module named '_ctypes'in Python - Solve the Error on Ubuntu
- Solve the Error on CentOS
- Solve the Error on MacOS
- Solve the Error on RHEL/Fedora
- Reinstalling Python
- Checking Python Version and Environment
- Verifying Python Paths
- Using a Different Python Distribution or Environment
- Updating Python and Packages
- Reinstalling Required Packages
- Conclusion

The "ModuleNotFoundError: No module named '_ctypes'" error is encountered when Python fails to locate the '_ctypes' module, which is essential for handling low-level interactions between Python and C code. This error can surface due to various reasons, and resolving it involves several potential solutions.
This tutorial aims to understand how to resolve the ModuleNotFoundError: No module named '_ctypes' in Python.
Understanding the Error ModuleNotFoundError: No module named '_ctypes' in Python
The '_ctypes' module is part of the Python standard library and is responsible for providing C-compatible data types and function calls. Issues arise when Python cannot find or load this module, often leading to the mentioned error message.
This error mainly arises from importing modules that are not understandable to the interpreter. This mainly occurs because of incorrect installation, inappropriate versioning, and incorrect module importing.
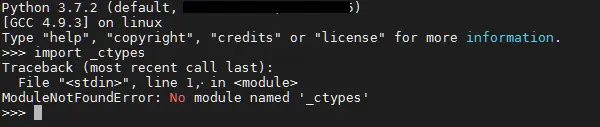
This issue can be replicated if you import ctypes using Python 3.7 or earlier versions.
This is a version compatibility problem. The earlier Python 3.7 is incompatible with this module, so it displays the following error.
Solve the Error on Ubuntu
We can resolve this error by installing the relevant module. This can be done with the help of the following command in Ubuntu or Linux.
# Depending on the operating system, ensure relevant system packages are installed
# For Linux:
sudo apt-get install libffi-dev
Verify system dependencies and installations required by the '_ctypes' module. Sometimes, missing system-level packages can lead to this error.
When you run sudo apt-get install libffi-dev, the system will prompt you for your password (if you’re not already a superuser) and then proceed to download and install the libffi-dev package along with its dependencies onto your system.
This particular command is relevant when dealing with Python or other programming languages that might require the libffi library for certain functionalities. Installing libffi-dev can resolve certain issues related to the '_ctypes' module or other modules that depend on libffi.
Solve the Error on CentOS
First, download Python from here and extract the content of the file into a new folder. Open the terminal in the same directory.
Run the following code one by one:
sudo yum -y install gcc gcc-c++
sudo yum -y install zlib zlib-devel
sudo yum -y install libffi-devel
./configure
make
make install
When these commands are run successfully, they facilitate the installation of development tools and libraries on Red Hat-based Linux systems. They install essential tools like GCC and libraries like zlib and libffi-devel.
After preparing the system with these prerequisites, the commands configure, compile, and install software from its source code. The './configure' command sets up the system, 'make' compiles the source code, and 'make install' installs the compiled software onto the system, allowing it to be used system-wide.
Solve the Error on MacOS
Use this code in your macOS terminal to install libffi. Here, we are installing libffi version 3.2.1. You can change your version accordingly.
wget ftp://sourceware.org/pub/libffi/libffi-3.2.1.tar.gz
tar xvfz libffi-3.2.1.tar.gz
cd libffi-3.2.1
./configure --prefix=/usr/local/libffi/3_2_1
make
make install
These commands collectively download, extract, configure, compile, and install the 'libffi' library from its source code on a Unix-like system. The sequence involves fetching the source code package, extracting its contents, configuring the build settings, compiling the source code into executable binaries, and finally installing the compiled library onto the system for broader use.
Solve the Error on RHEL/Fedora
Run the following command on the terminal:
yum install libffi-devel
An alternative to that command is:
sudo dnf install libffi-devel
Running either of these codes will likely prompt you for confirmation to proceed with the installation. After confirmation, it will download and install the libffi-devel package along with any necessary dependencies onto your system.
These development files are crucial when compiling and building software that relies on libffi functionality, especially during software development that involves interacting with C libraries or functions.
Reinstalling Python
Sometimes, this error occurs due to a corrupted or incomplete Python installation. To fix this issue, we can reinstall Python.
Type this line of code in the terminal:
pip uninstall python
# Use an appropriate Python installer (e.g., Anaconda, Python.org)
# Follow the installation instructions for your OS
After executing this command, we should install Python again.
Checking Python Version and Environment
Ensure that you’re using the correct Python version and environment. Sometimes, the error appears when using incompatible versions or virtual environments that lack the necessary modules.
Example Code:
python --version
# Check if the installed Python version is compatible
Verifying Python Paths
Check if Python paths are correctly set in the environment variables. Incorrect path configurations can lead to the '_ctypes' module not being found.
Example Python code:
import sys

print(sys.path)
# Verify if the Python paths are correctly configured
Using a Different Python Distribution or Environment
If the issue persists, consider using a different Python distribution (e.g., Anaconda) or creating a new virtual environment to isolate the problem.
Example Code:
# Create a new virtual environment
python -m venv new_env
source new_env/bin/activate # For Unix-based systems
# Or
new_env\Scripts\activate # For Windows
When the virtual environment is activated, the shell prompt typically changes to indicate the active environment. This signifies that any subsequent Python-related commands will use the Python interpreter and packages specific to the activated virtual environment (new_env in this case).
Using virtual environments is beneficial for isolating project dependencies and avoiding conflicts between different projects that may require different versions of packages or libraries. It allows for cleaner management of dependencies and ensures reproducibility across different environments.
Updating Python and Packages
Keeping Python and its associated packages up to date is crucial to accessing new features, enhancements, and fixes that address potential issues. To ensure you’re working with the latest versions, use the following commands:
# Upgrade pip to its latest version
pip install --upgrade pip

# Check for updates and upgrade Python-related packages
pip install --upgrade <package_name>
# Replace <package_name> with specific packages like numpy, pandas, etc.
The first command updates 'pip' itself to its latest version, making sure you have the most recent package management tool for Python. Additionally, for other Python-related packages, replace <package_name> with the names of the packages you want to update, such as 'ctypes' or other libraries used in your project.
This ensures that these packages are also upgraded to their latest available versions, optimizing compatibility and functionality within your Python environment. Read this article on how to update a Python package.
To update Python itself to a newer version, follow these steps:
-
Go to the Python official website and download the latest installer corresponding to your system architecture (32-bit or 64-bit).
-
Run the installer, select
"Customize installation", and ensure the option to"Install launcher for all users"is selected. -
Click
"Next", then choose the location where Python will be installed and ensure the box"Add Python to PATH"is checked. -
Proceed with the installation by clicking
"Install". -
Once completed, verify the installation by opening a command prompt and typing
python --version. It should display the newly installed Python version.
Reinstalling Required Packages
Reinstalling or upgrading packages related to '_ctypes' might resolve the issue if a broken or outdated package causes it.
Example Code:
pip uninstall ctypes
pip install ctypes
# Reinstall the '_ctypes' related package
Conclusion
In summary, the "ModuleNotFoundError: No module named '_ctypes'" error in Python arises when the '_ctypes' module, crucial for handling low-level interactions between Python and C code, cannot be located. Resolving this error involves several potential solutions based on different causes.
- Ubuntu Solution: Install the
'libffi-dev'package usingsudo apt-get install libffi-devto address missing dependencies. - CentOS Solution: Use a sequence of commands (installing GCC,
zlib, andlibffi-devel, running configure,make, andmake install) to manually compile and install the required components for resolving dependencies. - macOS Solution: Install
'libffi'using commands to resolve missing dependencies on macOS systems. - RHEL/Fedora Solution: Use
yum install libffi-develorsudo dnf install libffi-develto acquire the necessary development files. - Reinstalling Python: If the error persists due to a corrupted Python installation, consider reinstalling Python using
pip uninstall pythonand then following the appropriate Python installation instructions. - Environment and Path Checks: Verify correct Python versions, environments, and path configurations to ensure compatibility and correct module discovery.
- Virtual Environments: Create isolated virtual environments using tools like
'python -m venv'to segregate projects and manage dependencies effectively. - Update Python and Packages: Keep Python and related packages up to date by using a command like
pip install --upgrade pip. - Required Packages: Reinstall or upgrade packages related to
'_ctypes'that might be broken or outdated using commands likepip uninstall ctypesfollowed bypip install ctypes.
By following these steps systematically, users can address the 'ModuleNotFoundError: No module named '_ctypes'' issue in Python, resolving dependencies and ensuring the smooth functioning of the Python environment.

Related Article - Python Error
- Can Only Concatenate List (Not Int) to List in Python
- How to Fix Value Error Need More Than One Value to Unpack in Python
- How to Fix ValueError Arrays Must All Be the Same Length in Python
- Invalid Syntax in Python
- How to Fix the TypeError: Object of Type 'Int64' Is Not JSON Serializable
- How to Fix the TypeError: 'float' Object Cannot Be Interpreted as an Integer in Python