How to Create and Run a JavaScript File in Chrome
- Create and Run a JavaScript File in Chrome Using Developer Tools
-
Create and Run JavaScript File in Chrome Using
node.js

As a web developer, no matter what you do, whether front-end or back-end, you always have to work with JavaScript in some way or the other.
Writing, tweaking, and executing the JavaScript code inside the Chrome browser is always performed during our development. Generally, we execute JavaScript files inside the browser by connecting the JavaScript file with the HTML document.
But this is not always the case. Sometimes, we need to run the JS files inside the browser without the help of an HTML document.
So to run the JavaScript files inside the Chrome browser, there are two ways. One way is by creating a JavaScript file inside the Chrome dev tools or on the local system and then running the file inside the Chrome browser.
We will practically see both of these ways below.
Create and Run a JavaScript File in Chrome Using Developer Tools
The easiest way of creating and running a JavaScript file is by using the Chrome developer tools.
Steps for creating and running JavaScript files in dev tools:
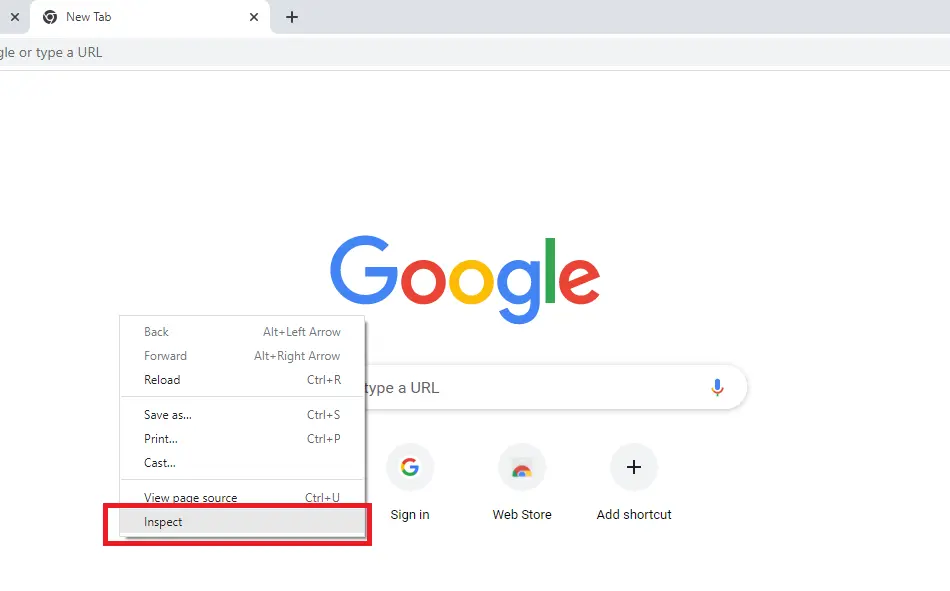
- Open a Chrome browser and press F12 on your keyboard to open Chrome developer tools. Alternatively, you can also right-click anywhere inside the browser and select
Inspectfrom the list to open dev tools, as shown below.
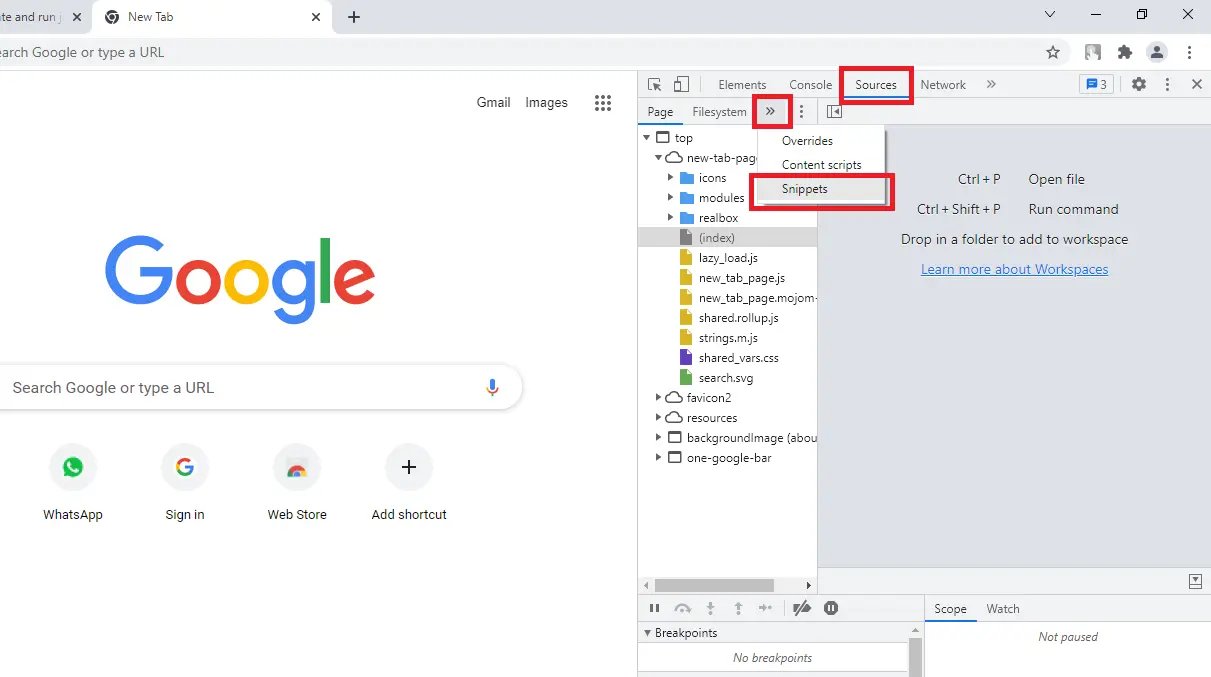
- After the Chrome dev tools are open, click on the
Sourcestab, then select theSnippetstab. If you can’t see the snippets tab, click on the arrow at the top to access it.
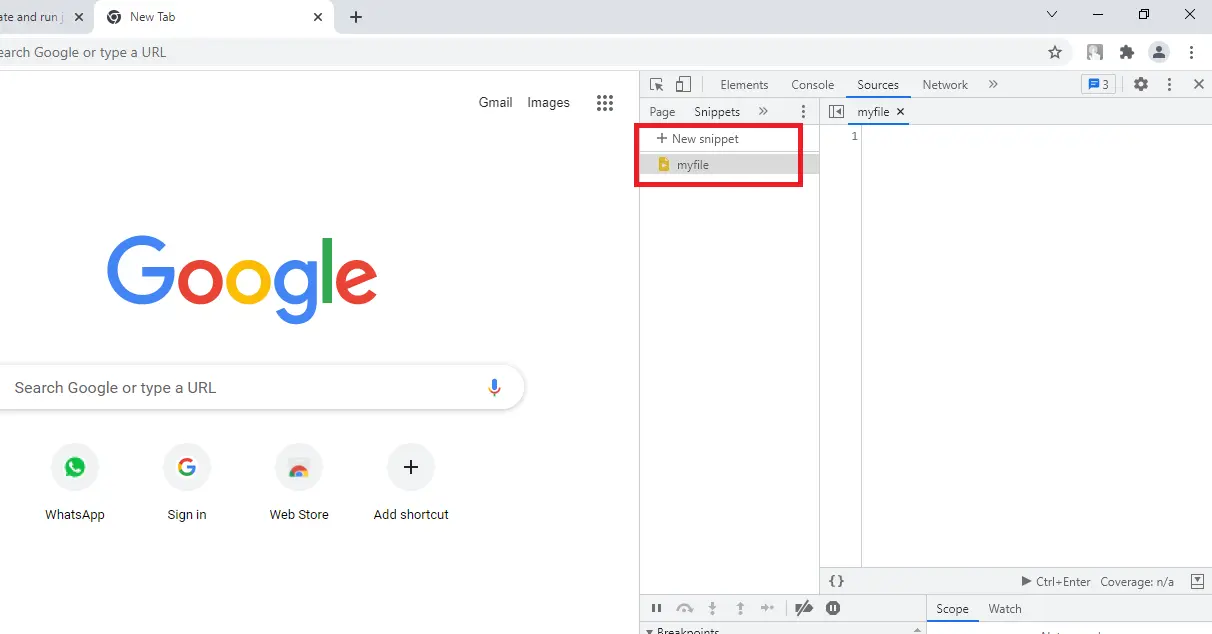
- To create a JavaScript file, click on the
New Snippetto create and give any name to that file. Here, we have givenmyFileas the file name.
- Inside here, you can write or paste your JavaScript code using the Ctrl + V key combination.
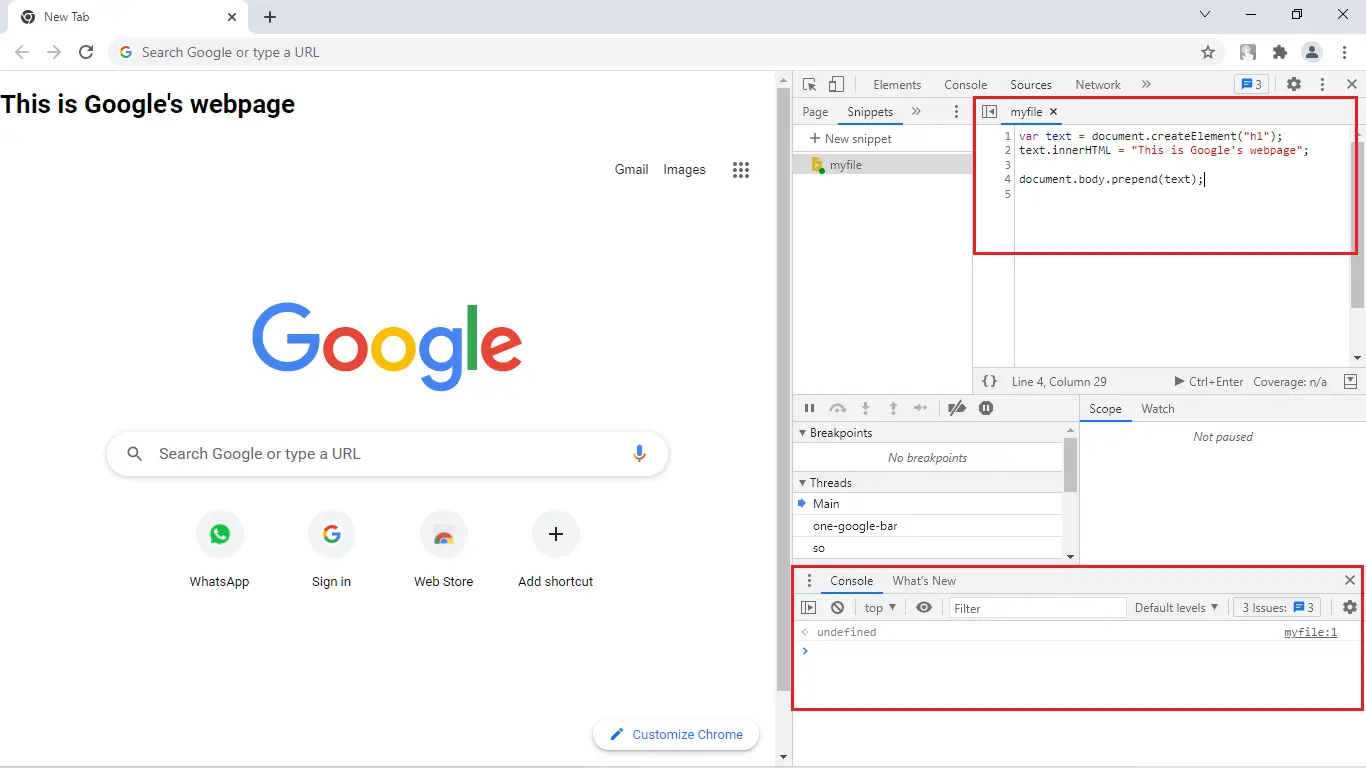
Below is the code that we have written inside dev tools.
Here, we have just created an h1 element and added a sentence inside it. Then we show this text at the top inside the body tag using the prepend method.
var text = document.createElement('h1');
text.innerHTML = 'This is Google\'s webpage';

document.body.prepend(text);
You can also refresh the page while you make changes inside the file.
This will not flush the code inside the file. To run the JavaScript code you have written, you can press Ctrl + Enter on the keyword.
If you have some console statements in your code, those things will be displayed inside the console window at the bottom of the screen, as shown in the above image. Note that whatever code you write inside this file will only be available to you until the browser is open.
As soon as you close the Chrome browser, all your changes will be lost. So it’s always better to create a separate file and then run it inside the Chrome browser.
This is what we will see in the next section.
Create and Run JavaScript File in Chrome Using node.js
Storing JavaScript code inside a separate file is always better. This is how we normally do when we create production-ready websites.
Creating a JavaScript file is simple, and everyone knows how to do it. Just add the .js extension at the end of the filename, and boom, the file is now a JavaScript file.
Although, the toughest part for most people is how to run this JavaScript file inside the browser. People usually connect JavaScript to an HTML document and then run it inside the Chrome browser.
But here we are not interested in that. Here, we will focus on directly running the JavaScript file inside the browser.
This becomes possible with the help of node.js, which is a JavaScript framework. You can download the node.js framework from the official website.
After installing the node.js on your system, you have to open the terminal window and navigate to the location where the JavaScript file is stored. Here, we will also need a library called express.js.
To install express using the below command.
npm i express
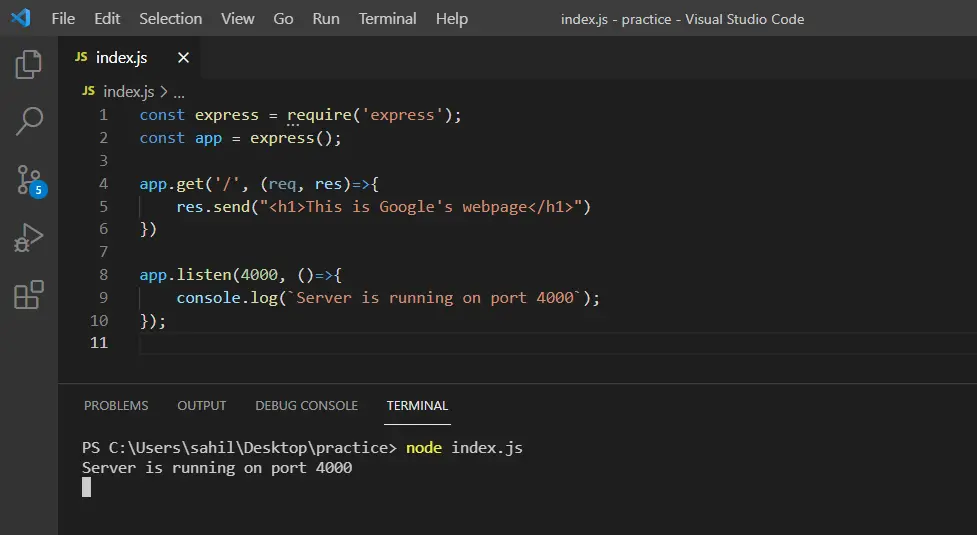
Then inside the JavaScript file, import the express library and initialize an express app as shown below.
const express = require('express');
const app = express();

app.get('/', (req, res) => {res.send('<h1>This is Google\'s webpage</h1>')})

app.listen(4000, () => {
  console.log(`Server is running on port 4000`);
});
Here, we also have to specify the port our server will be running. We have used 4000 as the port number in this case.
You can specify any number as the port number, and then using the get request at the / route, you can send the JavaScript code. This code will be displayed on the Chrome browser.
Here, we will be printing a text inside the browser’s console window by writing the above code inside a file called index.js, and then we will run this file using node.js.
To run the JavaScript file, run the node filename.js command. Ensure that you replace the filename with the JavaScript filename that you want to run, as shown below.
node index.js
Now head over to the URL localhost:4000, which you will see as the output on the browser.
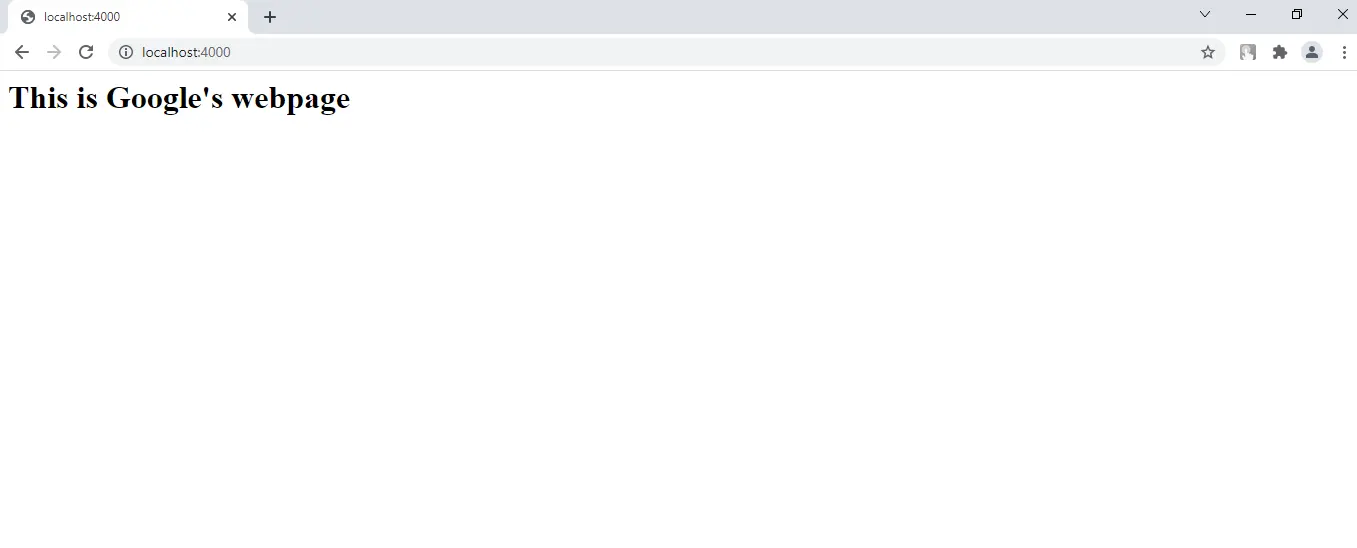
The content we have sent using the send() method will be displayed on the screen. This is how we create and run a JavaScript file inside the Chrome browser using node.js and express.js.

Sahil is a full-stack developer who loves to build software. He likes to share his knowledge by writing technical articles and helping clients by working with them as freelance software engineer and technical writer on Upwork.
LinkedIn