How to Simulate a Click With JavaScript
-
Simulate a Click Event Using
click()in JavaScript - Implementing a Function to Simulate a Custom Click Event in JavaScript
- Conclusion

Simulating a click in JavaScript means that the click event will be automatically triggered on the HTML element without clicking it manually by the user. This simulated click functionality can come in handy in various situations while creating interactive web pages.
To implement the simulated click functionality, we can use a built-in click() functionality provided by the JavaScript programming language or create our own click event using the MouseEvent class.
Let’s see how to implement both of these ways in this article.
Simulate a Click Event Using click() in JavaScript
The click() method triggers a click event in JavaScript. This event is triggered without a user’s interaction.
The click() can be used with a supporting element, such as input. This method works based on a concept called Event bubbling.
In event bubbling, an event bubbles up to the higher elements in the document tree and then fires their click events whenever it is triggered.
In the below HTML document, we have an input tag, a checkbox, and a script tag that links the JavaScript file to the HTML document.
The input tag has an id of myCheck and an event called mouseover, which takes the function myFunction as an input.
<body>
    <input type="checkbox" id="myCheck" onmouseover="myFunction()">
    <script src="./index.js"></script>
</body>
The myFunction is defined inside the JavaScript file. Inside this function, we are getting the input tag that we have created using its id by the document.getElementById() function.
We then add the click() function to that input.
function myFunction() {
  document.getElementById('myCheck').click();
}
After executing this code on the browser, this is the output that you will get.
The drawback of this method is that it only works with some of the HTML elements. To learn more about the click() function, visit MDN docs.
However, if you want to simulate a click on links like an anchor <a> tag or something like that, you must write your function to simulate a click in JavaScript. The click() function will not work.
Implementing a Function to Simulate a Custom Click Event in JavaScript
To simulate a custom click event in JavaScript, we must implement our function. For this, we will use the MouseEvent API for adding the click event.
Before we create our function, let’s first create the HTML document. This HTML document will have an anchor tag and a link to the JavaScript file.
We have added an id of link on the anchor <a> tag to access this HTML element inside our JavaScript file. We also have named this tag Click Me (you can provide any name for this tag).
The HTML document looks like this.
<body>
    <a href="#" id="link">Click Me</a>
    <script src="index.js"></script>
</body>
To create a new mouse event in JavaScript, we must create an object of the MouseEvent class. The MouseEvent constructor takes two parameters typeArg and mouseEventInit.
event = new MouseEvent(typeArg, mouseEventInit);
The typeArg is the event’s name that it wants to create. In this case, it’s a click event.
The mouseEventInit is a dictionary that can take various parameters in itself, such as bubbles, view, clientX, metaKey, etc. To learn more about the MouseEvent constructor and the various parameters, please read its documentation at the MDN website.
For our example, we have only passed three key-value pairs inside the mouseEventInit dictionary as an argument. Let’s see what each of the three parameters we passed to mouseEventInit means.
-
bubbles: In event bubbling, the event will start executing from the innermost element and then up to its ancestors (parents). It takes a boolean value.We have set it to
falsebecause we will be registering this event on a single element; the anchor tag. The element is also not present in a nested fashion. -
cancelable: This tells the browser whether the event that we are executing can be canceled or not. It also takes a boolean value. -
view: TheMouseEventalso accepts view, which is a part of theUIEvent. It is set tonullby default, but we can set its value towindowas well.This will execute the event inside the browser window.
var simulateClick = new MouseEvent('click', {
  bubbles: false,
  cancelable: true,
  view: window,
});

var url = document.getElementById('link');
url.addEventListener('click', () => console.log('clicked'))
url.dispatchEvent(simulateClick)
The custom event created using the MouseEvent class will store inside the simulateClick variable.
To get the anchor tag inside our JavaScript file, we will use the document.getElementById method and pass the anchor tag, link, in the id. We will then store that element inside a variable called url.
Now that we have the reference to the anchor tag inside our JavaScript file and our custom click event is also ready, it’s time to add it to the anchor tag.
To fire up the simulated click event that we have created, we will use the dispatchEvent method on the url variable and then pass the simulateClick inside it as an argument.
To ensure that the simulateClick event that we have created is working correctly, we will add another click event on the url variable using addEventListener. Then we will console log a statement.
This line of code is to check whether the event we have created has been dispatched or not. It can be removed at any point.
This event should be added before executing our custom simulateClick event. Otherwise, you will not know whether the simulateClick event has been successfully executed or not.
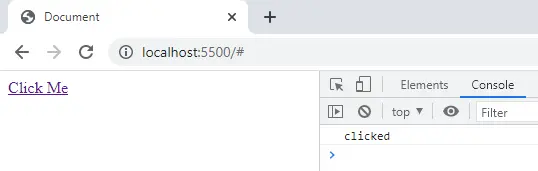
The above code will produce the output below:
Conclusion
This article demonstrates two methods of simulating a click event in JavaScript. One way is by using a built-in function called click(), and another way is by creating and executing our custom click event simulateClick.

Sahil is a full-stack developer who loves to build software. He likes to share his knowledge by writing technical articles and helping clients by working with them as freelance software engineer and technical writer on Upwork.
LinkedIn