How to Create JavaFX Message Box
Today’s tutorial demonstrates creating a JavaFX message box in our Java application. The message box can be a confirmation, warning, information, or error alert.
Create JavaFX Message Box
To accomplish the following example code, we use Java version 18, JavaFX version 13 and Netbeans IDE version 13.
Example Code:
// write your package name
package com.mycompany.javafx_messagebox;

// import required libraries
import javafx.application.Application;
import javafx.event.ActionEvent;
import javafx.geometry.Insets;
import javafx.scene.Scene;
import javafx.scene.control.Alert;
import javafx.scene.control.Alert.AlertType;
import javafx.scene.control.Button;
import javafx.scene.layout.TilePane;
import javafx.stage.Stage;

/**
 * JavaFX App
 */
public class App extends Application {
  @Override
  public void start(Stage stage) {
    // create a tile pane
    TilePane r = new TilePane();
    // add padding
    r.setPadding(new Insets(10, 10, 10, 10));

    // an array of button names
    String[] buttonNames = {"Confirmation MessageBox", "Error MessageBox", "Information MessageBox",
        "Warning MessageBox"};

    // Show no alert at the startup of the program
    Alert alert = new Alert(AlertType.NONE);

    /*
    a loop to create buttons, define actions when
    they are pressed and add them to the tile pane
    */
    for (String s : buttonNames) {
      Button button = new Button(s);

      button.setOnAction((ActionEvent event) -> {
        if (null != button.getText()) {
          switch (button.getText()) {
            case "Confirmation MessageBox":
              // set alert type, title, content text and then show it
              alert.setAlertType(AlertType.CONFIRMATION);
              alert.setTitle("Confirmation MessageBox");
              alert.setContentText("This is a CONFIRMATION "
                  + "message for you!");
              alert.show();
              break;
            case "Error MessageBox":
              // set alert type, title, content text and then show it
              alert.setAlertType(AlertType.ERROR);
              alert.setTitle("Error MessageBox");
              alert.setContentText("This is an ERROR message for you!");
              alert.show();
              break;
            case "Information MessageBox":
              // set alert type, title, content text and then show it
              alert.setAlertType(AlertType.INFORMATION);
              alert.setTitle("Information MessageBox");
              alert.setContentText("This is a INFORMATION "
                  + "message for you!");
              alert.show();
              break;
            case "Warning MessageBox":
              // set alert type, title, content text and then show it
              alert.setAlertType(AlertType.WARNING);
              alert.setTitle("Warning MessageBox");
              alert.setContentText("This is a WARNING message for you!");
              alert.show();
              break;
            default:
              break;
          }
        }
      });

      // add button
      r.getChildren().add(button);
    }

    // create a scene
    Scene sc = new Scene(r, 640, 50);

    // set the scene
    stage.setScene(sc);

    // show the stage
    stage.show();

  } // end start method

  // main method
  public static void main(String[] args) {
    launch(args);
  } // end main

} // end App class
Output (main window):

Output (confirmation message box, displayed when we click on Confirmation MessageBox button):

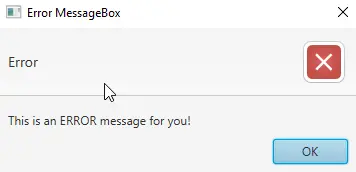
Output (error message box, displayed when we click on Error MessageBox button):
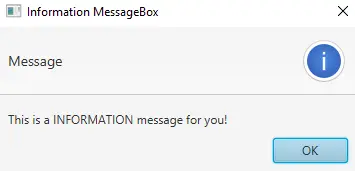
Output (information message box, displayed when we click on Information MessageBox button):
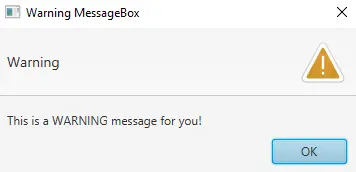
OUTPUT (warning message box, displayed when we click on the Warning MessageBox button):
For this tutorial, we don’t need to make any changes to the module-info.java and pom.xml files. Create a JavaFX project and practice the code given above.
We have a main class named App that extends the Application class (which is standard in Java). You can name the primary launch class (App).
Next, we override the start() method because the App is the child class of the Application class. Remember that the child class needs to implement all abstract functions/methods of the parent class.
After that, we have a start() method that takes one parameter of the Stage type. We are using the Stage type parameter because this is where all visual components JavaFX application will be displayed.
We do not need to create the Stage type object because the JavaFX runtime creates it. The following is the step-by-step explanation of what’s inside the start() method.
-
Create an object of JavaFX
TilePane, which is a layout component and lays out all its child components in the grid of same-sized cells. -
Add margins around the whole grid (
top/right/bottom/left). -
Create an array with the names of all buttons we need for this application.
-
Create an alert message box of type
NONEbecause we do not want to display any message box at the program’s startup. -
Next, we have a
forloop, which iterates over all the button names.- Inside the loop, we create a button of the current name.
- Set an action for that specific button based on the condition. We get the button text and display a message box based on the button name using the
switchstatement.
-
Add the button to the
TilePane. -
Create a scene using the
Sceneclass. -
Set the scene.
-
Finally, show the stage.
Now, it is the main method’s turn. We can launch the JavaFX application without having the main method, but it is useful when we are required to use parameters that are passed to the application using the command line.
