How to Detect Face Using the Haar Cascade Classifier in Python OpenCV

In this demonstration, we will learn the basics of face detection with the help of haar feature-based Cascade classifiers and learn how to detect faces from an image and video in OpenCV.
Create Face Detection Project With the Haar Cascade Classifier in OpenCV
Object detection using the Haar feature-based cascade classifiers is an effective object detection method proposed by Paul Viola and Michael Jones in their people. Haar feature-based cascades classifier is a machine learning-based approach where a cascade function is trained for many positive and negative images.
So what are these positive and negative images? A classifier is trained with a few hundred sample views of a particular object, which may be a face or a car or any other object called a positive.
For example, if you are going to detect a face, you have to train your classifier with the number of images that contain faces. Then, it is called the positive images.
In another case, if you want to detect the face and the image does not contain the face, then it is called the negative image.
After a classifier is trained, it can be applied to a region of interest in an input image. The classifier output is a 1 if the region is likely to show the object; otherwise, it is 0.
Let’s see how we can use the Haar Cascade detection in OpenCV.
OpenCV comes with a trainer as well as a detector. If you want to train your classifier for any object like a watch, car, or anything, then you can use this classifier.
We can find some trained classifier XML files on the OpenCV GitHub page. Plenty of trained classifiers are available inside this repository. For further information on how to utilize these classifiers, you can also check out OpenCV Hough Circles.
You only need to open this highlighted file and then download it by clicking the raw icon button. When it opens, you can right-click and save it on your computer.
Let’s open the code editor and define our classifiers.
There is a method called CascadeClassifier() where we can provide our classifier path. Once we have defined the classifier, then we read the image.
F_C = cv2.CascadeClassifier("haarcascade_frontalface_default.xml")
Since this classifier will work with the grayscale images, we need to convert our image into a grayscale image. It will be really easy to implement image conversion.
IMG = cv2.imread("inp.png")
G_scale = cv2.cvtColor(IMG, cv2.COLOR_BGR2GRAY)
The next step is to detect the faces inside this image; to do this, we will declare a variable called Faces. We will call the detectMultiScale() method, which takes three parameters.
The first is the grayscale image, and the second argument we are going to use is the scale factor, which is used to specify how much the image size is reduced at each image scale. The next is the min neighbors parameter, which specifies how many neighbors at each candidate rectangle should have to retain it.
Faces = F_C.detectMultiScale(G_scale, 1.1, 4)
The last step will be to iterate over all the faces we have detected and then draw a rectangle. This Faces variable will be the vector of the rectangle where each rectangle contains a detected object, and in our case, it will be the detected face.
We will get the parameter (x,y,w,h) from the Faces object. These are values of the rectangle of the object.
While getting the coordinates, we will draw the rectangle using the rectangle() method.
It takes a few parameters. The first is an image, the second is the points (x,y), which we got using the Faces vector, and the next parameter is the second point of the rectangle.
The next two parameters are the color and the thickness.
import cv2

F_C = cv2.CascadeClassifier("haarcascade_frontalface_default.xml")

IMG = cv2.imread("inp.png")
G_scale = cv2.cvtColor(IMG, cv2.COLOR_BGR2GRAY)
Faces = F_C.detectMultiScale(G_scale, 1.1, 4)

for (x, y, w, h) in Faces:
    cv2.rectangle(IMG, (x, y), (x + w, y + h), (255, 0, 0), 3)

cv2.imshow("IMG", IMG)

cv2.waitKey()
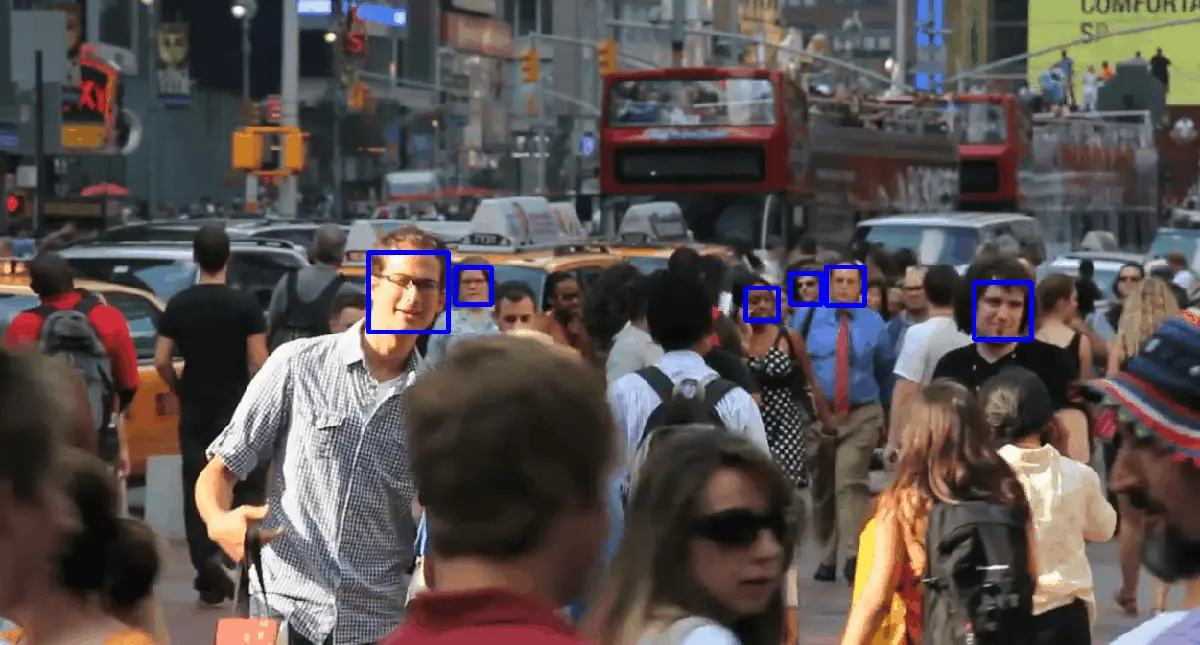
Now we can see the face is detected inside an image.

Let’s try to detect the face inside a video, so this will not be a different approach. We will only need to apply this approach to every frame, so instead of the reading image, we will use the VideoCapture() method to capture the video.
For capturing the frames, we need to define a Video variable and make it equal to VideoCapture() and provide an mp4 file. If you have the camera, you can provide it 0.
Now we will enclose all the above code inside a while loop, and to the while loop, we define the isOpened() method. If this method returns a true value, then the program will proceed to read the frame; we are to call Video.read(), which means we are reading every frame.
We will define a condition when somebody presses the key q, then the program will break out of the while loop. At last, outside our while loop, we will release our video.
import cv2

F_C = cv2.CascadeClassifier("haarcascade_frontalface_default.xml")

Video = cv2.VideoCapture("inp.mp4")

while Video.isOpened():
    _, IMG = Video.read()

    G_scale = cv2.cvtColor(IMG, cv2.COLOR_BGR2GRAY)
    Faces = F_C.detectMultiScale(G_scale, 1.1, 4)

    for (x, y, w, h) in Faces:
        cv2.rectangle(IMG, (x, y), (x + w, y + h), (255, 0, 0), 3)

    cv2.imshow("Window", IMG)
    K = cv2.waitKey(1)
    if K & 0xFF == ord("q"):
        break

Video.release()
In this video, we can see the faces detected in real-time video.

Hello! I am Salman Bin Mehmood(Baum), a software developer and I help organizations, address complex problems. My expertise lies within back-end, data science and machine learning. I am a lifelong learner, currently working on metaverse, and enrolled in a course building an AI application with python. I love solving problems and developing bug-free software for people. I write content related to python and hot Technologies.
LinkedIn