HOWTO · Java
How to Fix Java.Lang.ClassNotFoundException: Org.SpringFramework.Web.Servlet.DispatcherServlet
The error java.lang.ClassNotFoundException: org.springframework.web.servlet.DispatcherServlet is going to be covered in today's post on Java.
On this page
The error java.lang.ClassNotFoundException: org.springframework.web.servlet.DispatcherServlet is going to be covered in today’s post on Java.
What Is the java.lang.ClassNotFoundException: org.springframework.web.servlet.DispatcherServlet
You may see this exception while implementing a Spring MVC application to Servlet containers because of the java.lang.ClassNotFoundException: org.springframework.web.servlet.DispatcherServlet, often in the spring-webmvc.jar file, cannot be found.
In the Spring MVC framework, the DispatcherServlet intercepts all HTTP requests and routes them to the appropriate controllers based on URL mapping, which is the heart of the FrontController pattern.
The Servlet container and Spring MVC framework rely on DispatcherServlet to communicate. Servlet containers must deliver or route all HTTP requests to the specified DispatcherServlet, which has to be declared in your web.xml and given a URL pattern.
Causes of java.lang.ClassNotFoundException: org.springframework.web.servlet.DispatcherServlet
The following are examples of possible reasons for the exception.
-
Check to see whether the configuration file can be opened. If it cannot, you need to update the correct package name in the line that reads
<servlet-class></servlet-class>in theweb.xmlfile. -
At the time of Tomcat’s initialization, the required
SpringMVC related.jarfiles are not loaded and implemented. However, given these files are already in yourclasspath, we’ll not experience any errors when using the Eclipse IDE to create the program.This only occurs when the program is executing.
Solution of java.lang.ClassNotFoundException: org.springframework.web.servlet.DispatcherServlet
Although the right path to the package is opened, the path is not imported into the WEB-INF/lib directory. The following is the particular solution to the problem.
-
To start, open the Eclipse IDE application and create a new project by the below steps.
From the left upper corner select
File>New>Java Project, to create a new project.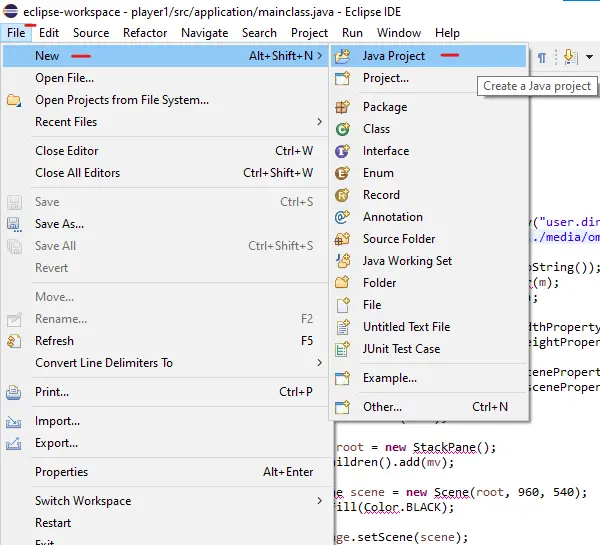
After creating a new project, name it.
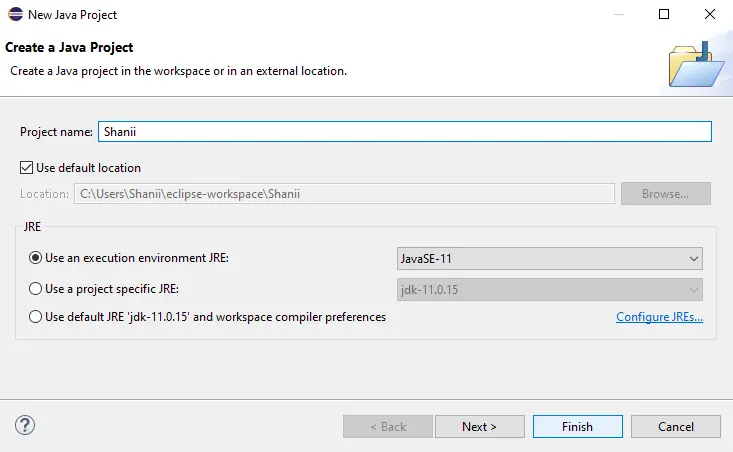
-
Next, select
Propertiesfrom the drop-down list that appears when we right-click on the project that we just created.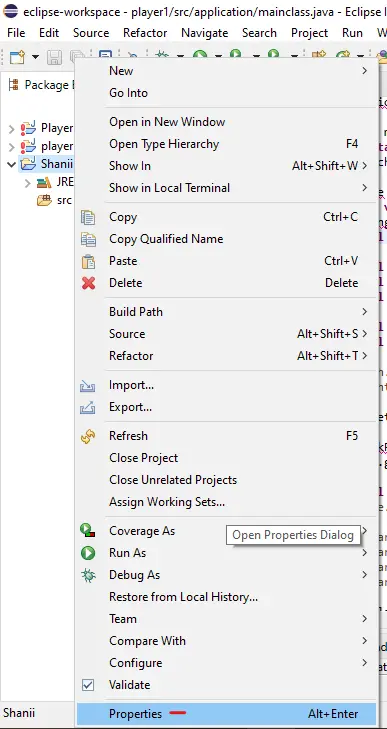
-
After that, select
Deployment Assemblyfrom the panel on the left of the screen. If you’re working onSpringMVC, you will seeDeployment Assembly.Otherwise, it will not appear on the list.
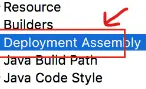
-
To specify the packing structure, click the
OKbutton. -
There will appear a new window. Click
Addand then chooseJava Build Path Entriesfrom the list.
-
After selecting all of the
libraries, click theFinishbutton to complete the process. -
Click on
Maven Dependencieson the new window to include all Maven’s.jarfiles.
-
You can now test your application by running it on Tomcat.