How to Group the Radio Buttons in C#
-
Use the
GroupBoxClass to Group the Radio Buttons inC# -
Use the
PanelClass to Group the Radio Buttons inC# -
Programmatically Group the Radio Buttons Without Using
PanelorGroupBoxClass inC#

In Windows Form Applications, the RadioButton controls can be grouped to function as a set and are designed to provide users an option among two or more settings.
This tutorial will teach you the three primary methods to group the radio buttons in C#.
Each procedure or object only uses one carrier as a group of radio buttons may display a choice of package carriers for order. Thus, only one RadioButton at a time can be chosen, even if it’s a part of a functional group.
You can use Panel or GroupBox controls, a form, or programmatically group the radio buttons by drawing them inside a container. All the buttons added directly to a form become one group.
Use the GroupBox Class to Group the Radio Buttons in C#
The radio button controls can be mutually exclusive as the GroupName property of the RadioButton controls specifies it. The GroupBox class belongs to the System.Windows.Forms namespace and represents a Windows control and can be declared as:
public class GroupBox : System.Windows.Forms.Control
You can select or receive focus on controls contained within the GroupBox control as it cannot be selected or receive focus. One drawback of using this control is that it cannot display a scroll bar, and if that is one of your requirements, you must use the Panel control to group the radio buttons with a scroll bar.
It logically groups the radio buttons to function as a set and acts as a container control to define groups of controls. In a group, you can create a CheckedChanged event to track which radio button from the GroupBox control is selected and reports/records its text on the user demand.
using System;
using System.Drawing; // use drawing to insert buttons into the form_designer
using System.Windows.Forms;
namespace group_button {
public partial class Form1 : Form {
public Form1() {
// initialize the essential components of the form
InitializeComponent();
}
private void button1_Click(object sender, EventArgs e) {
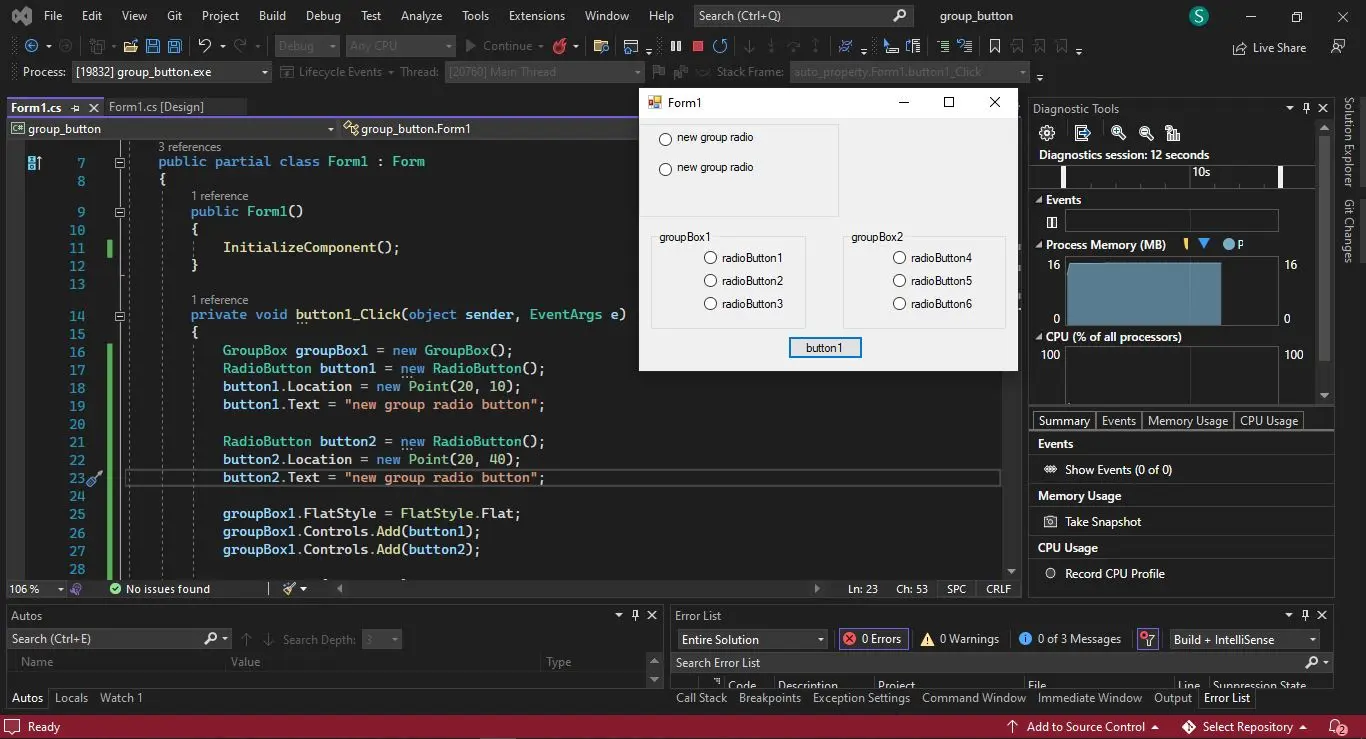
GroupBox groupBox1 = new GroupBox();
RadioButton button1 = new RadioButton();
button1.Location = new Point(20, 10);
button1.Text = "new group radio button";
RadioButton button2 = new RadioButton();
button2.Location = new Point(20, 40);
button2.Text = "new group radio button";
groupBox1.FlatStyle = FlatStyle.Flat;
groupBox1.Controls.Add(button1);
groupBox1.Controls.Add(button2);
Controls.Add(groupBox1);
}
}
}
Output:
The selection of a radio button from a group clears the other options automatically, where each option or control is given a container that constitutes a group. The container in Windows Form Applications can be a Form, and you must place each radio button group in its container to create multiple groups on a single form.
Additionally, it’s possible to get or set the state of a radio button in C# by using the Checked property after initializing a new instance of the RadioButton class. The .NET offers incredible customization of the GroupBox container and the RadioButton class by introducing hundreds of properties that enable you to achieve satisfactory results.
You can generate an aesthetically appealing layout of radio buttons while maintaining your functional needs by grouping them using some frequently used containers, including the GroupBox and the Panel.
By default, the ambient is the BackColor of your radio buttons. You can easily change this using Color.Transparent and apply it to each radio button belonging to a specific group.
Use the Panel Class to Group the Radio Buttons in C#
The Panel control is more manageable than any other control to group radio buttons. The ability to show or hide individual controls or child controls is one of its best use cases.
Use the form’s designer at design time or the Panel class in the code at run-time to declare or create a Panel control for your radio buttons in a Windows form.
To create a Panel control at run-time, create an instance of its class, set its properties, and add it to the form control. You can create a dynamic panel to create an instance of the Panel class using the line:
Panel dynamicPanel = newPanel();
The .Location, .Name, .Size, and .TabIndex are some of the primary properties of the panel control. Set its properties in the code and add the panel into a form so it becomes a part of that particular form.
You can use Controls.Add(panel_name); in your code to add the panel control to the form’s control and use Form.Controls.Add to display it on the form based on the control’s location and size.
using System;
using System.Drawing; // use drawing to insert buttons into the form_designer
using System.Windows.Forms;
namespace group_button {
public partial class Form1 : Form {
public Form1() {
InitializeComponent();
}
private void button1_Click(object sender, EventArgs e) {
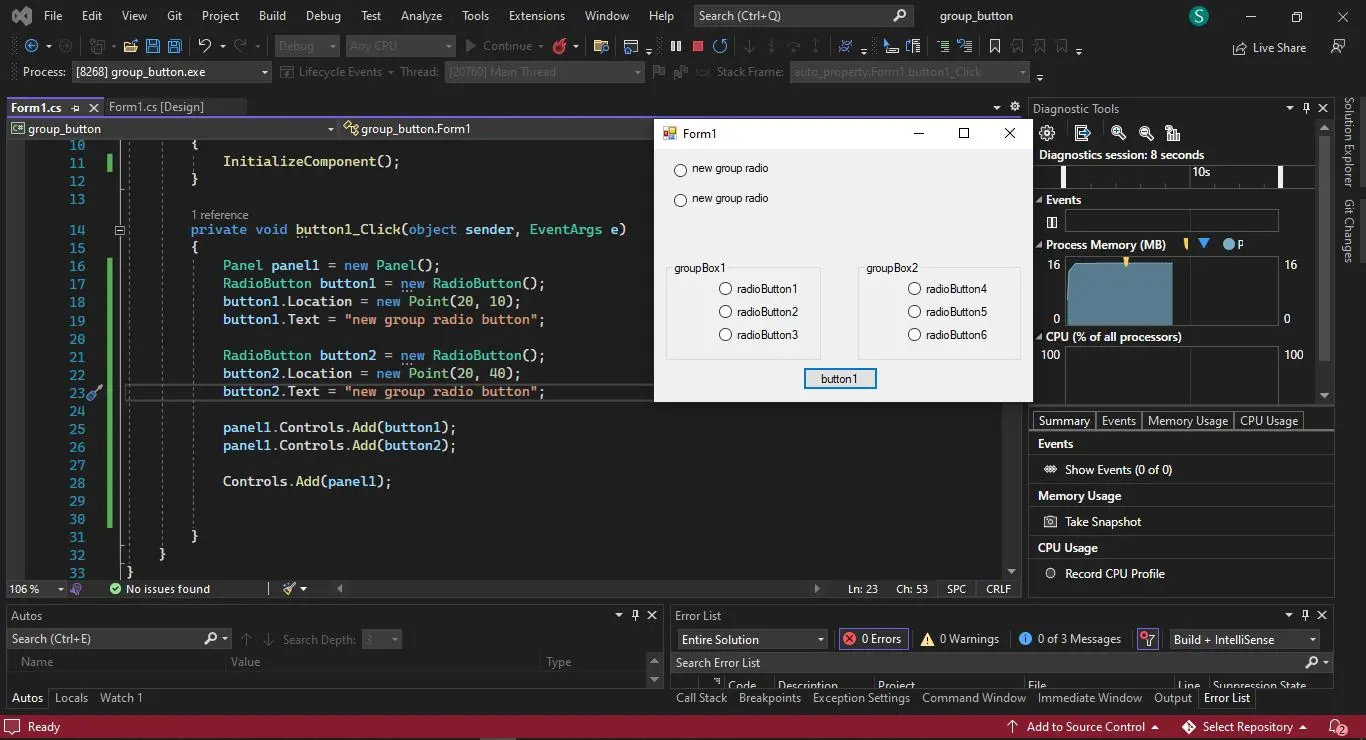
Panel panel1 = new Panel();
RadioButton button1 = new RadioButton();
button1.Location = new Point(20, 10);
button1.Text = "new group radio button";
RadioButton button2 = new RadioButton();
button2.Location = new Point(20, 40);
button2.Text = "new group radio button";
panel1.Controls.Add(button1);
panel1.Controls.Add(button2);
Controls.Add(panel1);
}
}
}
Output:
The easiest way to set the panel properties is from the Properties window on the control. Furthermore, you can add the radio button controls to your panel and set its visibility by setting the value of new_panel.Visible = false // or true for visible.
If you want the detailed customization to change the appearance or the border style of the Panel control, use the System.Drawing namespace to call pre-defined methods. Furthermore, you can use your panel control’s BorderStyle property to provide the panel with a standard three-dimensional border.
The properties like AutoScroll are a part of your Panel control as it belongs to or is derived from the ScrollableControl class. The Panel control doesn’t display a caption; to create a radio button group with captions, you need to use the GroupBox control.
As the Panel control provides an identifiable grouping for radio buttons, it also can subdivide a form by function. You can move or modify all the radio buttons by grouping them using a panel control that gives the user a logical visual cue and easy access to each control through its Controls property.
Programmatically Group the Radio Buttons Without Using Panel or GroupBox Class in C#
The Control.Tag property makes the grouping of radio buttons extremely simple. As the Tag property is an Object type, you can dynamically create OnClick events to handle selection within custom groups.
The RadioButton class in C# acts as a selection control that functions similarly to the CheckBox class, except only one radio button within a specific group can be selected. The Appearance and FlatStyle properties of a radio button can alter its appearance at the creation of its constructer.
using System;
using System.Windows.Forms;
namespace group_button {
public class create_radiobutton_group : RadioButton {
public string radiobutton_group { get; set; }
}
public partial class Form1 : Form {
public Form1() {
InitializeComponent();
radioButton3.Hide();
radioButton1.Hide();
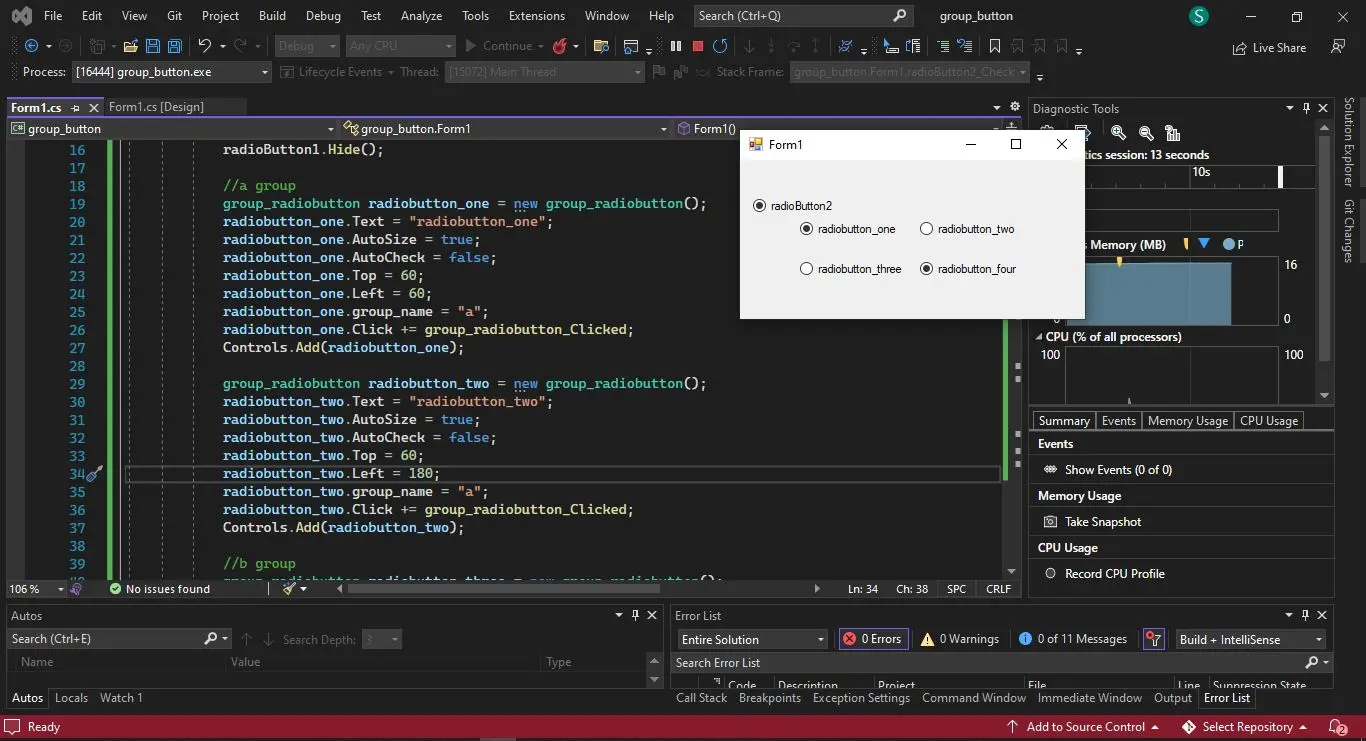
// a group
create_radiobutton_group button_radio_first = new create_radiobutton_group();
button_radio_first.Text = "button_radio_first";
button_radio_first.AutoSize = true;
button_radio_first.AutoCheck = false;
button_radio_first.Top = 60;
button_radio_first.Left = 60;
button_radio_first.radiobutton_group = "a";
button_radio_first.Click += group_radiobutton_Clicked;
Controls.Add(button_radio_first);
create_radiobutton_group button_radio_second = new create_radiobutton_group();
button_radio_second.Text = "button_radio_second";
button_radio_second.AutoSize = true;
button_radio_second.AutoCheck = false;
button_radio_second.Top = 60;
button_radio_second.Left = 180;
button_radio_second.radiobutton_group = "a";
button_radio_second.Click += group_radiobutton_Clicked;
Controls.Add(button_radio_second);
// b group
create_radiobutton_group button_radio_third = new create_radiobutton_group();
button_radio_third.Text = "button_radio_third";
button_radio_third.AutoSize = true;
button_radio_third.AutoCheck = false;
button_radio_third.Top = 100;
button_radio_third.Left = 60;
button_radio_third.radiobutton_group = "b";
button_radio_third.Click += group_radiobutton_Clicked;
Controls.Add(button_radio_third);
create_radiobutton_group button_radio_fourth = new create_radiobutton_group();
button_radio_fourth.Text = "button_radio_fourth";
button_radio_fourth.AutoSize = true;
button_radio_fourth.AutoCheck = false;
button_radio_fourth.Top = 100;
button_radio_fourth.Left = 180;
button_radio_fourth.radiobutton_group = "b";
button_radio_fourth.Click += group_radiobutton_Clicked;
Controls.Add(button_radio_fourth);
}
private void Form1_Load(object sender, EventArgs e) {}
private void button1_Click(object sender, EventArgs e) {}
private void group_radiobutton_Clicked(object sender, EventArgs e) {
// create an object of the radio button class
create_radiobutton_group radio_button = (sender as create_radiobutton_group);
if (!radio_button.Checked) {
foreach (var control_var in Controls) {
if (control_var is create_radiobutton_group &&
(control_var as create_radiobutton_group).radiobutton_group ==
radio_button.radiobutton_group) {
(control_var as create_radiobutton_group).Checked = false;
}
}
radio_button.Checked = true;
}
}
private void radioButton1_CheckedChanged(object sender, EventArgs e) {}
private void radioButton2_CheckedChanged(object sender, EventArgs e) {}
private void radioButton3_CheckedChanged(object sender, EventArgs e) {}
}
}
Output:
Each panel or group box represents a separate group of radio buttons where each group has its separate settings and represents a group or a set.
A constructor, such as public RadioButton(), creates a radio button instance without a label and responds by firing a click event handled by an event handler. That exact event handler is responsible for the desired response by the user.
Performance-wise, both Panel and GroupBox controls are optimized and can be further enhanced according to one’s needs. A Windows form panel control can visually group radio buttons for a clear user interface, perform programmatic grouping, or move the radio button controls as a unit at design time in C#.

Hassan is a Software Engineer with a well-developed set of programming skills. He uses his knowledge and writing capabilities to produce interesting-to-read technical articles.
GitHub