How to Update Nested State Properties in React

When we attempt to update the initial state of a component in React, it means that we want that initial state to change in response to an action from the user or a system event.
When the initial state is changed or updated, the information displayed on the browser changes as well. This is because React renders the component again with the updated code.
The setState() function is the primary React function that can update the nested state of a component.
the setState() Function in React
After we have set the initial state of a component, the React setState() is the function called to initialize a new state. Because we need the user to trigger an event, we will apply the onClick function alongside the setState() to listen to the action taken by the user and then render the updated state component.
Update Nested State Properties in React
We will now look at various examples that demonstrate how to update the initial state of a nested component.
Update a Single Attribute
In this example, we will use the setState() method to update the initial state component, and we will update a single entry that exists in the array:
Code Snippet (App.js):
import React, { Component } from 'react'
class App extends Component {
constructor(props){
    super(props)

    // Set initial state
    this.state = {greeting :
        'Click the button to receive greetings'}

    // Binding this keyword
    this.updateState = this.updateState.bind(this)
}
updateState(){
    // Changing state
    this.setState({greeting :
        'Welcome!!!'})
}
render(){
    return (
    <div>
        <h2>Greetings Portal</h2>
        <p>{this.state.greeting}</p>
        {/* Set click handler */}
        <button onClick={this.updateState}>
        Click me!
        </button>
    </div>
    )
}
}
export default App;
Output:
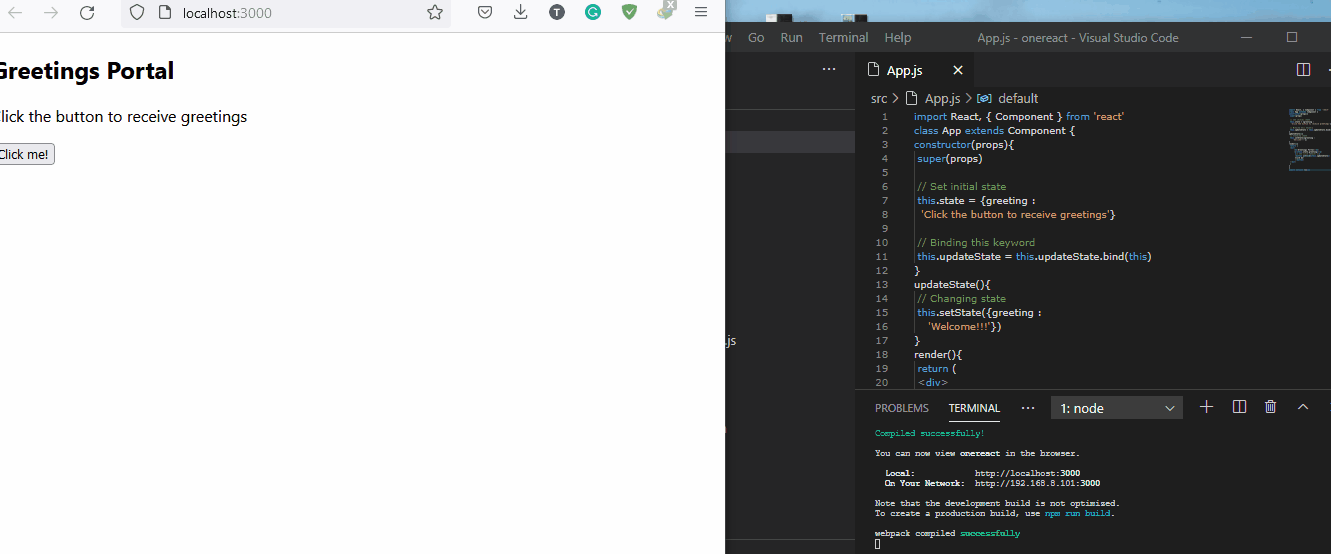
After setting the component’s initial state, we need to first bind the greeting keyword to the updateState function so that React will know which keyword to look for in the components and change.
Then we use the setState function to code out what data we want the greeting keyword to return.
Lastly, we use the onClick event listener with the updateState function, such that when the user hits the Click me! button, the information on the browser is changed and updated.
Update Multiple Attributes
This example is much more similar to the previous example. But here, we are dealing with multiple entries in the component state.
Code Snippet (App.js):
import React, { Component } from 'react'
class App extends Component {
constructor(props){
    super(props)

    // Set initial state
    this.state = {
    test: "Nil",
    questions: "0",
    students: "0"
    }

    // Binding this keyword
    this.updateState = this.updateState.bind(this)
}
updateState(){
    // Changing state
    this.setState({
        test: 'Programming Quiz',
        questions: '10',
        students: '30'
    })
}
render(){
    return (
    <div>
        <h2>Test Portal</h2>
        <p>{this.state.test}</p>

        <p>{this.state.questions}</p>

        <p>{this.state.students}</p>
        {/* Set click handler */}
        <button onClick={this.updateState}>
        Click me!
        </button>
    </div>
)
}
}
export default App;
Output:
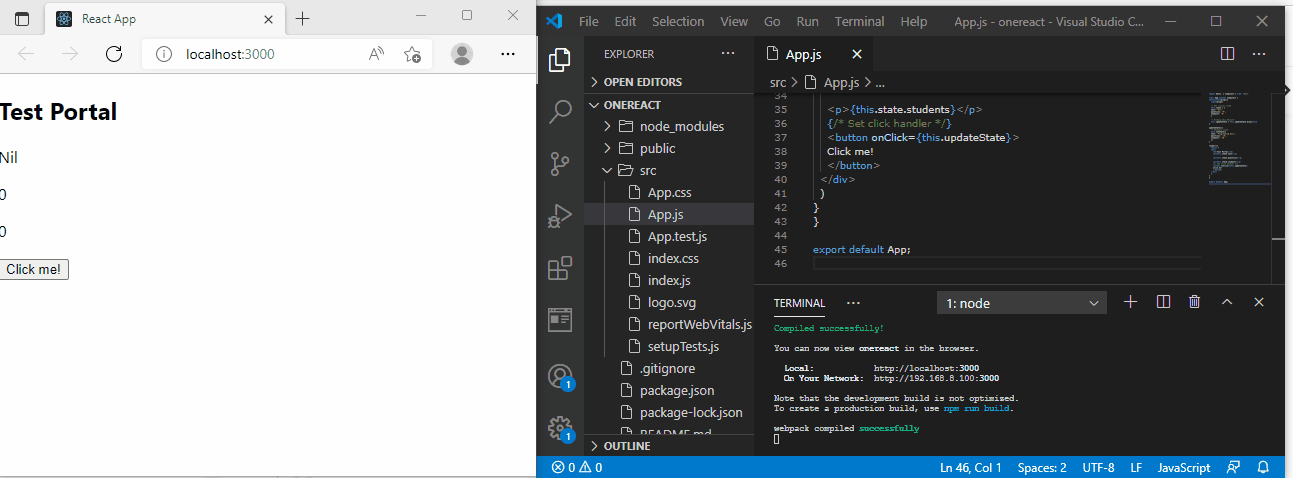
After setting the first state, we bind the this.state keyword. After that, we proceed to update the states of the elements in the array.
Because we are dealing with multiple elements, we put each item into a paragraph element to display it like a list when it is rendered on the web page.
Update State Using Props
In this example, we are using props to update the initial state. Props is a short word for properties.
This method is ideal for dealing with tasks that include multiple items in the array and complex forms of data, and it will help update the state easily.
Like in the examples above, we are doing the coding in the App.js.
Code Snippet (App.js):
import React, { Component } from 'react'
class App extends Component {
static defaultProps = {
    testTopics : [
        'React JS', 'Node JS', 'Compound components',
        'Lifecycle Methods', 'Event Handlers',
        'Router', 'React Hooks', 'Redux',
        'Context'
    ]
}

constructor(props){
    super(props)

    // Set initial state
    this.state = {
    testName: "React js Test",
    topics: ''
    }

    // Binding this keyword
    this.updateState = this.updateState.bind(this)
}
listOfTopics(){
    return (
    <ul>
        {this.props.testTopics.map(topic => (
            <li>{topic}</li>
        ))}
    </ul>
    )
}

updateState(){
    // Changing state
    this.setState({
    testName: 'Test topics are:',
    topics: this.listOfTopics()
    })
}
render(){
    return (
    <div>
        <h2>Test Information</h2>
        <p>{this.state.testName}</p>
        <p>{this.state.topics}</p>
        {/* Set click handler */}
        <button onClick={this.updateState}>
        Click me!
        </button>
    </div>
    )
}
}
export default App;
Output:
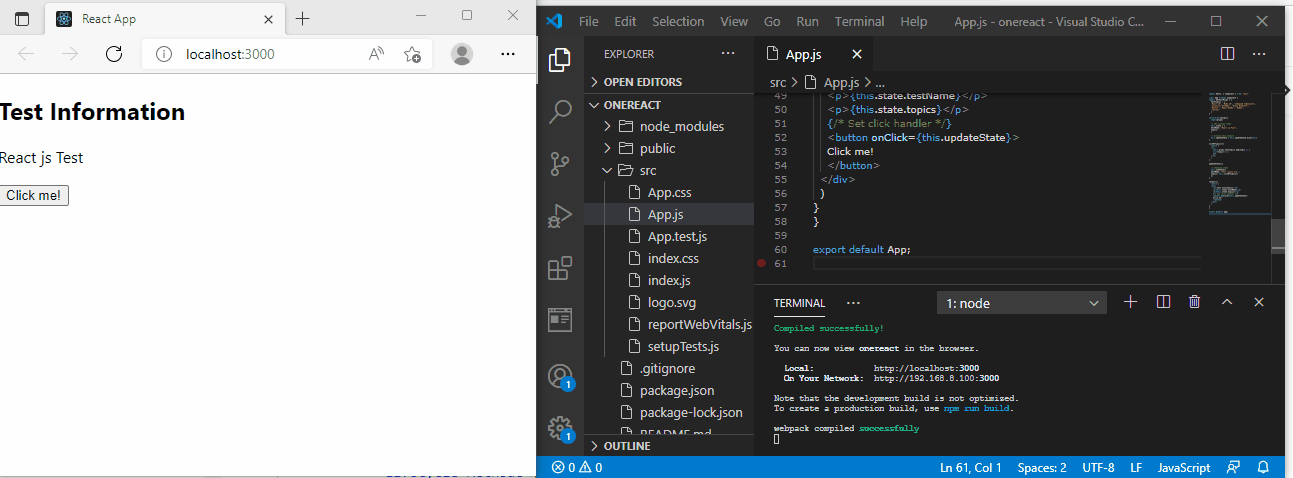
We start by passing the multiple data in our testTopics array. Then we set the initial state of our data into the testName array.
After binding the testName keyword to the updateState, we then make a listOfTopics function that will return the items in the testTopics array as a list with a state of topic.
Then we use the setState() function alongside the onClick event listener, such that when the Click me! button is punched, the list of items will be displayed in place of the initial state, React js Test.
Update State With Its Previous Value
This is a numerical example where we want the initial value to increase. In this case, we want the initial state to increase instead of change.
Because we want the initial state to increase, we will pass the prevState as a parameter inside the useState() function, and useState() will be used in an arrow function.
Code Snippet (App.js):
import React, { Component } from 'react'

class App extends Component {

    constructor(props){
        super(props)

        // Set initial state
        this.state = {
            count: 0
        }

        // Binding this keyword
        this.updateState = this.updateState.bind(this)
    }

    updateState(){
        // Changing state
        this.setState((prevState) => {
            return { count: prevState.count + 1}
        })
    }

    render(){
        return (
            <div>
                <h2>Click Counter</h2>
                <p>You have clicked me {this.state.count} times.</p>
                {/* Set click handler */}
                <button onClick={this.updateState}>
                    Click me!
                </button>
            </div>
        )
    }
}

export default App;
Output:
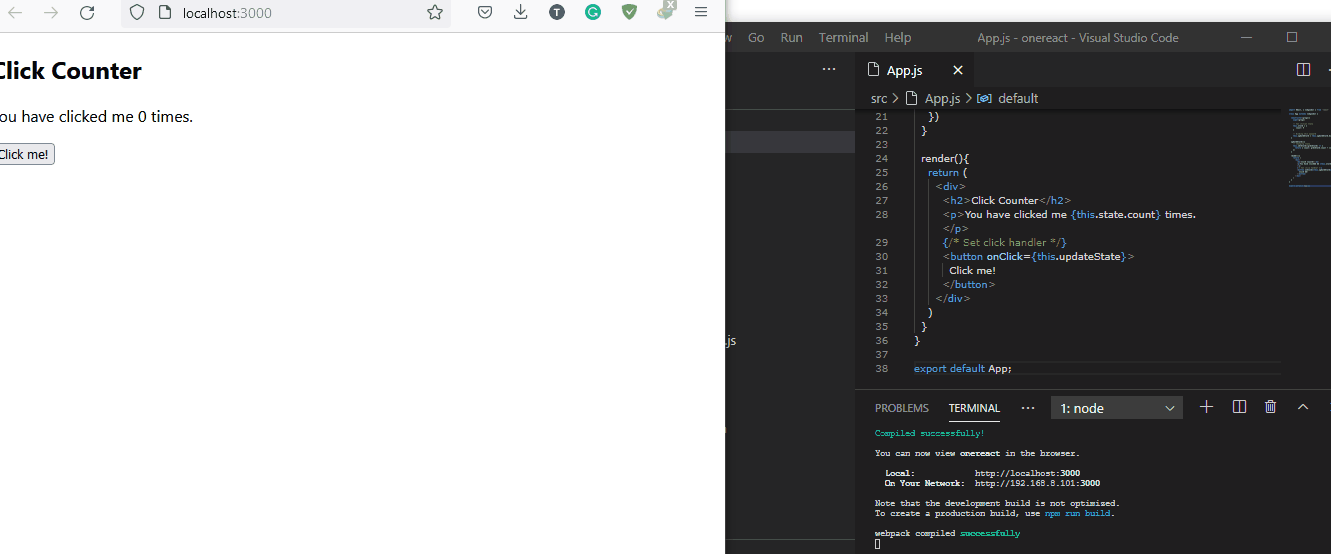
We called prevState inside the setState function so that when the button is clicked, it recognizes the last state the data was in and increases that state by 1, as we have set in the return array to increase the count by 1.
Conclusion
There are various uses for updating the state of a component in React. But, with the examples we have discussed, a coder should be able to apply the different use cases in any situation.

Fisayo is a tech expert and enthusiast who loves to solve problems, seek new challenges and aim to spread the knowledge of what she has learned across the globe.
LinkedIn