React에서 중첩 상태 속성 업데이트
React에서 구성 요소의 초기 상태를 업데이트하려고 할 때 이는 사용자 또는 시스템 이벤트의 작업에 대한 응답으로 초기 상태가 변경되기를 원한다는 것을 의미합니다.
초기 상태가 변경되거나 업데이트되면 브라우저에 표시되는 정보도 변경됩니다. 이는 React가 업데이트된 코드로 컴포넌트를 다시 렌더링하기 때문입니다.
setState() 함수는 컴포넌트의 중첩 상태를 업데이트할 수 있는 기본 React 함수입니다.
React의 setState() 함수
구성 요소의 초기 상태를 설정한 후 React setState()는 새 상태를 초기화하기 위해 호출되는 함수입니다. 사용자가 이벤트를 트리거해야 하므로 setState()와 함께 onClick 함수를 적용하여 사용자가 수행한 작업을 수신한 다음 업데이트된 상태 구성 요소를 렌더링합니다.
React에서 중첩 상태 속성 업데이트
이제 중첩된 구성 요소의 초기 상태를 업데이트하는 방법을 보여주는 다양한 예를 살펴보겠습니다.
단일 속성 업데이트
이 예에서는 setState() 메서드를 사용하여 초기 상태 구성 요소를 업데이트하고 배열에 있는 단일 항목을 업데이트합니다.
코드 조각(App.js):
import React, { Component } from 'react'
class App extends Component {
constructor(props){
    super(props)

    // Set initial state
    this.state = {greeting :
        'Click the button to receive greetings'}

    // Binding this keyword
    this.updateState = this.updateState.bind(this)
}
updateState(){
    // Changing state
    this.setState({greeting :
        'Welcome!!!'})
}
render(){
    return (
    <div>
        <h2>Greetings Portal</h2>
        <p>{this.state.greeting}</p>
        {/* Set click handler */}
        <button onClick={this.updateState}>
        Click me!
        </button>
    </div>
    )
}
}
export default App;
출력:
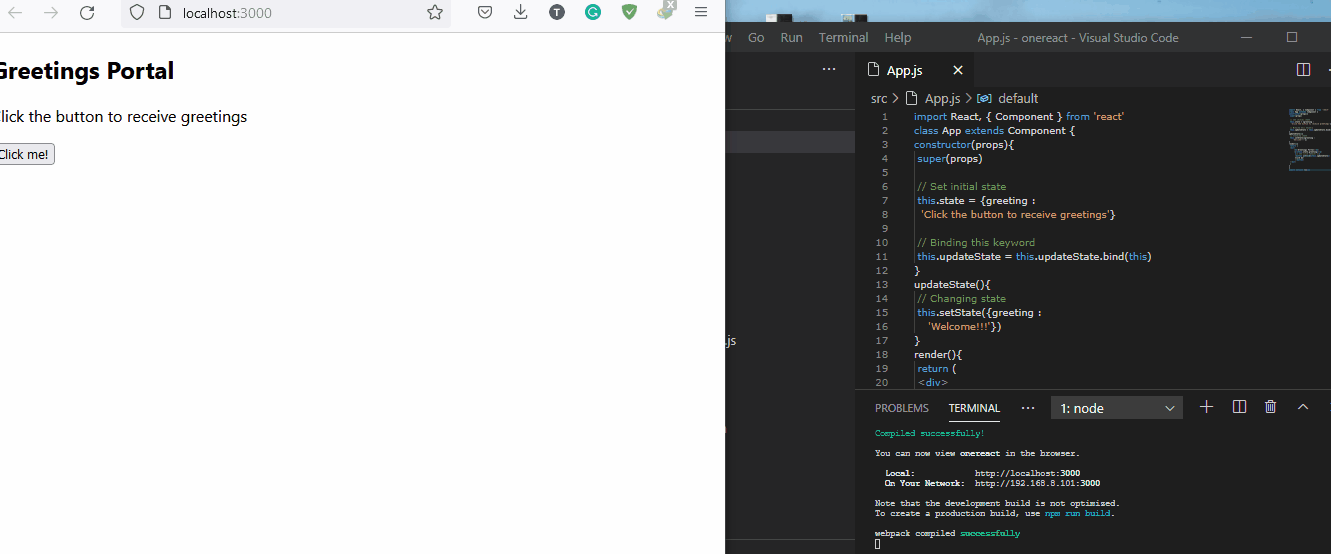
구성 요소의 초기 상태를 설정한 후에는 먼저 greeting 키워드를 updateState 함수에 바인딩해야 React가 구성 요소에서 찾고 변경할 키워드를 알 수 있습니다.
그런 다음 setState 함수를 사용하여 greeting 키워드가 반환할 데이터를 코딩합니다.
마지막으로 updateState 함수와 함께 onClick 이벤트 리스너를 사용하여 사용자가 Click me!를 눌렀을 때 버튼을 누르면 브라우저의 정보가 변경되고 업데이트됩니다.
여러 속성 업데이트
이 예는 이전 예와 훨씬 유사합니다. 그러나 여기에서는 구성 요소 상태의 여러 항목을 처리합니다.
코드 조각(App.js):
import React, { Component } from 'react'
class App extends Component {
constructor(props){
    super(props)

    // Set initial state
    this.state = {
    test: "Nil",
    questions: "0",
    students: "0"
    }

    // Binding this keyword
    this.updateState = this.updateState.bind(this)
}
updateState(){
    // Changing state
    this.setState({
        test: 'Programming Quiz',
        questions: '10',
        students: '30'
    })
}
render(){
    return (
    <div>
        <h2>Test Portal</h2>
        <p>{this.state.test}</p>

        <p>{this.state.questions}</p>

        <p>{this.state.students}</p>
        {/* Set click handler */}
        <button onClick={this.updateState}>
        Click me!
        </button>
    </div>
)
}
}
export default App;
출력:
첫 번째 상태를 설정한 후 this.state 키워드를 바인딩합니다. 그런 다음 배열에 있는 요소의 상태를 업데이트합니다.
여러 요소를 다루기 때문에 웹 페이지에서 렌더링될 때 목록처럼 표시하기 위해 각 항목을 단락 요소에 넣습니다.
Props를 사용하여 상태 업데이트
이 예에서는 props를 사용하여 초기 상태를 업데이트합니다. Props는 속성의 줄임말입니다.
이 방법은 배열의 여러 항목과 복잡한 형태의 데이터를 포함하는 작업을 처리하는 데 이상적이며 상태를 쉽게 업데이트하는 데 도움이 됩니다.
위의 예와 같이 App.js에서 코딩을 하고 있습니다.
코드 조각(App.js):
import React, { Component } from 'react'
class App extends Component {
static defaultProps = {
    testTopics : [
        'React JS', 'Node JS', 'Compound components',
        'Lifecycle Methods', 'Event Handlers',
        'Router', 'React Hooks', 'Redux',
        'Context'
    ]
}

constructor(props){
    super(props)

    // Set initial state
    this.state = {
    testName: "React js Test",
    topics: ''
    }

    // Binding this keyword
    this.updateState = this.updateState.bind(this)
}
listOfTopics(){
    return (
    <ul>
        {this.props.testTopics.map(topic => (
            <li>{topic}</li>
        ))}
    </ul>
    )
}

updateState(){
    // Changing state
    this.setState({
    testName: 'Test topics are:',
    topics: this.listOfTopics()
    })
}
render(){
    return (
    <div>
        <h2>Test Information</h2>
        <p>{this.state.testName}</p>
        <p>{this.state.topics}</p>
        {/* Set click handler */}
        <button onClick={this.updateState}>
        Click me!
        </button>
    </div>
    )
}
}
export default App;
출력:
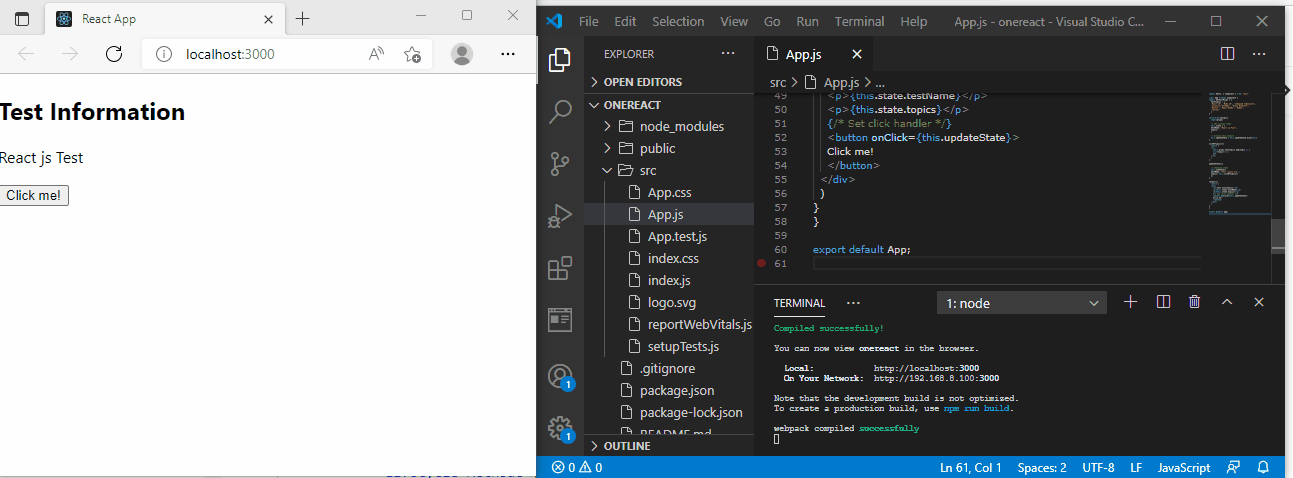
testTopics 배열에 여러 데이터를 전달하는 것으로 시작합니다. 그런 다음 데이터의 초기 상태를 testName 배열로 설정합니다.
testName 키워드를 updateState에 바인딩한 후 testTopics 배열의 항목을 topic 상태의 목록으로 반환하는 listOfTopics 함수를 만듭니다.
그런 다음 onClick 이벤트 리스너와 함께 setState() 함수를 사용하여 Click me! 버튼을 누르면 초기 상태인 React js Test 대신 항목 목록이 표시됩니다.
이전 값으로 상태 업데이트
이것은 초기 값을 증가시키려는 수치적 예입니다. 이 경우 초기 상태가 변경되는 대신 증가하기를 원합니다.
초기 상태가 증가하기를 원하기 때문에 prevState를 useState() 함수 내부의 매개변수로 전달하고 useState()는 화살표 함수에서 사용됩니다.
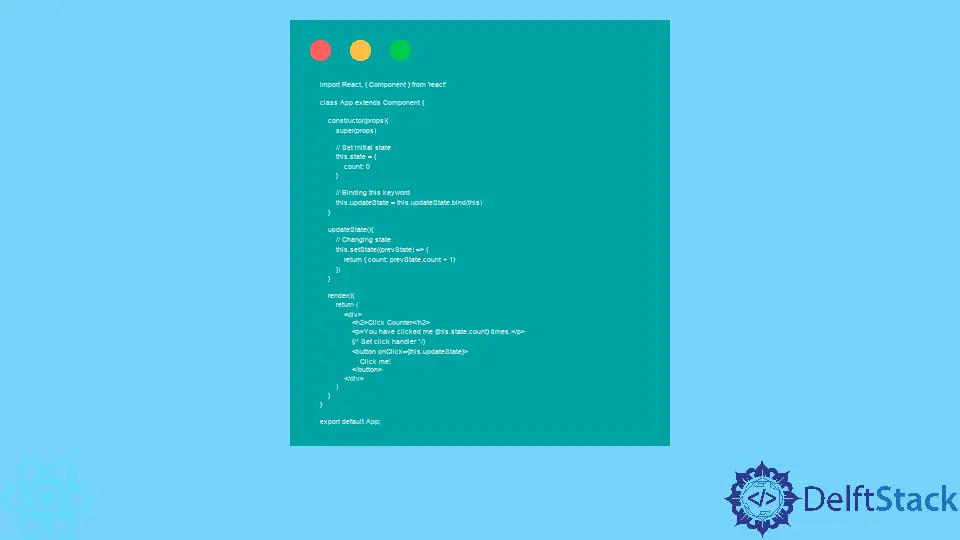
코드 조각(App.js):
import React, { Component } from 'react'

class App extends Component {

    constructor(props){
        super(props)

        // Set initial state
        this.state = {
            count: 0
        }

        // Binding this keyword
        this.updateState = this.updateState.bind(this)
    }

    updateState(){
        // Changing state
        this.setState((prevState) => {
            return { count: prevState.count + 1}
        })
    }

    render(){
        return (
            <div>
                <h2>Click Counter</h2>
                <p>You have clicked me {this.state.count} times.</p>
                {/* Set click handler */}
                <button onClick={this.updateState}>
                    Click me!
                </button>
            </div>
        )
    }
}

export default App;
출력:
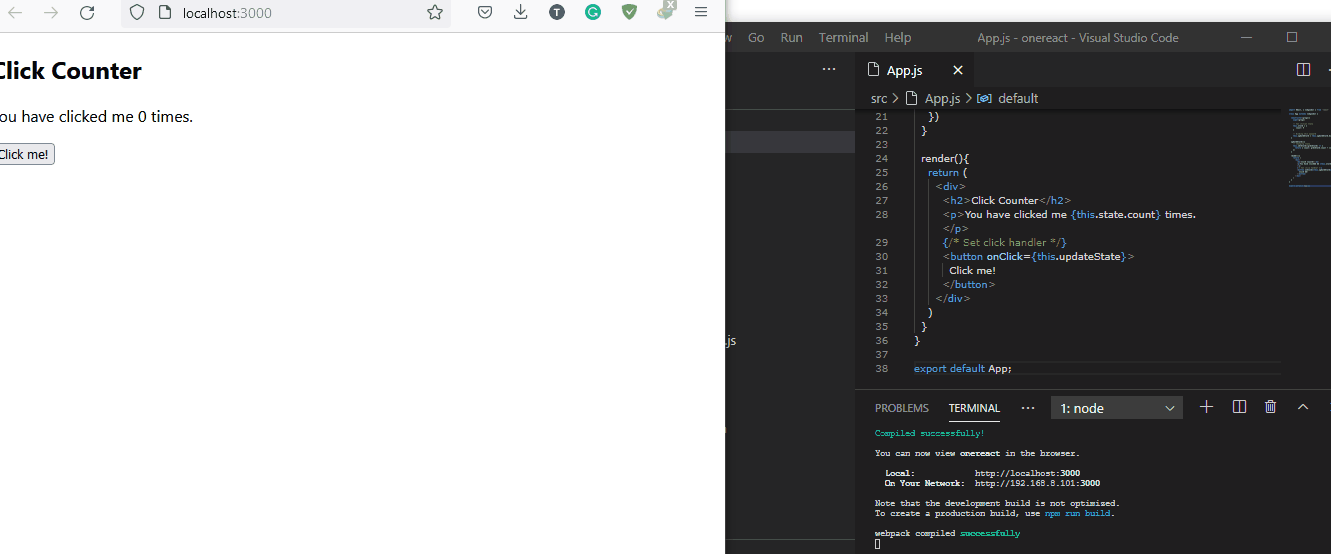
setState 함수 내에서 prevState를 호출하여 버튼을 클릭할 때 데이터가 있었던 마지막 상태를 인식하고 해당 상태를 1만큼 증가시킵니다. 1.
결론
React에서 구성 요소의 상태를 업데이트하는 데에는 다양한 용도가 있습니다. 그러나 우리가 논의한 예를 통해 코더는 어떤 상황에서도 다양한 사용 사례를 적용할 수 있어야 합니다.

Fisayo is a tech expert and enthusiast who loves to solve problems, seek new challenges and aim to spread the knowledge of what she has learned across the globe.
LinkedIn