How to Perform Image Segmentation in Python
-
Install the
scikit-imageModule in Python - Convert Image Format in Python
- Supervised Segmentation in Python
- Unsupervised Segmentation in Python
In this tutorial, we will learn how we can perform image segmentation in Python using the scikit-image library.
Image segmentation divides images into many layers, each represented by a smart, pixel-wise mask. Combining, blocking, and splitting images based on their integration level.
Install the scikit-image Module in Python
pip install scikit-image
After installation, we will convert the image format to perform segmentation.
Convert Image Format in Python
The required input for applying filters and other processing techniques is a two-dimensional vector, i.e., a monochromatic image.
We will use the skimage.color.rgb2gray() function to convert an RGB image to grayscale format.
from skimage import data, io, filters
from skimage.color import rgb2gray
import matplotlib.pyplot as plt

image = data.coffee()
plt.figure(figsize=(15, 15))
gray_coffee = rgb2gray(image)
plt.subplot(1, 2, 2)
plt.imshow(gray_coffee, cmap="gray")
plt.show()
We convert the sample coffee image in the scikit library to grayscale in the above code.
Let us take a look at the grayscale version of the image.

We will perform the segmentation using two techniques, i.e., Supervised and Unsupervised segmentation.
Supervised Segmentation in Python
External input is required for this form of segmentation to work. We will perform this type using two approaches.
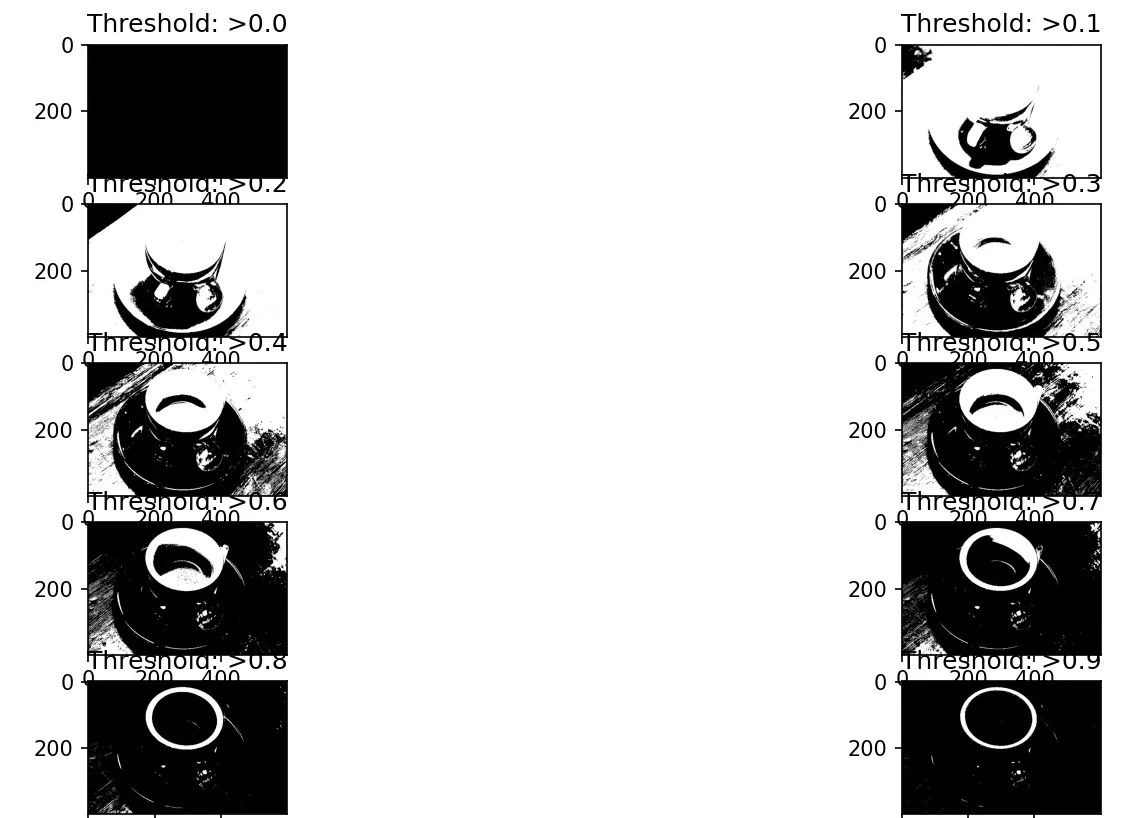
Segmentation by Thresholding – Manual Input in Python
An external pixel value from 0-255 is employed to distinguish the image from the background. As a result, the image is altered to be larger or smaller than the given threshold.
We will perform this method using the below code.
from skimage import data
from skimage import filters
from skimage.color import rgb2gray
import matplotlib.pyplot as plt

coffee = data.coffee()
gray_coffee = rgb2gray(coffee)

plt.figure(figsize=(15, 15))

for i in range(10):

    binarized_gray = (gray_coffee > i * 0.1) * 1
    plt.subplot(5, 2, i + 1)

    plt.title("Threshold: >" + str(round(i * 0.1, 1)))

    plt.imshow(binarized_gray, cmap="gray")
plt.show()
plt.tight_layout()
Let us now see the output of the above code, where we can see the image segmented using various threshold values.
Let us learn another approach to supervised segmentation called Active Contour Segmentation.
Active Contour Segmentation in Python
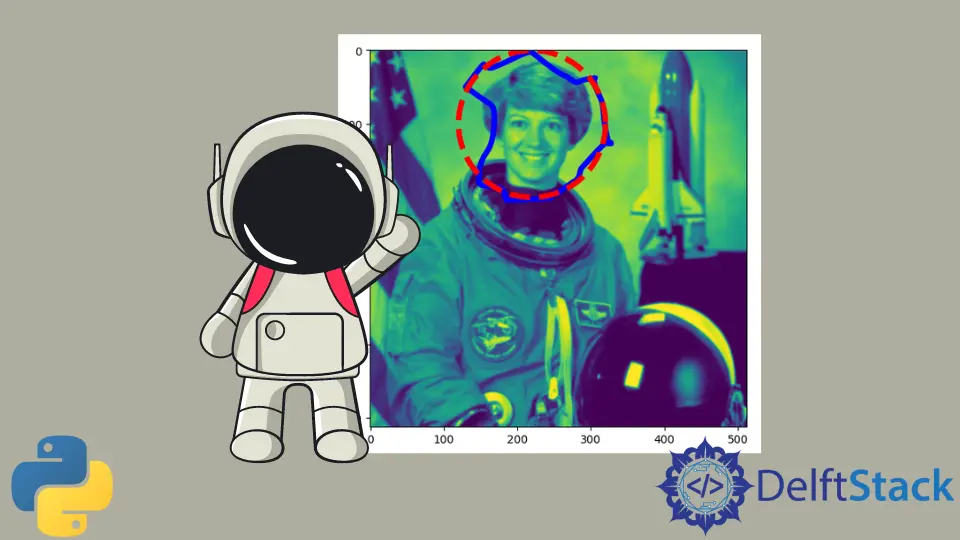
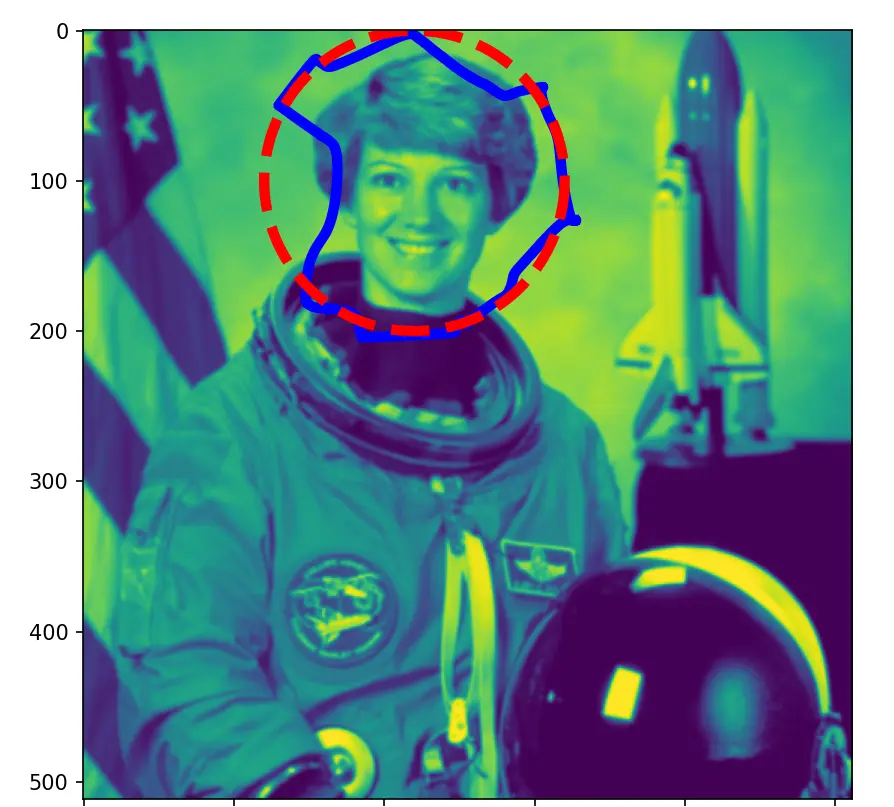
An active contour is a segmentation method that separates the pixels of interest from the rest of the image for further processing and analysis using energy forces and limitations. By fitting snakes to image features, the skimage.segmentation.active_contour() function creates active contours.
We will use the below code to apply this method.
import numpy as np
import matplotlib.pyplot as plt
from skimage.color import rgb2gray
from skimage import data
from skimage.filters import gaussian
from skimage.segmentation import active_contour

astronaut = data.astronaut()
gray_astronaut = rgb2gray(astronaut)
gray_astronaut_noiseless = gaussian(gray_astronaut, 1)
x1 = 220 + 100 * np.cos(np.linspace(0, 2 * np.pi, 500))
x2 = 100 + 100 * np.sin(np.linspace(0, 2 * np.pi, 500))

snake = np.array([x1, x2]).T
astronaut_snake = active_contour(gray_astronaut_noiseless, snake)

fig = plt.figure(figsize=(10, 10))
ax = fig.add_subplot(111)

ax.imshow(gray_astronaut_noiseless)

ax.plot(astronaut_snake[:, 0], astronaut_snake[:, 1], "-b", lw=5)
ax.plot(snake[:, 0], snake[:, 1], "--r", lw=5)
plt.show()
We use the sample astronaut image in skimage to perform active contour segmentation in the above code. We circle the part where we see the segmentation occurring.
Let us see the output of this technique.
Now let us explore the Unsupervised Segmentation technique.
Unsupervised Segmentation in Python
The first method we employ in this type of segmentation is marking the boundaries method.
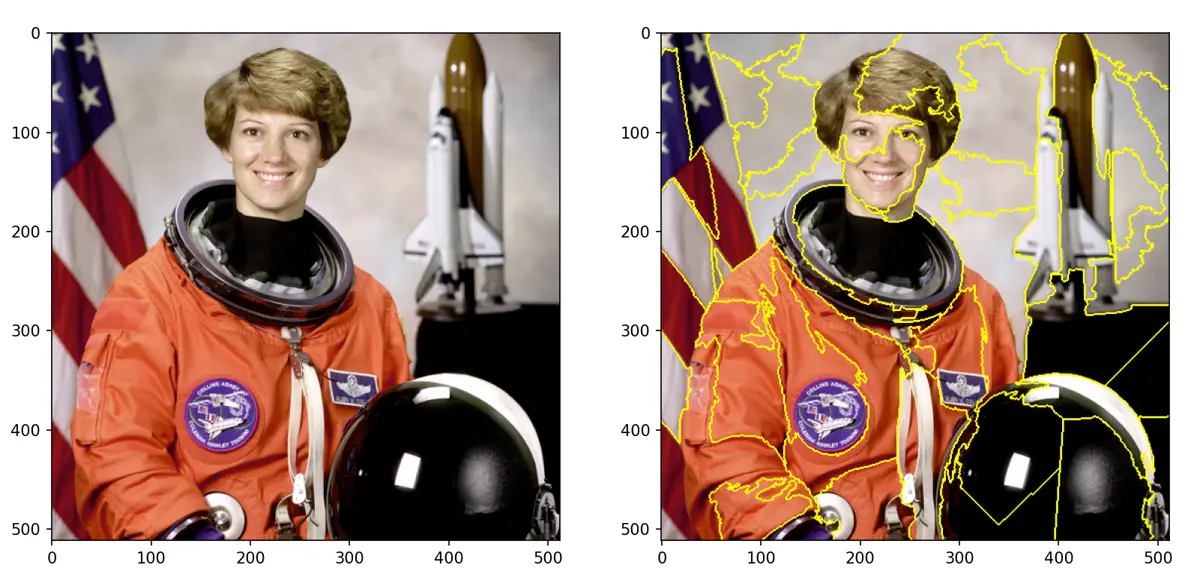
Mark Boundaries Method in Python
This methodology provides an image with highlighted borders between labeled sections. The skimage.segmentation.mark_boundaries() function returns an image with labelled region borders.
We will use the below code to employ this technique.
from skimage.segmentation import slic, mark_boundaries
from skimage.data import astronaut
import matplotlib.pyplot as plt

plt.figure(figsize=(15, 15))

astronaut = astronaut()
astronaut_segments = slic(astronaut, n_segments=100, compactness=1)

plt.subplot(1, 2, 1)
plt.imshow(astronaut)
plt.subplot(1, 2, 2)
plt.imshow(mark_boundaries(astronaut, astronaut_segments))
plt.show()
The segmented image was obtained using the above code for the following technique.
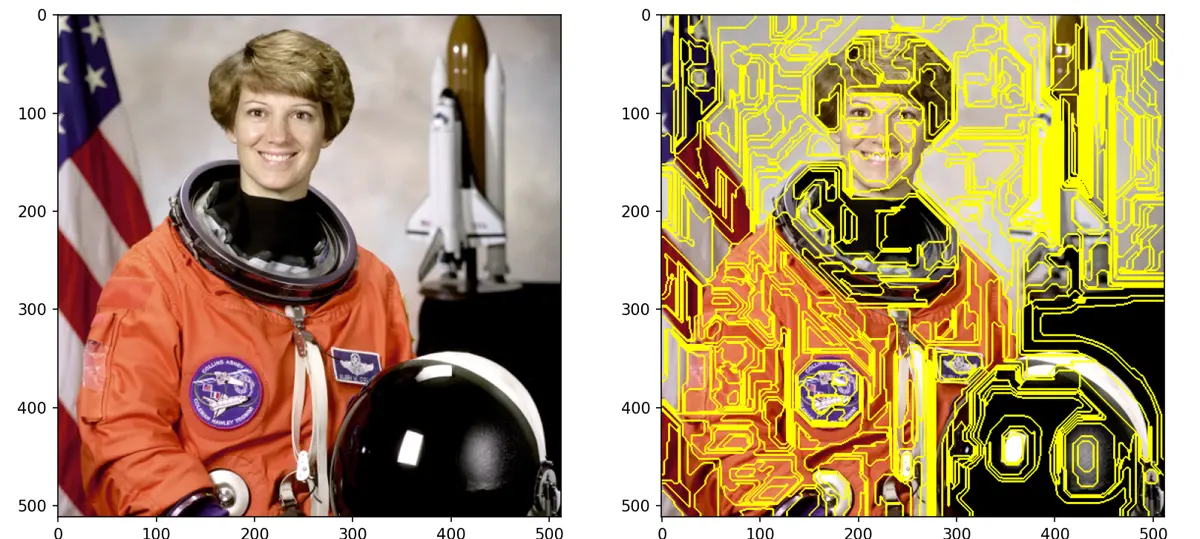
The second technique in this type of approach is Felzenszwalb’s Segmentation.
Felzenszwalb’s Segmentation in Python
Felzenszwalb’s Segmentation uses a rapid, minimum spanning tree-based clustering to over-segment an RGB picture on the image grid. The Euclidean distance between pixels is used in this approach.
Felzenszwalb’s efficient graph-based image segmentation is computed using the skimage.segmentation.felzenszwalb() function.
Let us see the below code for performing this type of segmentation.
from skimage.segmentation import felzenszwalb, mark_boundaries
from skimage.color import label2rgb
from skimage.data import astronaut

import matplotlib.pyplot as plt

plt.figure(figsize=(15, 15))
astronaut = astronaut()

astronaut_segments = felzenszwalb(astronaut, scale=2, sigma=5, min_size=100)

plt.subplot(1, 2, 1)
plt.imshow(astronaut)

# Marking the boundaries of
# Felzenszwalb's segmentations
plt.subplot(1, 2, 2)
plt.imshow(mark_boundaries(astronaut, astronaut_segments))
plt.show()
The above code’s output would be below.
Thus we have successfully performed image segmentation in Python using the scikit-image module by employing multiple techniques in supervised and unsupervised segmentation approaches.