How to Write JSON Object to a File in PowerShell
- PowerShell Custom Objects
- PowerShell JSON Object to JSON String
-
Save JSON String to a File Using
ConvertTo-JsonandOut-File -
Save JSON String to a File Using
ConvertTo-JsonandSet-Content -
Save JSON String to a File Using
ConvertTo-JsonandAdd-Content - Conclusion

PowerShell, a robust and versatile scripting language, provides powerful tools for managing and manipulating data. When it comes to handling JSON (JavaScript Object Notation) data, PowerShell offers efficient ways to convert custom objects into JSON strings and subsequently write them to files.
In this article, we will delve into the process of converting PowerShell objects to JSON strings and saving them to files using various cmdlets like ConvertTo-Json, Out-File, Set-Content, and Add-Content.
PowerShell Custom Objects
The PSCustomObject is a fundamental element in PowerShell used to define custom objects. A custom object typically contains properties and their associated values, providing a structured way to organize data.
In addition to creating custom objects from scratch, PowerShell is also proficient in handling and processing JSON objects efficiently.
Creating a JSON Custom Object
Let’s begin by examining how to create a JSON custom object using an example JSON structure. We will store this JSON structure in the $MyJsonVar variable.
$MyJsonVar = @"
 {
   "ExampleJson":{
     "Fruit1":{
       "Name":"Apple",
       "Price":"`$10.00"
     }
  }
 }
"@
Output:
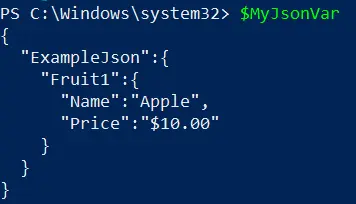
In this example, we have defined a JSON structure representing fruit information.
Converting JSON to PowerShell Custom Object
To convert the JSON representation into a PowerShell Custom Object, we utilize the ConvertFrom-JSON cmdlet. Let’s assign the newly created JSON object to the $MyJsonObject variable.
$MyJsonObject = $MyJsonVar | ConvertFrom-Json
The ConvertFrom-JSON cmdlet transforms the JSON structure into a proper PSCustomObject.
Displaying the Created PowerShell Custom Object
Now, let’s display the newly created PSCustomObject, which corresponds to the original JSON structure.
$MyJsonObject
Output:

These commands access and display the price and name properties of the fruit defined in the custom object. So, it has been confirmed that we got a proper PowerShell custom object called $MyJsonObject.
PowerShell JSON Object to JSON String
PowerShell offers the ConvertTo-Json cmdlet, a valuable tool to convert an existing custom object into a JSON string. This process effectively transforms the object into a plain text representation in JSON format, which can be further utilized or stored as needed.
Syntax of the ConvertTo-Json cmdlet:
ConvertTo-Json
[-InputObject] <Object>
[-Depth <Int32>]
[-Compress]
[-EnumsAsStrings]
[-AsArray]
[-EscapeHandling <StringEscapeHandling>]
[<CommonParameters>]
The ConvertTo-Json cmdlet provides several optional parameters to customize the JSON conversion process. Here’s a breakdown of these parameters:
-
-InputObject: This parameter is fundamental, as it designates the custom object that requires conversion into a JSON string. You can pass the object directly to this parameter. -
-Depth: This crucial parameter enables you to specify the number of levels in the resulting JSON string. The depth signifies how many levels of nested objects or arrays will be included in the JSON string.However, it must be used judiciously, as improper usage may lead to data loss. The default value is set to 2.
-
-Compress: This parameter compresses the output JSON by removing unnecessary whitespace and indentation, resulting in a more compact JSON string. -
-EnumsAsStrings: When used, this parameter represents enumeration values as strings in the JSON output, ensuring compatibility with systems that may not handle numerical enumerations well.
-
-AsArray: When specified, this parameter formats the output as a JSON array, even if the input object is not an array. -
-EscapeHandling: This parameter allows customization of how special characters are escaped in the JSON string, providing options such asDefault,EscapeNonAscii,EscapeHtml, andDoNotEscape.
To demonstrate the usage of the ConvertTo-Json cmdlet, let’s consider the custom object in the previous section ($MyJsonObject):
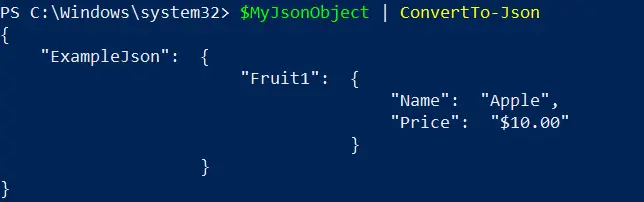
We can pipe a custom object to the ConvertTo-Json cmdlet easily. We can send the $MyJsonObject through the pipe (|) to transform the custom object into a JSON string.
$MyJsonObject | ConvertTo-Json
Output:
Let’s further demonstrate the usage of the ConvertTo-Json cmdlet. Let’s consider a custom object named $AnotherJsonObject:
$AnotherJsonObject = @{
    Name     = "John Doe"
    Age      = 30
    IsActive = $true
    Hobbies  = @("Reading", "Gardening")
    Address  = @{
        Street  = "1234 Elm St"
        City    = "Anytown"
        Country = "USA"
    }
}
To convert this object into a JSON string and display the output, use the following command:
$AnotherJsonObject | ConvertTo-Json
The output of this transformation is an illustrative JSON string representing the original custom object.
{
    "Name": "John Doe",
    "Age": 30,
    "IsActive": true,
    "Hobbies": [
        "Reading",
        "Gardening"
    ],
    "Address": {
        "Street": "1234 Elm St",
        "City": "Anytown",
        "Country": "USA"
    }
}
As we can see, the output shows a structured object ($AnotherJsonObject) representing personal information such as name, age, activity status, hobbies, and address details of a person.
Save JSON String to a File Using ConvertTo-Json and Out-File
Once you’ve obtained a JSON string using the ConvertTo-Json cmdlet in PowerShell, the next logical step is to save it to a file for later use or sharing. Fortunately, PowerShell provides several methods to accomplish this, with one of the most straightforward being the use of Out-File.
The Out-File cmdlet is a reliable tool to save the JSON string to a file. Below is an example illustrating how to achieve this:
$MyJsonObject | ConvertTo-Json | Out-File -FilePath "D:\path\to\example.json"
Output:
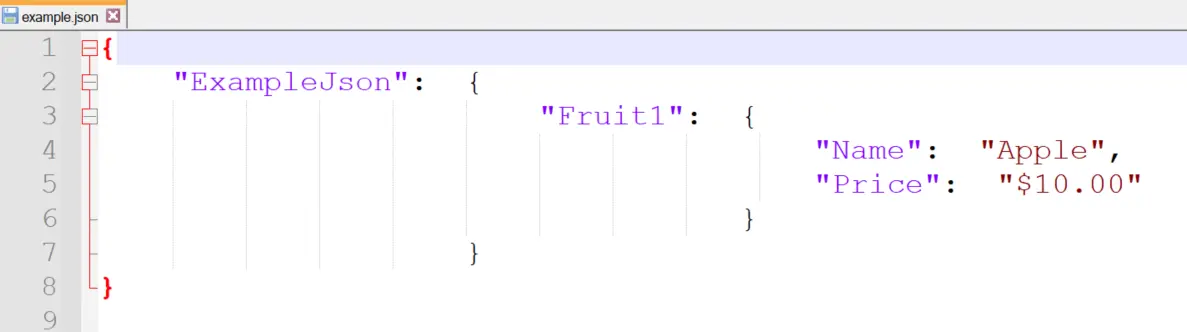
In this example, $MyJsonObject represents the variable containing the JSON string generated using ConvertTo-Json. The pipeline (|) then passes this JSON string to Out-File for writing to a file.
The -FilePath parameter specifies the destination path for the JSON string. Simply replace "D:\path\to\example.json" with the desired file path where you intend to save the JSON content.
By using Out-File in this manner, you efficiently persist your JSON data to a file, making it accessible for future use or sharing. This simple yet powerful technique is instrumental in effectively managing JSON data within a PowerShell environment.
Save JSON String to a File Using ConvertTo-Json and Set-Content
Another way to save the JSON string to a file is using the Set-Content cmdlet. The Set-Content cmdlet provides a straightforward way to write data to a file, making it a suitable choice for saving a JSON string to disk.
The following example demonstrates this process:
$MyJsonObject | ConvertTo-Json | Set-Content -Path "D:\path\to\example.json"
In this example, $MyJsonObject is the variable containing the JSON string generated using ConvertTo-Json. The pipeline (|) passes this JSON string to Set-Content for writing to a file.
The -Path parameter specifies the destination path for the JSON string. Simply replace "D:\path\to\example.json" with the desired file path where you intend to save the JSON content.
Save JSON String to a File Using ConvertTo-Json and Add-Content
Another method we can use to save a JSON string to a file in PowerShell is the Add-Content cmdlet, which allows appending the JSON string to an existing file. The following example demonstrates how to achieve this:
$MyJsonObject | ConvertTo-Json | Add-Content -Path "D:\path\to\example.json"
In this example, $MyJsonObject represents the variable containing the JSON string generated using ConvertTo-Json. The pipeline (|) passes this JSON string to Add-Content for appending to a file specified by the -Path parameter.
The -Path parameter signifies the file to which the JSON string will be appended. Simply replace "D:\path\to\example.json" with the desired file path where you intend to append the JSON content.
The Add-Content cmdlet offers a convenient way to add or append content to a file without overwriting the existing data. This is especially useful when dealing with JSON strings that need to be updated or extended over time.
Conclusion
This article has demonstrated the process of converting PowerShell objects to JSON strings and saving them to files using the ConvertTo-Json cmdlet, along with other file-handling cmdlets like Out-File, Set-Content, and Add-Content.
By leveraging these tools, users can efficiently handle JSON data, allowing for streamlined data management, sharing, and integration with diverse applications and systems.

Nimesha is a Full-stack Software Engineer for more than five years, he loves technology, as technology has the power to solve our many problems within just a minute. He have been contributing to various projects over the last 5+ years and working with almost all the so-called 03 tiers(DB, M-Tier, and Client). Recently, he has started working with DevOps technologies such as Azure administration, Kubernetes, Terraform automation, and Bash scripting as well.