How to Clear Serial Monitor in Arduino
-
Clear
Serial Monitorby Closing It and Opening It Again in Arduino IDE -
Clear
Serial Monitorby Using Another Serial Terminal Program -
Clear
Serial Monitorby Using theSerial MonitorClear Button -
Clear
Serial Monitorby Using theSerial.flush()Function -
Clear
Serial Monitorby Using a Custom Command -
Clear
Serial Monitorby UsingPuTTY - Conclusion

Arduino programming, with its powerful Serial Monitor, forms the backbone of interactive electronics projects, facilitating real-time communication between an Arduino board and a computer. There are situations where you may want to clear the Serial Monitor to improve readability or reset the view of the data.
We will explore different methods to clear the Serial Monitor in Arduino, providing example codes and explanations for each approach. From simple approaches like closing and reopening the Serial Monitor to more advanced techniques involving external serial terminal programs like PuTTY, we explore a range of strategies in this article.
Clear Serial Monitor by Closing It and Opening It Again in Arduino IDE
There is no direct method to clear the serial monitor in Arduino IDE because it’s not a regular terminal, so it’s not possible to clear the screen using standard terminal commands.
But you can clear it by closing it and opening it again. This method will also restart the Arduino.
You can also use delay in the void loop to slow down printing values on the serial monitor. In this way, you can see the values.
You can also pause the serial monitor from the Arduino IDE to check the serial readings.
void loop() {
  // Your Code
  delay(1000);
}
Clear Serial Monitor by Using Another Serial Terminal Program
Instead of using Arduino IDE, you can use another program for serial monitoring, like the Bray terminal. It has a lot of stunning features, along with a clear receive and send window.
But it is only available for Windows. It is only a single and small .exe file that can be used without installation.
Clear Serial Monitor by Using the Serial Monitor Clear Button
The Serial Monitor itself provides a clear button that allows you to manually clear the displayed data. This method is the most straightforward:
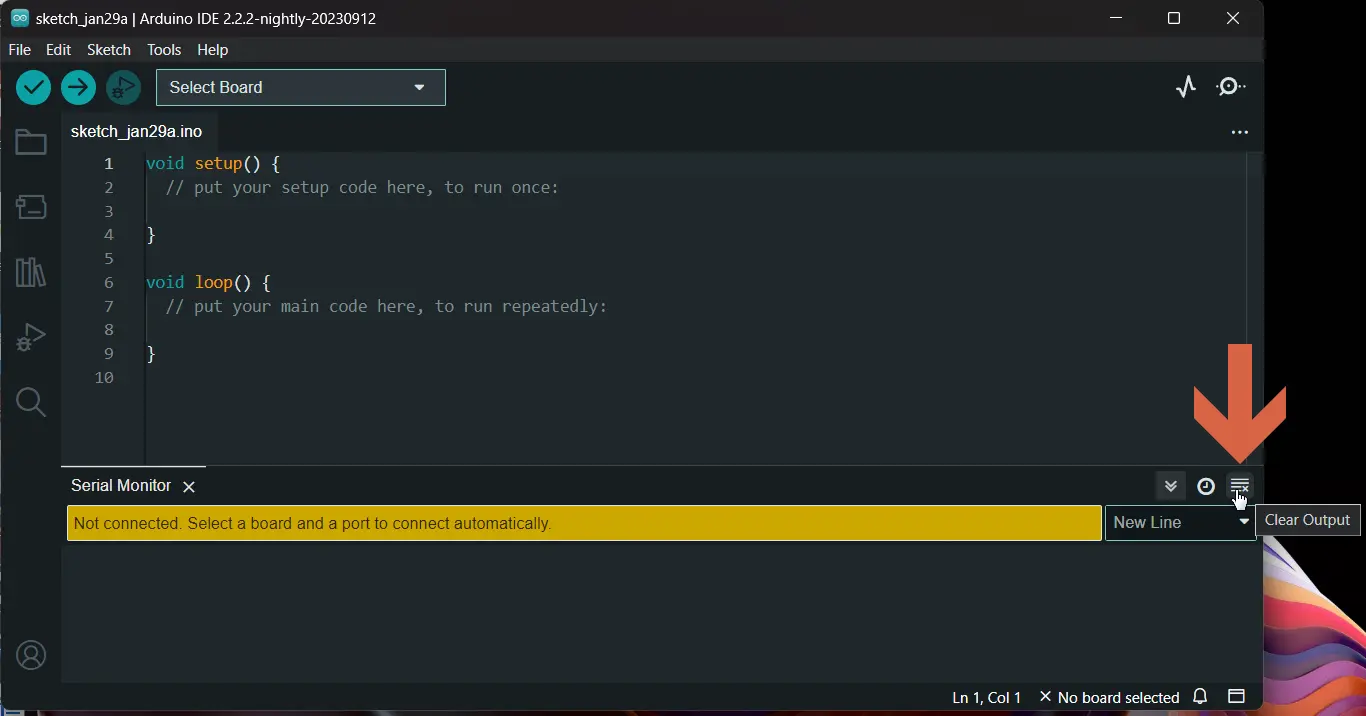
To clear the Serial Monitor, click the "Clear Output" button located at the top-right corner of the Serial Monitor window in the Arduino IDE.
Clear Serial Monitor by Using the Serial.flush() Function
The Serial.flush() function can be employed to clear the Serial Monitor by discarding any incoming or outgoing serial data:
void setup() {
  Serial.begin(9600);
  Serial.flush();  // Clear Serial Monitor
}

void loop() {
  // Your Arduino code here
}
Note that using Serial.flush() might introduce a delay in your program execution as it waits for the transmission of outgoing serial data to complete.
Clear Serial Monitor by Using a Custom Command
You can define a custom command in your Arduino sketch to trigger the clearing of the Serial Monitor remotely. This method is useful if you want more control over when the Serial Monitor is cleared:
void setup() { Serial.begin(9600); }

void loop() {
  if (Serial.available() > 0) {
    char command = Serial.read();
    if (command == 'C') {
      clearSerialMonitor();
    }
  }

  // Your Arduino code here
}

void clearSerialMonitor() {
  Serial.write(27);     // ESC
  Serial.print("[2J");  // Clear entire screen
  Serial.write(27);     // ESC
  Serial.print("[H");   // Move cursor to home position
}
In this example, sending the character 'C' through the Serial Monitor triggers the clearSerialMonitor function. The clearSerialMonitor function sends ANSI escape codes to clear the screen ([2J) and move the cursor to the home position ([H).
Clear Serial Monitor by Using PuTTY
PuTTY, a versatile terminal emulator, can be employed to communicate with Arduino boards. Below are the detailed steps on how to clear the Arduino terminal screen using PuTTY.
Before diving into clearing the Serial Monitor, it’s essential to understand the basics of serial communication between Arduino and your computer. Arduino communicates with the computer through a virtual COM port, and the Serial Monitor is a tool in the Arduino IDE that allows you to view and send serial data to and from your Arduino board.
Prerequisites
Before we delve into the process, make sure you have the following prerequisites in place:
- Arduino Board: Ensure that you have an Arduino board connected to your computer.
PuTTYInstalled: Download and installPuTTYfrom the official website.- Arduino IDE: Install the Arduino IDE for programming and uploading code to your Arduino board.
Establishing Serial Communication With PuTTY
-
Connect Arduino to PC
Connect your Arduino board to your computer using a USB cable.
-
Open Arduino IDE
Launch the Arduino IDE on your computer.
-
Select the Correct Port
Go to the
"Tools"menu in the Arduino IDE and select the correct port under the"Port"option. -
Upload a Simple Sketch
Upload a simple sketch to your Arduino board. For example, you can use the
"Blink"sketch from theExamplesmenu. -
Note the Baud Rate
In the Arduino IDE, note the baud rate used in your sketch. This information is crucial for setting up
PuTTYlater. -
Open
PuTTYLaunch
PuTTYon your computer. -
Configure
PuTTY- In the
PuTTYConfiguration window, select the"Serial"category. - Enter the correct COM port number for your Arduino board in the
"Serial line"field. - Set the baud rate to match the one used in your Arduino sketch.
- Click
"Open"to establish a serial connection.
- In the
Clearing Arduino Terminal Screen
Once you’ve established a serial connection between PuTTY and your Arduino board, you can clear the terminal screen using the following steps:
-
Sending Control Characters
In the PuTTY terminal, press Ctrl + L. This key combination sends the clear screen command to the Arduino.
-
Using Serial Commands
You can include commands in your Arduino sketch to clear the terminal screen. For example, you can use the
Serial.println("\033[2J\033[H");command in your code to clear the screen. -
Implementing Clear Screen Functionality
Modify your Arduino code to include a function for clearing the screen. For instance, you can create a function named
clearScreen()and call it when needed:void clearScreen() { Serial.println("\033[2J\033[H"); } void setup() { Serial.begin(9600); // Additional setup code } void loop() { // Your main code } -
Sending Custom Commands
Depending on your specific requirements, you can send custom escape sequences or commands to achieve different effects on the terminal screen.
By following these steps, you can easily clear the Arduino terminal screen using PuTTY. This functionality is particularly useful when working on projects that involve continuous serial communication and debugging.
Experiment with different commands and customize the process according to your project’s needs.
Conclusion
In this article, we explored various methods to clear the Arduino Serial Monitor, a critical tool for debugging and monitoring Arduino sketches. We discussed techniques such as closing and reopening the Serial Monitor, using alternative serial terminal programs like Bray Terminal, leveraging built-in features, employing the Serial.flush() function, introducing custom commands in Arduino code, and clearing the Arduino terminal screen using PuTTY.
Each method provides developers with options tailored to their specific project requirements, enhancing the debugging and monitoring capabilities of Arduino-based projects.
