JavaFX メディアプレーヤー
この記事では、JavaFX を使用して Java でメディアプレーヤーを作成する方法を学習します。そのためには、組み込みの JavaFX を使用して、手動でセットアップします。
組み込みの JavaFX を使用してメディアプレーヤーを作成する
組み込みの JavaFX を使用するには、JavaFX が含まれている Java8 が必要です。個別にインストールする必要はありません。
このセクションでは、次のツールを使用しています。
- Java 8
- NetBeans 13(任意の IDE を使用できます)
サンプルコード(Main.java、メインクラス):
// write the package name (yours may be different)
package com.mycompany.main;

// import necessary libraries
import static javafx.application.Application.launch;

import java.net.URL;
import javafx.application.Application;
import javafx.scene.Scene;
import javafx.scene.layout.Pane;
import javafx.scene.media.Media;
import javafx.scene.media.MediaPlayer;
import javafx.scene.media.MediaView;
import javafx.stage.Stage;

// Main Class
public class Main extends Application {
  // main method
  public static void main(String[] args) {
    launch(args);
  } // end main method

  /**
   *
   * @param primaryStage
   * @throws Exception
   */
  @Override
  public void start(Stage primaryStage) throws Exception {
    // path to the file
    final URL resource = getClass().getResource("/music/audio.mp3");

    // create Media Object and pass it the path of the audio file
    Media mediafile = new Media(resource.toString());

    // create MediaPlayer Object and pass the mediafile instance to it
    MediaPlayer player = new MediaPlayer(mediafile);

    // Add a mediaView, to display the media. Its necessary !
    // This mediaView is added to a Pane
    MediaView mediaView = new MediaView(player);

    // Add to scene
    Scene scene = new Scene(new Pane(mediaView), 400, 200);

    // Show the stage
    primaryStage.setTitle("Media Player");
    primaryStage.setScene(scene);
    primaryStage.show();

    // Play the media once the stage is shown
    player.play();

  } // end start
} // end Main Class
JavaFX を使用するには、プライマリ起動クラスが必要です。これは、Application クラス(Java 8 以降の Java の標準クラス)を拡張する必要があります。プライマリ起動クラスの名前は Main であり、これは Application クラスも拡張します。
Main クラスは Application クラスのサブクラスであると言えます。したがって、すべての抽象メソッドを実装する必要があります。そのため、Main クラスは start() メソッドをオーバーライドします。
start() 関数は、1つの Stage タイプのパラメーターを受け入れます。これは、JavaFX アプリのすべてのビジュアルセクションが表示される場所です。
Stage タイプのオブジェクトは、JavaFX ランタイムによって作成されます。手動で作成する必要はありません。
start() メソッド内で、オーディオファイルのパスを取得し、それを resource 変数に保存します。この変数は、文字列形式で Media コンストラクターに渡され、さらに MediaPlayer コンストラクターに渡されます。。次に、メディアを表示/表示するための mediaView を追加します。これは必要です。
次に、この mediaView が Pane に追加されます。JavaFX アプリケーションのウィンドウに何かを表示するために使用される Stage オブジェクトに Scene を追加する必要があります。
JavaFX アプリに表示する必要のあるすべてのコンポーネントは、シーン内に配置する必要があることを忘れないでください。この例では、メディアビューとともに Scene オブジェクトを Stage に追加しています。
その後、タイトルを設定し、シーンを設定し、ステージが表示されたらメディアを再生します。
ここで、main メソッドについて説明します。main() 関数なしで JavaFX アプリを起動できることをご存知ですか。ただし、コマンドラインパラメーターをアプリケーションに渡す必要がある場合に役立ちます。
JavaFX をセットアップし、それを使用してメディアプレーヤーを作成する
JavaFX を手動でインストールするには、次のものが必要です。
- Java 18
- NetBeans バージョン 13(任意の IDE を使用できます)
module-info.javaおよびpom.xmlファイルを更新して、javafx.controlsおよびjavafx.mediaをインストールします(すべてのファイルの完全なコードを以下に示します)- 依存関係をインストールするために Maven を使用しています。Gradle を使用できます。
サンプルコード(module-info.java ファイル):
module com.mycompany.test {
  requires javafx.controls;
  requires javafx.media;
  exports com.mycompany.test;
}
サンプルコード(pom.xml ファイル):
<project xmlns="http://maven.apache.org/POM/4.0.0" xmlns:xsi="https://www.w3.org/2001/XMLSchema-instance"
xsi:schemaLocation="http://maven.apache.org/POM/4.0.0 http://maven.apache.org/maven-v4_0_0.xsd">
    <modelVersion>4.0.0</modelVersion>
    <groupId>com.mycompany</groupId>
    <artifactId>Test</artifactId>
    <version>1.0-SNAPSHOT</version>
    <properties>
        <project.build.sourceEncoding>UTF-8</project.build.sourceEncoding>
        <maven.compiler.release>11</maven.compiler.release>
        <javafx.version>16</javafx.version>
        <javafx.maven.plugin.version>0.0.6</javafx.maven.plugin.version>
    </properties>
    <dependencies>
        <dependency>
            <groupId>org.openjfx</groupId>
            <artifactId>javafx-controls</artifactId>
            <version>${javafx.version}</version>
        </dependency>
        <dependency>
            <groupId>org.openjfx</groupId>
            <artifactId>javafx-media</artifactId>
            <version>${javafx.version}</version>
        </dependency>
    </dependencies>

    <build>
        <plugins>
            <plugin>
                <groupId>org.apache.maven.plugins</groupId>
                <artifactId>maven-compiler-plugin</artifactId>
                <version>3.8.1</version>
                <configuration>
                    <release>${maven.compiler.release}</release>
                </configuration>
            </plugin>
            <plugin>
                <groupId>org.openjfx</groupId>
                <artifactId>javafx-maven-plugin</artifactId>
                <version>${javafx.maven.plugin.version}</version>
                <configuration>
                    <mainClass>com.mycompany.test.App</mainClass>
                </configuration>
            </plugin>
        </plugins>
    </build>
</project>
サンプルコード(App.java、メインクラス):
// write the package name (yours may be different)
package com.mycompany.test;

// import necessary libraries
import java.net.URL;
import javafx.application.Application;
import javafx.scene.Scene;
import javafx.scene.layout.Pane;
import javafx.scene.media.Media;
import javafx.scene.media.MediaPlayer;
import javafx.scene.media.MediaView;
import javafx.stage.Stage;

/**
 * JavaFX App
 */
public class App extends Application {
  /**
   *
   * @param primaryStage
   */
  @Override
  public void start(Stage primaryStage) {
    // path to the file
    final URL resource = getClass().getResource("/music/video.mkv");

    // create Media Object and pass it the path of the video/audio file
    Media mediafile = new Media(resource.toString());

    // create MediaPlayer Object and pass the mediafile instance to it
    MediaPlayer player = new MediaPlayer(mediafile);

    // Add a mediaView, to display the media. Its necessary !
    // This mediaView is added to a Pane
    MediaView mediaView = new MediaView(player);

    // Add to scene
    Scene scene = new Scene(new Pane(mediaView), 1080, 750);

    // Show the stage
    primaryStage.setTitle("Media Player");
    primaryStage.setScene(scene);
    primaryStage.show();

    // Play the media once the stage is shown
    player.play();
  }

  // main method
  public static void main(String[] args) {
    launch(args);
  } // end main method

} // end App class
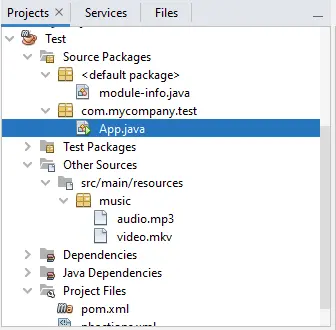
Java アプリケーションでは、module-info.java および pom.xml ファイルはデフォルトパッケージおよびプロジェクトファイルにあります。以下は、明確に理解するための Java アプリケーション内のすべてのファイルのスクリーンショットです。
このコードは、前のセクションと同じですが、違いは JavaFX を手動でインストールし、ビデオファイルを再生します。
