How to Use React Hooks With WebSockets
- Create a Bid App Using React Hooks Without the WebSocket Dependency
- Create a Chat App Using React Hooks With the WebSocket Dependency
- Conclusion

When we use chat apps, cryptocurrency, and online multiplayer gaming applications that require us to get live updates, these applications use the WebSocket protocol.
When we want to connect these applications to the server, the WebSocket is applied; it is pointed to the server URL. It works very much like a wall socket that we plug our devices into so that we can get it powered.
So when we point our applications to the URL of the server, using WebSocket, the react application connects straight to the server, and we get updates instantly. We can apply WebSockets directly, without the aid of an API, and we can also use third-party dependencies, as we will see in the examples below.
Create a Bid App Using React Hooks Without the WebSocket Dependency
In this example, we will use the WebSocket directly to build this bidding app. The application will constantly be fetching data from bitstamp.net’s server.
So the data displayed on the webpage will constantly change because we are using a WebSocket to fetch live updates from the website.
To begin, we will create a new react app, navigate to our project’s src folder, and access the App.js file. Then we write these codes inside it:
Code Snippet- App.js:
import React, { useState } from "react";

function  App() {
  const [bids, setBids] = useState([0]);

  const ws = new WebSocket("wss://ws.bitstamp.net");

  const apiCall = {
    event: "bts:subscribe",
    data: { channel: "order_book_btcusd" },
  };

  ws.onopen = (event) => {
    ws.send(JSON.stringify(apiCall));
  };

ws.onmessage = function (event) {
    const json = JSON.parse(event.data);
    try {
      if ((json.event = "data")) {
        setBids(json.data.bids.slice(0, 5));
      }
    } catch (err) {
      console.log(err);
    }
  };
  const firstBids = bids.map((item) => {
    return (
      <div>
        <p> {item}</p>
      </div>
    );
  });

  return <div>{firstBids}</div>;
}

export default  App;
Output:
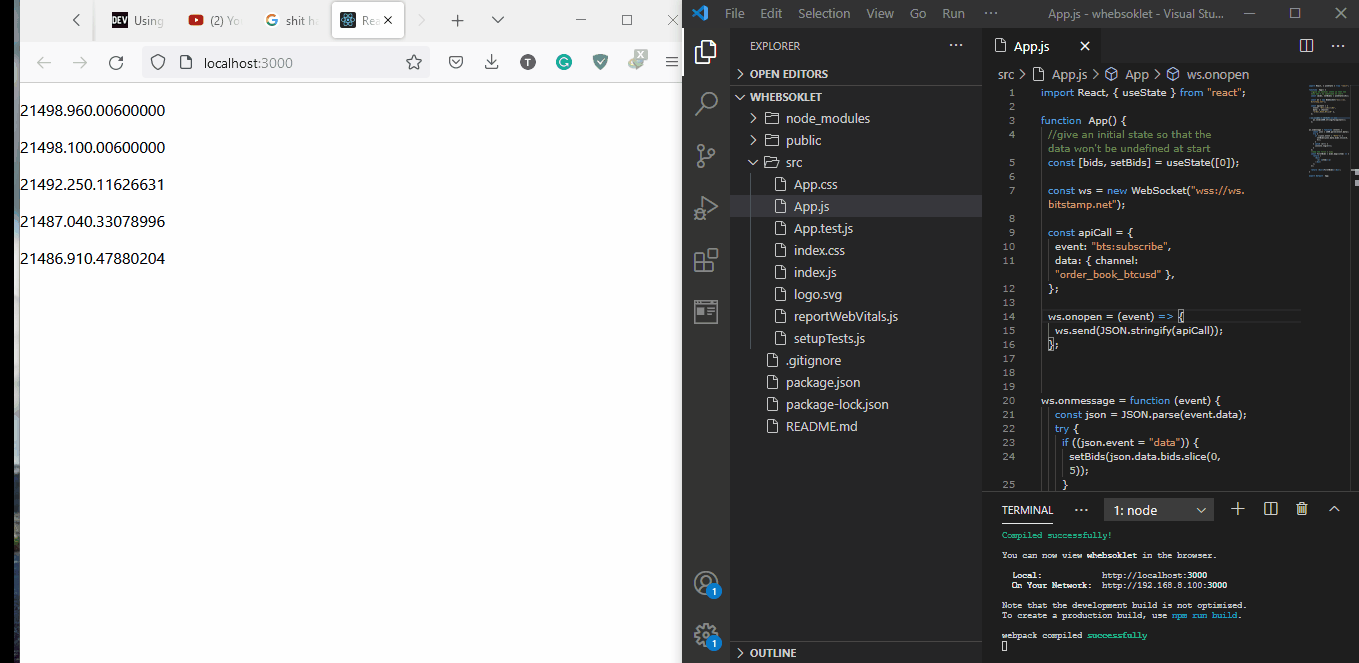
Because we will be getting constant updates, the state of our components will constantly be changing/updating, so we need to use the useState hook with our components. Then, at the ws.open point, we try to create a connection to the server from which we will be getting the updates.
Once we start getting the updates, we use ws.onmessage to determine how we want to receive the data. Since we want just 5 bids, we use the splice method to set the number of bids we receive to 5.
Once everything is set successfully, we will see five groups of constantly changing numbers.
Create a Chat App Using React Hooks With the WebSocket Dependency
This example requires that we go full stack React because as we create the interface of the app{frontend}, we will also set up the server ourselves, which is what is referred to as backend development.
Let’s create a folder and name it Chatter; inside this folder, we create two folders, frontend and server. Now, using our terminal, we will cd into the server folder and type in npm init; this will create our package.json file.
There will be prompts to follow, but at the entry point, we will type in server.js. After this is done, we will see the package.json file appear inside the server folder.
Next is installing the WebSocket dependency, still using the terminal. Inside the server folder, we will type in npm install express socket.io.
Next, we do npm install nodemon inside the same folder. When we make any code changes, this dependency restarts the server, making it work more efficiently.
After installation, we will open our package.json file; under the scripts, after tests, we will include this in the next line, "start": "nodemon server.js". Then we will do npm start to start the server.
Still, in the server folder, we will then go ahead and create the server.js file and type in these codes:
Code Snippet- Server.js:
const app = require('express')()
const server = require('http').createServer(app)
const io = require('socket.io')(server, {
    cors: {
        origin: '*',
    }
})

io.on('connection', socket => {
    console.log('connection made successfully')
    socket.on('message', payload => {
        console.log('Message received on server: ', payload)
        io.emit('message', payload)
    })
})

server.listen(7000, () => {
    console.log('I am listening at port: 7000)');
})
This creates the backend server for our web application using the socket.io dependency. The console.log will assist us in knowing the connection state of the server and the app.
Good thing the terminal inside VS Code allows us to open more than one terminal at once. This will be very useful in this example.
We open another terminal, and then we cd into the frontend folder to create the project folder for our frontend. We will use: npx create-react-app chatter to do this.
After this, we navigate to the Chatter folder and install the WebSocket client. We will install it with npm install socket.io-client and then import it into the App.js file.
Then we will type these codes inside the App.js file like this:
Code Snippet- App.js:
import React, { useState, useEffect } from "react";
import io from 'socket.io-client';

const socket = io('http://localhost:7000')
const userName = 'User '+parseInt(Math.random()*10)
function App() {
  const [message, setMessage] = useState('')
  const [chat, setChat] = useState([])

  useEffect(() => {
    socket.on('message', payload => {
      setChat([...chat, payload])
    })
  })

  const sendMessage = (e) => {
    e.preventDefault();
    socket.emit('message', {userName, message })
    setMessage('')
  };
  return (
    <div className="App">
      <h1>Welcome to chatter</h1>
      <form onSubmit={sendMessage}>
        <input type="text" name="message" placeholder='Type message' value={message} onChange={(e) => { setMessage(e.target.value) }} required></input>
        <button type="submit">Send</button>
      </form>
      {chat.map((payload, index)=>{
        return(
          <h4>{payload.userName}: <span>{payload.message}</span></h4>
        )
      })}
    </div>
  );
}

export default App;
Output:

So we import the useState and useEffect hooks alongside React, and then we point the WebSocket to the server address inside the server.js file.
Once we press the send button, we expect that the message inside the input box will disappear. This is why we need to set our setMessage component to the useState hook and to the e.preventDefault() function.
Then we want different users to send chats; hence we use the Math.random() function. So whenever a new user sends a chat, the function assigns a random number to the user.
To get a better experience of this chat app in action, we should open two or more browsers. Once we type in a new message and click send, we see the new messages appear on each browser; each message is identified by the user’s random number that has been assigned.
This is where the useEffect hook comes into play. As we type in the messages, we see each message lined up after the other.
Conclusion
There is no doubt about the usefulness and the effectiveness of utilizing the WebSocket to create live applications. Gone are the days when data are queued and exchanged in batches; with the evolution of the WebSocket, we see an instant data exchange.

Fisayo is a tech expert and enthusiast who loves to solve problems, seek new challenges and aim to spread the knowledge of what she has learned across the globe.
LinkedIn