How to Fix the Columns in the react-table Component
-
Use the
react-table-stickyforreact-tableVersion > 7 -
Use the
react-table-hoc-fixed-columnsforreact-tableVersion < 7

This article will teach us to create a fixed column for the react-table component. Sometimes, it requires that we create a sticky column at the left or right position and make other columns scrollable.
This article illustrates two different methods to create a sticky column.
Use the react-table-sticky for react-table Version > 7
If you use the react-table library version > 7, you should use the react-table-sticky library to create the sticky columns. To install the react-table-sticky dependency, run the below command in your project directory.
npm i react-table-sticky
To make the sticky column, we need to use useSticky while creating the table and pass the sticky key while creating the columns data, as illustrated below.
// creating a table
const { getTableProps, getTableBodyProps, headerGroups, rows, prepareRow } =
    useTable({columns, data,},useBlockLayout,
	// use useSticky here
      useSticky
    );
// column data
 const columns = [
{
    Header: "City Info",
    sticky: "left",
    columns: [
        {
          Header: "Name",
          accessor: "Name",
          width: 150,
        },
      ],
    {
    //Other groups of columns
    },
},
]
In the example below, we have created the data for the different cities and passed columns and data as a prop of the Table component. Also, added the sticky: left key-value pair to the City Info group of columns.
In the table component, we created and showed the data by iterating through the data.
Example Code:
import React from "react";
import styled from "styled-components";
import { useTable, useBlockLayout } from "react-table";
import { useSticky } from "react-table-sticky";
// style for the table
const Styles = styled.div`
  padding: 1rem;

  .table {
    border: 2px dotted #ddd;

    .th,
    .td {
      border-bottom: 1px dotted #ddd;
      padding: 5px;
      background-color: #fff;
      border-right: 1px dotted #ddd;
    }

    &.sticky {
      overflow: scroll;
    }
  }
`;
function Table({ columns, data }) {
  const { getTableProps, getTableBodyProps, headerGroups, rows, prepareRow } =
    useTable(
      {
        columns,
        data,
      },
      useBlockLayout,
      // use useSticky here
      useSticky
    );
  return (
    <Styles>
      {/* setup table header */}
      <div {...getTableProps()} className="table sticky">
        <div className="header">
          {headerGroups.map((hdrGroup) => (
            <div {...hdrGroup.getHeaderGroupProps()} className="tr">
              {hdrGroup.headers.map((clmn) => (
                <div {...clmn.getHeaderProps()} className="th">
                  {clmn.render("Header")}
                </div>
              ))}
            </div>
          ))}
        </div>
        {/*  setup table body */}
        <div {...getTableBodyProps()}>
          {rows.map((singleRow) => {
            prepareRow(singleRow);
            return (
              <div {...singleRow.getRowProps()} className="tr">
                {singleRow.cells.map((singleCell) => {
                  return (
                    <div {...singleCell.getCellProps()} className="td">
                      {singleCell.render("Cell")}
                    </div>
                  );
                })}
              </div>
            );
          })}
        </div>
      </div>
    </Styles>
  );
}
function App() {
  // data of the different cities to show in the table
  const data = [
    {
      Name: "Rajkot",
      population: 3000000,
      isClean: "Yes",
      totalCars: 40000,
      Bikes: 60000,
    },
    {
      Name: "Gondal",
      population: 3400000,
      isClean: "Yes",
      totalCars: 45000,
      Bikes: 40000,
    },
    {
      Name: "Surat",
      population: 45000000,
      isClean: "Yes",
      totalCars: 23000,
      Bikes: 32000,
    },
    {
      Name: "Vadodara",
      population: 560000,
      isClean: "No",
      totalCars: 870000,
      Bikes: 100000,
    },
    {
      Name: "Jetpur",
      population: 20000,
      isClean: "Yes",
      totalCars: 10000,
      Bikes: 30000,
    },
    {
      Name: "Valsad",
      population: 700000,
      isClean: "No",
      totalCars: 8000,
      Bikes: 45000,
    },
  ];
  // table columns
  const columns = [
    {
      Header: "City Info",
      sticky: "left",
      columns: [
        {
          Header: "Name",
          accessor: "Name",
          width: 150,
        },
      ],
    },
    {
      Header: "Details",
      columns: [
        {
          Header: "Population",
          accessor: "population",
          width: 200,
        },

        {
          Header: "Is Clean?",
          accessor: "isClean",
          width: 200,
        },
        {
          Header: "Total Cars",
          accessor: "totalCars",
          width: 200,
        },
        {
          Header: "Total Bikes",
          accessor: "Bikes",
          width: 200,
        },
      ],
    },
  ];
  return <Table columns={columns} data={data} />;
}
export default App;
Output:

In the above output, users can see that when the size of the browser decreases and table columns become horizontally scrollable, the Name column remains fixed at the left, and other columns become scrollable.
Use the react-table-hoc-fixed-columns for react-table Version < 7
If developers use the react-table version < 7, they can also use the react-table-hoc-fixed-columns library. It has an easy use than the react-sticky-table library.
Users need to run the below command in the terminal to install the react-table-hoc-fixed-columns dependency on their current React project.
npm i react-table-hoc-fixed-columns
After that, we need to create a table with the withFixedColumns imported from the react-table-hoc-fixed-columns. Also, users need to add the fixed: position key-value pair to the column group.
const ReactFixedColumnsTable = withFixedColumns(ReactTable);
const columns = [
{
    Header: "Name Info",
   fixed: "Right",
    columns: [
        {
          Header: "First Name",
          accessor: "firstName",
          width: 150,
        },
      ],
    {
    //Other groups of columns
    },
},
]
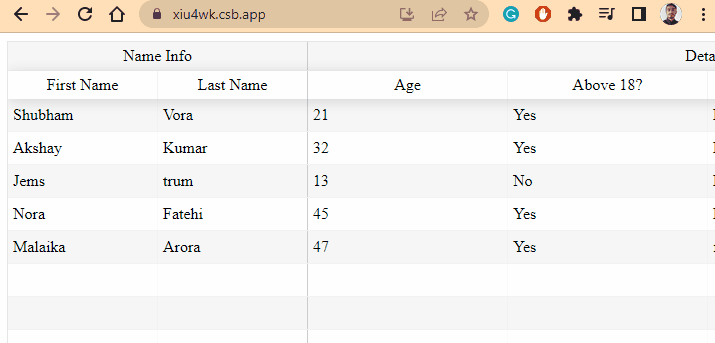
We have created normal data of some people in the example below and used that to create a table with the react-table. Also, we passed the fixed: "left" key-value pair to the first group of columns array to fix the first two columns at left.
Example Code:
// import required libraries
import React from "react";
import { render } from "react-dom";
import ReactTable from "react-table";
import "react-table/react-table.css";
// Import React Table HOC Fixed columns
import withFixedColumns from "react-table-hoc-fixed-columns";
import "react-table-hoc-fixed-columns/lib/styles.css";
const ReactFixedColumnsTable = withFixedColumns(ReactTable);
function App() {
  // Creating the data for the table
  const tableData = [
    {
      firstName: "Shubham",
      lastName: "Vora",
      Age: 21,
      Above18: "Yes",
      Gender: "Male",
      City: "Rajkot",
    },
    {
      firstName: "Akshay",
      lastName: "Kumar",
      Age: 32,
      Above18: "Yes",
      Gender: "Male",
      City: "Ahmedabad",
    },
    {
      firstName: "Jems",
      lastName: "trum",
      Age: 13,
      Above18: "No",
      Gender: "Male",
      City: "Delft",
    },
    {
      firstName: "Nora",
      lastName: "Fatehi",
      Age: 45,
      Above18: "Yes",
      Gender: "Female",
      City: "Mumbai",
    },
    {
      firstName: "Malaika",
      lastName: "Arora",
      Age: 47,
      Above18: "Yes",
      Gender: "female",
      City: "Delhi",
    },
  ];
  const tableColumns = [
    {
      Header: "Name Info",
      // adding fixed property in the object
      fixed: "left",
      columns: [
        {
          Header: "First Name",
          accessor: "firstName",
          width: 150,
        },
        {
          Header: "Last Name",
          accessor: "lastName",
          width: 150,
        },
      ],
    },
    {
      Header: "Details",
      columns: [
        {
          Header: "Age",
          accessor: "Age",
          width: 200,
        },

        {
          Header: "Above 18?",
          accessor: "Above18",
          width: 200,
        },
        {
          Header: "Gender",
          accessor: "Gender",
          width: 200,
        },
        {
          Header: "City",
          accessor: "City",
          width: 200,
        },
      ],
    },
  ];
  return (
    <div>
      {/* calling the table component */}
      <ReactFixedColumnsTable
        data={tableData}
        columns={tableColumns}
        Defa
        className="-striped"
      />
      <br />
    </div>
  );
}
export default App;
Output:
So, there is no default way to make columns fixed or sticky while using the react-table library. Users always need to use other third-party libraries.
Users can use any React library according to the version of the react-table they are using, as discussed above.
If users don’t want to use a third-party library to make columns of tables sticky, they can customize the CSS and achieve the same.