React-Table 고정 컬럼
-
react-table버전 > 7에 대해react-table-sticky사용 -
react-table버전 < 7에react-table-hoc-fixed-columns를 사용하세요.

이 기사에서는 react-table 구성 요소에 대한 고정 열을 만드는 방법을 알려줍니다. 경우에 따라 왼쪽 또는 오른쪽 위치에 고정 열을 만들고 다른 열을 스크롤 가능하게 만들어야 합니다.
이 문서에서는 고정 열을 만드는 두 가지 방법을 설명합니다.
react-table 버전 > 7에 대해 react-table-sticky 사용
react-table 라이브러리 버전 > 7을 사용하는 경우 react-table-sticky 라이브러리를 사용하여 고정 열을 생성해야 합니다. react-table-sticky 종속성을 설치하려면 프로젝트 디렉토리에서 아래 명령을 실행하십시오.
npm i react-table-sticky
스티키 컬럼을 만들려면 아래 그림과 같이 테이블을 생성하는 동안 useSticky를 사용하고 컬럼 데이터를 생성하는 동안 sticky 키를 전달해야 합니다.
// creating a table
const { getTableProps, getTableBodyProps, headerGroups, rows, prepareRow } =
    useTable({columns, data,},useBlockLayout,
	// use useSticky here
      useSticky
    );
// column data
 const columns = [
{
    Header: "City Info",
    sticky: "left",
    columns: [
        {
          Header: "Name",
          accessor: "Name",
          width: 150,
        },
      ],
    {
    //Other groups of columns
    },
},
]
아래 예에서는 여러 도시에 대한 데이터를 생성하고 열과 데이터를 Table 구성 요소의 소품으로 전달했습니다. 또한 City Info 열 그룹에 sticky: left 키-값 쌍을 추가했습니다.
table 구성 요소에서 데이터를 반복하여 데이터를 생성하고 표시했습니다.
예제 코드:
import React from "react";
import styled from "styled-components";
import { useTable, useBlockLayout } from "react-table";
import { useSticky } from "react-table-sticky";
// style for the table
const Styles = styled.div`
  padding: 1rem;

  .table {
    border: 2px dotted #ddd;

    .th,
    .td {
      border-bottom: 1px dotted #ddd;
      padding: 5px;
      background-color: #fff;
      border-right: 1px dotted #ddd;
    }

    &.sticky {
      overflow: scroll;
    }
  }
`;
function Table({ columns, data }) {
  const { getTableProps, getTableBodyProps, headerGroups, rows, prepareRow } =
    useTable(
      {
        columns,
        data,
      },
      useBlockLayout,
      // use useSticky here
      useSticky
    );
  return (
    <Styles>
      {/* setup table header */}
      <div {...getTableProps()} className="table sticky">
        <div className="header">
          {headerGroups.map((hdrGroup) => (
            <div {...hdrGroup.getHeaderGroupProps()} className="tr">
              {hdrGroup.headers.map((clmn) => (
                <div {...clmn.getHeaderProps()} className="th">
                  {clmn.render("Header")}
                </div>
              ))}
            </div>
          ))}
        </div>
        {/*  setup table body */}
        <div {...getTableBodyProps()}>
          {rows.map((singleRow) => {
            prepareRow(singleRow);
            return (
              <div {...singleRow.getRowProps()} className="tr">
                {singleRow.cells.map((singleCell) => {
                  return (
                    <div {...singleCell.getCellProps()} className="td">
                      {singleCell.render("Cell")}
                    </div>
                  );
                })}
              </div>
            );
          })}
        </div>
      </div>
    </Styles>
  );
}
function App() {
  // data of the different cities to show in the table
  const data = [
    {
      Name: "Rajkot",
      population: 3000000,
      isClean: "Yes",
      totalCars: 40000,
      Bikes: 60000,
    },
    {
      Name: "Gondal",
      population: 3400000,
      isClean: "Yes",
      totalCars: 45000,
      Bikes: 40000,
    },
    {
      Name: "Surat",
      population: 45000000,
      isClean: "Yes",
      totalCars: 23000,
      Bikes: 32000,
    },
    {
      Name: "Vadodara",
      population: 560000,
      isClean: "No",
      totalCars: 870000,
      Bikes: 100000,
    },
    {
      Name: "Jetpur",
      population: 20000,
      isClean: "Yes",
      totalCars: 10000,
      Bikes: 30000,
    },
    {
      Name: "Valsad",
      population: 700000,
      isClean: "No",
      totalCars: 8000,
      Bikes: 45000,
    },
  ];
  // table columns
  const columns = [
    {
      Header: "City Info",
      sticky: "left",
      columns: [
        {
          Header: "Name",
          accessor: "Name",
          width: 150,
        },
      ],
    },
    {
      Header: "Details",
      columns: [
        {
          Header: "Population",
          accessor: "population",
          width: 200,
        },

        {
          Header: "Is Clean?",
          accessor: "isClean",
          width: 200,
        },
        {
          Header: "Total Cars",
          accessor: "totalCars",
          width: 200,
        },
        {
          Header: "Total Bikes",
          accessor: "Bikes",
          width: 200,
        },
      ],
    },
  ];
  return <Table columns={columns} data={data} />;
}
export default App;
출력:

위 출력에서 사용자는 브라우저의 크기가 줄어들고 테이블 열이 가로로 스크롤 가능해지면 Name 열이 왼쪽에 고정되고 다른 열은 스크롤 가능하게 되는 것을 볼 수 있습니다.
react-table 버전 < 7에 react-table-hoc-fixed-columns를 사용하세요.
개발자가 react-table 버전 < 7을 사용하는 경우 react-table-hoc-fixed-columns 라이브러리도 사용할 수 있습니다. react-sticky-table 라이브러리보다 사용하기 쉽습니다.
현재 React 프로젝트에 react-table-hoc-fixed-columns 종속성을 설치하려면 터미널에서 아래 명령을 실행해야 합니다.
npm i react-table-hoc-fixed-columns
그런 다음 react-table-hoc-fixed-columns에서 가져온 withFixedColumns로 테이블을 생성해야 합니다. 또한 사용자는 열 그룹에 fixed: position 키-값 쌍을 추가해야 합니다.
const ReactFixedColumnsTable = withFixedColumns(ReactTable);
const columns = [
{
    Header: "Name Info",
   fixed: "Right",
    columns: [
        {
          Header: "First Name",
          accessor: "firstName",
          width: 150,
        },
      ],
    {
    //Other groups of columns
    },
},
]
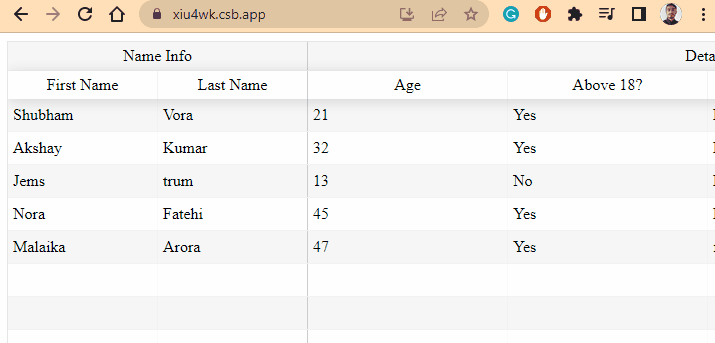
아래 예제에서 일부 사람들의 일반 데이터를 생성하고 이를 사용하여 react-table로 테이블을 생성했습니다. 또한 fixed: "left" 키-값 쌍을 첫 번째 열 그룹 배열에 전달하여 왼쪽의 처음 두 열을 고정했습니다.
예제 코드:
// import required libraries
import React from "react";
import { render } from "react-dom";
import ReactTable from "react-table";
import "react-table/react-table.css";
// Import React Table HOC Fixed columns
import withFixedColumns from "react-table-hoc-fixed-columns";
import "react-table-hoc-fixed-columns/lib/styles.css";
const ReactFixedColumnsTable = withFixedColumns(ReactTable);
function App() {
  // Creating the data for the table
  const tableData = [
    {
      firstName: "Shubham",
      lastName: "Vora",
      Age: 21,
      Above18: "Yes",
      Gender: "Male",
      City: "Rajkot",
    },
    {
      firstName: "Akshay",
      lastName: "Kumar",
      Age: 32,
      Above18: "Yes",
      Gender: "Male",
      City: "Ahmedabad",
    },
    {
      firstName: "Jems",
      lastName: "trum",
      Age: 13,
      Above18: "No",
      Gender: "Male",
      City: "Delft",
    },
    {
      firstName: "Nora",
      lastName: "Fatehi",
      Age: 45,
      Above18: "Yes",
      Gender: "Female",
      City: "Mumbai",
    },
    {
      firstName: "Malaika",
      lastName: "Arora",
      Age: 47,
      Above18: "Yes",
      Gender: "female",
      City: "Delhi",
    },
  ];
  const tableColumns = [
    {
      Header: "Name Info",
      // adding fixed property in the object
      fixed: "left",
      columns: [
        {
          Header: "First Name",
          accessor: "firstName",
          width: 150,
        },
        {
          Header: "Last Name",
          accessor: "lastName",
          width: 150,
        },
      ],
    },
    {
      Header: "Details",
      columns: [
        {
          Header: "Age",
          accessor: "Age",
          width: 200,
        },

        {
          Header: "Above 18?",
          accessor: "Above18",
          width: 200,
        },
        {
          Header: "Gender",
          accessor: "Gender",
          width: 200,
        },
        {
          Header: "City",
          accessor: "City",
          width: 200,
        },
      ],
    },
  ];
  return (
    <div>
      {/* calling the table component */}
      <ReactFixedColumnsTable
        data={tableData}
        columns={tableColumns}
        Defa
        className="-striped"
      />
      <br />
    </div>
  );
}
export default App;
출력:
따라서 react-table 라이브러리를 사용하는 동안 열을 고정하거나 고정시키는 기본 방법은 없습니다. 사용자는 항상 다른 타사 라이브러리를 사용해야 합니다.
사용자는 위에서 설명한 대로 사용 중인 react-table의 버전에 따라 모든 React 라이브러리를 사용할 수 있습니다.
사용자가 타사 라이브러리를 사용하여 테이블 열을 고정하지 않으려면 CSS를 사용자 지정하여 동일한 결과를 얻을 수 있습니다.