How to Make React Component/Div Draggable
-
Make React Component/Div Draggable With
onMouse - Make React Component/Div Draggable Using the React-Draggable Dependency
- Make React Component/Div Draggable With Beautiful DnD
- Conclusion

It is now fun to be a website builder or perhaps pick website building as a hobby. You can build a website simply by using your mouse to pick the contents and arrange them, like a jigsaw puzzle.
When we create contents or apps that enable users to drag and drop items easily, it makes the app easy to use, even for novices, which could lead to wide acceptance of the app in the market.
When we build apps or games in React, the ability to drag and drop contents makes it easy and fast to complete these tasks, even the more complex ones.
Let us look at examples that will help us learn how to make a component draggable.
Make React Component/Div Draggable With onMouse
The React draggable feature utilizes tons of event listeners, but this example will utilize three: onMouseDown, onMouseMove, and onMouseUp.
We start by creating a new React project. We open our terminal in VS Code and type in npx create-react-app dragone.
Then we navigate to the dragone folder and create two folders. The first folder will be named Main, and inside it, we will create the MainApp.js and MainApp.css files.
These files will contain the codes for the homepage.
The second folder will be named Components, and inside it will be two files, Dialog.js and Dialog.css. These will be the component we want to drag across our browser screen.
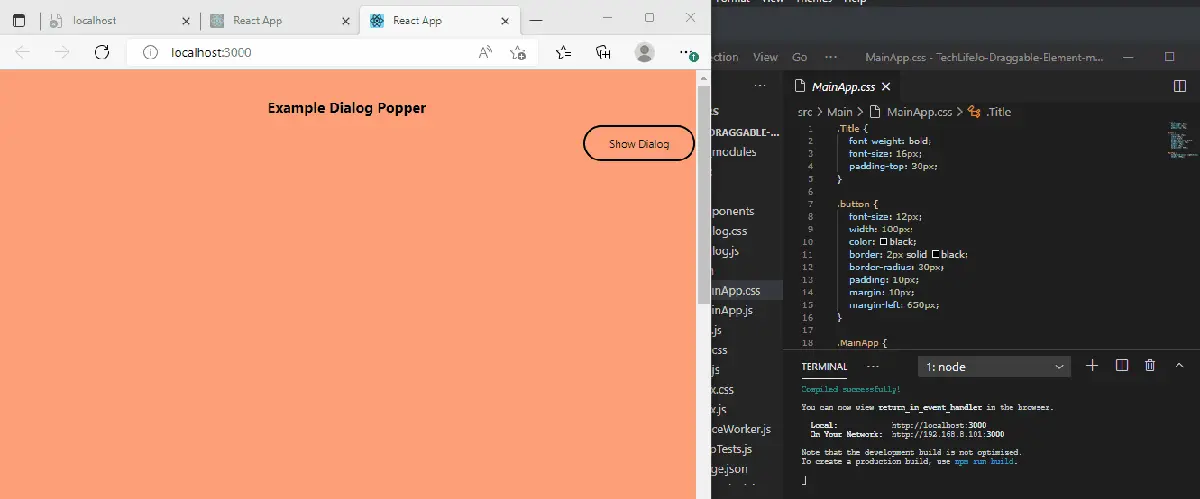
Inside the MainApp.js, we will input these codes:
Code Snippet (MainApp.js):
import React, { Component } from 'react';
import './MainApp.css';
import Dialog from '../Components/Dialog';


export default class MainApp extends Component {
    constructor(props) {
        super(props);

        this.state = {
            showDialog: false
        }
    }

    _showDialog() {
        this.setState({showDialog: !this.state.showDialog});
    }

    render() {

        return (
            <div className='MainApp'>
                <div className='Title'>Example Dialog Popper</div>
                <div className='button' onClick={this._showDialog.bind(this)}> Show Dialog </div>
                <Dialog onClose={this._showDialog.bind(this)} show={this.state.showDialog}/>
            </div>
        );
    }
}
On this page, once the Show Dialog button is clicked, the onClick event listener is activated, and it pops up the component that we wish to drag.
The MainApp.css contains the stylings that beautify the page:
Code Snippet (MainApp.css):
.Title {
    font-weight: bold;
    font-size: 16px;
    padding-top: 30px;
}

.button {
    font-size: 12px;
    width: 100px;
    color: black;
    border: 2px solid black;
    border-radius: 30px;
    padding: 10px;
    margin: 10px;
    margin-left: 650px;
}

.MainApp {
    background-color: lightsalmon;
    height: 1000px;
}
We move to the best part of this example, where we create the draggable component. We head into the Dialog.js, and we do some coding:
Code Snippet (Dialog.js):
import React, { Component } from 'react';
import './Dialog.css';

export default class Dialog extends Component {
    constructor(props) {
        super(props);

        this.state = {
            diffX: 0,
            diffY: 0,
            dragging: false,
            styles: {}
        }

        this._dragStart = this._dragStart.bind(this);
        this._dragging = this._dragging.bind(this);
        this._dragEnd = this._dragEnd.bind(this);
    }

    _dragStart(e) {
        this.setState({
            diffX: e.screenX - e.currentTarget.getBoundingClientRect().left,
            diffY: e.screenY - e.currentTarget.getBoundingClientRect().top,
            dragging: true
        });
    }

    _dragging(e) {

        if(this.state.dragging) {
            var left = e.screenX - this.state.diffX;
            var top = e.screenY - this.state.diffY;

            this.setState({
                styles: {
                    left: left,
                    top: top
                }
            });
        }
    }

    _dragEnd() {
        this.setState({
            dragging: false
        });
    }

    render() {
        var classes = this.props.show ? 'Dialog' : 'Dialog hidden';
        return (
            <div className={classes} style={this.state.styles} onMouseDown={this._dragStart} onMouseMove={this._dragging} onMouseUp={this._dragEnd}>
                <div className='DialogTitle'>My Dialog</div>
                <div className='Contents'>
                    Contents of the Dialog:
                        - one
                        - two
                        - three
                </div>
                <div className='closeButton' onClick={this.props.onClose}>
                    Close
                </div>
            </div>
        );
    }
}
We define the states we want the component to be in every situation. At the default state, the component isn’t moving anywhere, and we set the dragging to false.
Then we bind the three states that the components will be in, i.e., dragStart, dragging, and dragEnd, and assign each to the onMouse event listeners that fit. The onMouseDown activates once the mouse is placed on the component, then the function assigned to _dragStart gets to work.
The onMouseMove indicates the component is being dragged, which activates the function assigned to _dragging.
Lastly, onMouseUp indicates that the mouse is no more placed on the component. This activates the function tied to _dragEnd.
The Dialog.css is where the code for styling the draggable component is done:
Code Snippet (Dialog.css):
.Dialog {
    width: 400px;
    height: 400px;
    background-color: lightblue;
    border-radius: 10px;
    border: 3px solid grey;
    position: absolute;
    cursor: move;
    top: 150px;
    left: 520px;
}

.hidden {
    display: none;
}

.DialogTitle {
    font-weight: bold;
    padding-top: 10px;
    padding-bottom: 10px;
    border-bottom: 3px solid grey;
}

.Contents {
    padding-top: 50px;
    padding-bottom: 200px;
}

.closeButton {
    font-size: 12px;
    width: 100px;
    color: black;
    border: 2px solid black;
    border-radius: 25px;
    padding: 10px;
    margin: 10px;
    margin-left: 140px;
    cursor: pointer;
}
Then we import MainApp into the App.js like so:
Code Snippet (App.js):
import React from 'react';
import './App.css';
import MainApp from './Main/MainApp.js';

function App() {
  return (
    <div className="App">
      <MainApp />
    </div>
  );
}

export default App;
Output:
Make React Component/Div Draggable Using the React-Draggable Dependency
We can also make a component draggable by utilizing react’s dependency. After we have created the new project with npx create-react-app dragtwo.
We navigate to the dragtwo folder to install the dependency. In our terminal, we type in npm install react-draggable.
Then we will go to the App.js to do a little bit of coding:
Code Snippet (App.js):
import logo from './logo.svg';
import './App.css';
import Draggable from "react-draggable";

function App() {
  return (
    <Draggable>
      <img
      src="https://images.pexels.com/photos/20787/pexels-photo.jpg?auto=compress&cs=tinysrgb&h=350"
      alt="new"
      />
    </Draggable>
  );
}

export default App;
Output:
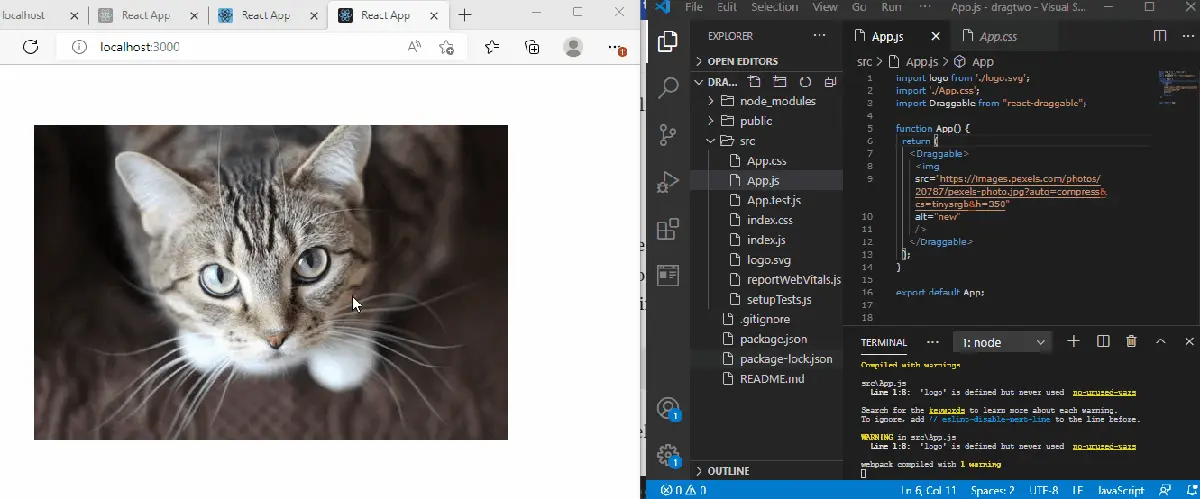
First, we import Draggable from react-draggable. Then we create the component that will be draggable.
We then wrap this component inside the <Draggable></Draggable> tag.
Make React Component/Div Draggable With Beautiful DnD
React’s Beautiful DnD dependency is another straightforward and easy-to-use library that can be utilized to make components draggable.
To boot, we first create our react component, then we navigate to the project folder to install the dependency with: install react-beautiful-dnd --save.
Next, we open the App.js file and type in these codes:
Code Snippet (App.js):
import React, { useState } from 'react';
import { DragDropContext, Droppable, Draggable } from 'react-beautiful-dnd';
import './App.css';

const finalSpaceCharacters = [
  {
    id: 'james',
    name: 'James',
  },
  {
    id: 'john',
    name: 'John',
  },
  {
    id: 'israel',
    name: 'Israel',
  },
  {
    id: 'joker',
    name: 'Joker',
  },
  {
    id: 'quinn',
    name: 'Quinn',
  }
]

function App() {
  const [characters, updateCharacters] = useState(finalSpaceCharacters);

  function handleOnDragEnd(result) {
    if (!result.destination) return;

    const items = Array.from(characters);
    const [reorderedItem] = items.splice(result.source.index, 1);
    items.splice(result.destination.index, 0, reorderedItem);

    updateCharacters(items);
  }

  return (
    <div className="App">
      <header className="App-header">
        <h1>Final Space Characters</h1>
        <DragDropContext onDragEnd={handleOnDragEnd}>
          <Droppable droppableId="characters">
            {(provided) => (
              <ul className="characters" {...provided.droppableProps} ref={provided.innerRef}>
                {characters.map(({ id, name }, index) => {
                  return (
                    <Draggable key={id} draggableId={id} index={index}>
                      {(provided) => (
                        <li ref={provided.innerRef} {...provided.draggableProps} {...provided.dragHandleProps}>

                          <p>
                            {name}
                          </p>
                        </li>
                      )}
                    </Draggable>
                  );
                })}
                {provided.placeholder}
              </ul>
            )}
          </Droppable>
        </DragDropContext>
      </header>
    </div>
  );
}

export default App;
Output:
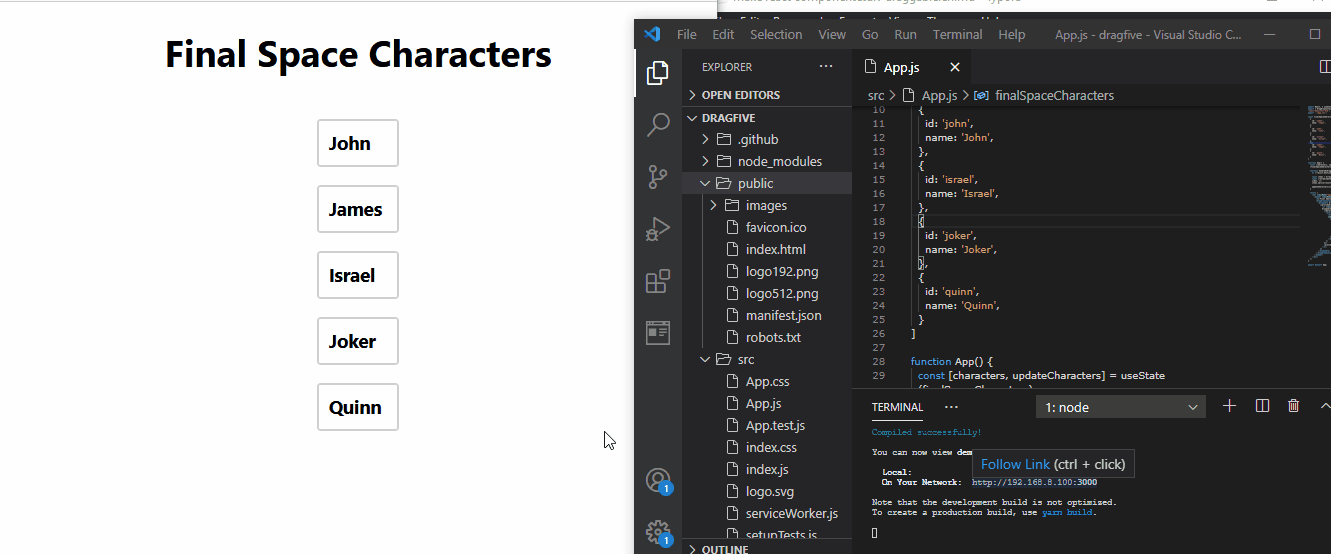
To boot, we first create an array of names that we need to drag and reorder. Then we utilize the splice method, such that once we take an item out of its position, it is automatically replaced by the next item.
Next, we create the functions to handle the dragging and dropping of items. After creating the functions for dragging the components, we wrap all these functions inside the <Draggable></Draggable> tags.
We create the function for dropping items, and we wrap it, including the functions in the draggable tag inside the <Droppable></Droppable>, then we wrap all of these inside the <DragDropContext></DragDropContext> tag.
Conclusion
The flexibility of React makes almost every project possible and straightforward to create. The React drag functionality is useful for creating games and easy-to-use apps for users.

Fisayo is a tech expert and enthusiast who loves to solve problems, seek new challenges and aim to spread the knowledge of what she has learned across the globe.
LinkedIn