How to Set Font Weight in React Native
In this article, we will learn to use different fonts with different font weights in React Native.
Font Weight in React Native
The font-weight property may show some problems in the React Native application, so we will use additional font files to replicate the same in the React Native application. To add custom fonts in React Native, we need to download the font files, for example, .ttf files.
After downloading the font files, we need to perform specific steps to use them in our React Native app.
In this article demo, we use the OpenSans font with three variants to show different font-weight, which are OpenSans Regular, OpenSans Bold, and OpenSans Italic.
The steps to add different fonts for different font weights are given below:
-
There are many websites available to download font files. Users can follow the Google fonts website to download the desired fonts.
-
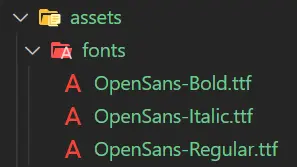
Add the fonts in the
fontsfolder of theassetsdirectory of the React Native project. If you don’t have afontsfolder in theassets, create a folder namedfonts, and tmove the downloaded fonts in thefontsfolder.The above image shows the folder structure that should look like after moving all font files to the
assets/fontsfolder. -
Create a new file named
react-native.config.jsin your React Native project. If your project already has this file, you don’t need to create it again; you can use the previously created one. -
Add the following code to this file.
module.exports = { project: { ios: {}, android: {}, }, assets: ["./assets/fonts/"], }; -
To link the
assetsto the React Native project, perform the following commands in the terminal.For React Native version >= 0.69:
npx react-native-assetFor React Native version < 0.69:
npx react-native link -
The
useFontshooks initialize the fonts so we can use them in our project. Firstly, we must import theseuseFontshooks from theexpo-font, which takes an object in the parameter, and the object’s key defines the font family name, which will be used in the project to set the font. -
The object’s value is called the
requirefunction that binds the downloaded font file to the object key. We can apply theuseFontshooks using the syntax given below:// using useFonts hooks const [loaded] = useFonts({ OpenSansRegular: require('./assets/fonts/OpenSans-Regular.ttf'), OpenSansBold: require('./assets/fonts/OpenSans-Bold.ttf'), OpenSansItalic: require('./assets/fonts/OpenSans-Italic.ttf'), });
Use Different Fonts in the React Native Project
It is the final step to use the different fonts for different font weights. In the App.js file of our React Native project, we will write the code to use the useFonts hooks.
In the below example, firstly, we imported the required components for our React Native project, and those are StyleSheet to set up the style of our React Native project, Text to write content text, View to set up the project view, useFonts to set the fonts.
The useFonts hook is set up by the previously discussed method. Then, we mentioned some styling for the View component using StyleSheet.
Finally, in the Text components, we set the fontFamily style using the style attribute and give the values from the useFont hook.
import { StyleSheet, Text, View } from 'react-native';
import { useFonts } from 'expo-font';
export default function App(){
    // load fonts
    const [loaded] = useFonts({
        OpenSansRegular: require('./assets/fonts/OpenSans-Regular.ttf'),
        OpenSansBold: require('./assets/fonts/OpenSans-Bold.ttf'),
        OpenSansItalic: require('./assets/fonts/OpenSans-Italic.ttf'),
    });
    if (!loaded) {
        return null;
    }
	// show texts with different fonts
    return (
        <View style={styles.container}>
            <Text style={{ fontFamily: 'OpenSansRegular', fontSize: 30 }}>OpenSans Regular</Text>
            <Text style={{ fontFamily: 'OpenSansBold', fontSize: 30 }}>OpenSans Bold</Text>
            <Text style={{ fontFamily: 'OpenSansItalic', fontSize: 30 }}>OpenSans Italic</Text>
        </View>
    );
}
// style for the component
const styles = StyleSheet.create({
  container: {
    flex: 1,
    width: '100%',
    backgroundColor: '#fff',
    alignItems: 'center',
    justifyContent: 'center',
  },
});
Output:
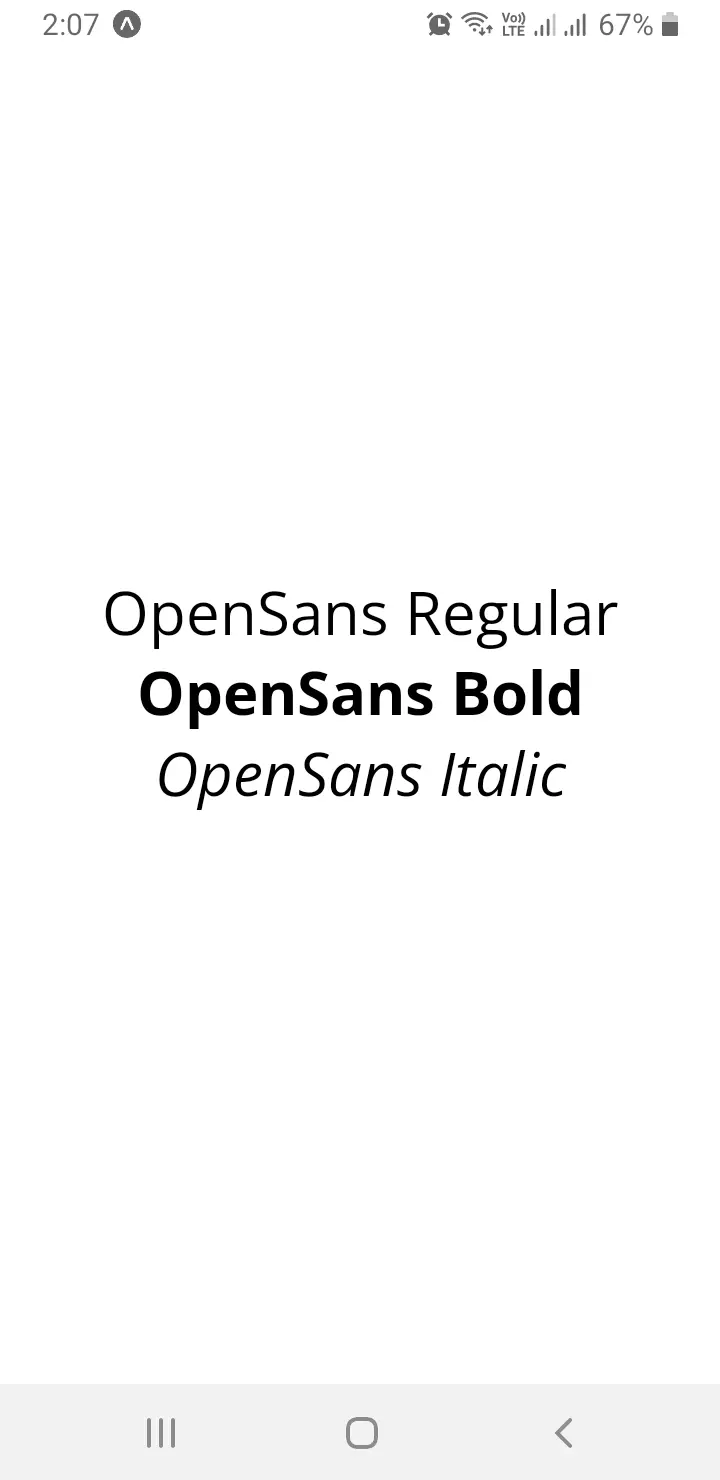
In the above output, users can see three kinds of font weights of the same font.
This article taught us to use different fonts for different font weights. It is very easy, but users must follow the step-by-step process. Users can follow the example to understand the process better.