How to Set User Agent Using Requests in Python
- Understand How HTTP Header Works
- Get User Agent Data in Python
- Set User Agent Value Using Requests in Python

This article explains the topic of HTTP header user agents and how to set the user agent using requests in Python. You will learn about HTTP headers and their significance in understanding user agents, getting user agents, and learning multiple ways to set user agents using requests in Python.
Understand How HTTP Header Works
Every HTTP request and response includes a series of strings called HTTP header fields sent and received by both the client application and the server. HTTP headers allow transmitting extra information to a server and let the server send back that information.
Working with headers enables things like authenticating yourself when using APIs or conveying the request on what kind of information the application expects.
Let’s look at some examples of HTTP headers:
-
Cache-Control: TheCache-Controlgeneral-header field expresses instructions that ALL caching systems MUST follow. TheCache-Controlgeneral-header can be used by an HTTP client or server to define cache parameters or to make specific cache requests for particular types of documents.A list of caching directives separated by commas is provided. For instance:
Cache - Control: cache - request - directive | cache - response - directive # OR Cache - control: no - cache -
Date: Without exception, every HTTP date/time stamp should always be expressed in Greenwich Mean Time (GMT). Any one of the following three date/time stamp representations may be used by HTTP applications:Sat, 22 Sep 2022 20:22:37 GMT ; RFC 822, updated by RFC 1123 Saturday, 22-Sep-22 20:23:37 GMT ; RFC 850, obsoleted by RFC 1036 Sat Sep 22 20:24:37 2022 ; ANSI C's asctime() format -
User Agent: It returns information like the browser version and the system OS of the computer from which the request is sent. This is the header that will be specifically focused on in this article, explaining how to set user-agent usingrequests.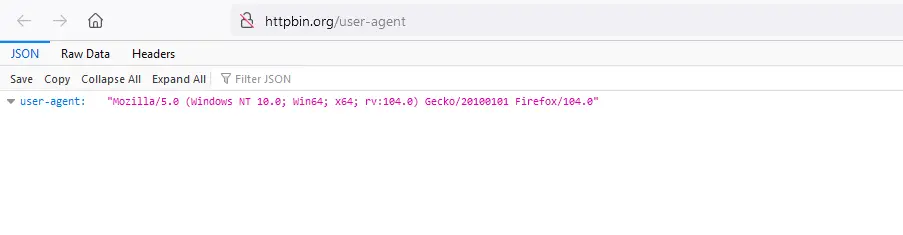
The case of these headers is irrelevant since these headers are case insensitive, so the phrase User-Agent might alternatively be written as user-agent.
Let’s look at an example of how to print headers from an URL. This program sends requests to the targeted URL, fetches all the headers from it, and then prints them.
import requests

url = "http://www.tutorialspoint.com/python"

headers = requests.get(url).headers
print(headers)
The first line of the code imports the Python library package requests. An object variable url is created that stores the URL of the website to which the request should be sent.
Inside the variable headers, the request.get() function is used to fetch headers from the url and then saved inside the variable. Lastly, the variable headers is printed.
This prints the entire dictionary of headers from the given URL.
Output:
C:\python38\python.exe "C:/Users/Win 10/main.py"
{'Content-Encoding': 'gzip', 'Age': '1490828', 'Cache-Control': 'max-age=2592000', 'Content-Type': 'text/html; charset=UTF-8', 'Date': 'Sat, 24 Sep 2022 17:50:06 GMT', 'Expires': 'Mon, 24 Oct 2022 17:50:06 GMT', 'Last-Modified': 'Wed, 07 Sep 2022 11:42:58 GMT', 'Server': 'ECAcc (tir/CD76)', 'Strict-Transport-Security': 'max-age=63072000; includeSubdomains', 'Vary': 'Accept-Encoding', 'X-Cache': 'HIT', 'X-Content-Type-Options': 'nosniff', 'X-Frame-Options': 'SAMEORIGIN', 'X-Version': 'June-1 V2', 'X-XSS-Protection': '1; mode=block', 'Content-Length': '9299'}

Process finished with exit code 0
Get User Agent Data in Python
We have seen how to get an entire dictionary of headers using Python. Before learning how to set the user-agent using requests, it is important to understand this section.
This section explains an important juncture that specifically calls the user-agent among all the headers from the URL and displays it.
As the user agent returns data of the browser and the system os, it heavily depends on what method is used to access the website. For example, the website http://httpbin.org/user-agent returns specific user agent data when accessed with different browsers.
When Firefox is used to access this URL, the user agent is set as:
When Google Chrome is used, the user agent changes as per it:

But when a Python script that uses the requests function is executed to get the user-agent, the URL returns the version of the request.
Here in the program below, the requests function is used to fetch user agent data that shows different results than what was seen with browsers:
import requests

r = requests.get("http://httpbin.org/user-agent")

data = r.json()
print(data["user-agent"])
The URL returns the requested version of the Python script used.
Output:
C:\python38\python.exe "C:/Users/Win 10/main.py"
python-requests/2.28.1

Process finished with exit code 0
Set User Agent Value Using Requests in Python
This section will explain how to add custom headers and set the user-agent using requests in Python. This section presents four different methods to set user-agent using requests.
Set User Agent Requests in Python for Requests Version 2.12
If the system runs a python version that runs a version of requests 2.12 or older, then this method should be followed:
The first program shows how to get default headers and then update it specifically to set user-agent using requests.
Import the requests library package and sets the URL in an object variable. In the variable headers, store the copy of the default headers which the library package requests will use.
Replace the default headers with the custom one intended. Because requests’ source code has a unique CaseInsensitiveDict implementation for default headers, the dictionary turns case-insensitive.
Create a variable response that targets the URL with a get request and fetches the response state of the URL. If the URL is active and running, it returns the code - 200, which gets printed.
Because a custom header is set for the user-agent, the data inside the response must be converted into JSON so that headers like the user agent can be accessed specifically.
The JSON data of variable response is stored inside variable data. The program searches for a user-agent from the data, and the newly set user-agent using requests gets printed.
import requests

url = "http://httpbin.org/user-agent"

headers = requests.utils.default_headers()
headers.update(
    {
        "User-Agent": "My User Agent 1.0",
    }
)

response = requests.get(url, headers=headers)
print(response)

data = response.json()
print(data["user-agent"])
Output:
C:\python38\python.exe "C:/Users/Win 10/main.py"
<Response [200]>
My User Agent 1.0

Process finished with exit code 0
Set User Agent Requests in Python for Requests Versions 2.13
The newer version of requests allows updating headers directly by creating a dictionary. In this example, the program sets two headers - user-agent and from.
Both are valid HTTP headers that get updated.
The value of request.get() is saved inside the variable response, similar to the last program. To check if the HTTP header user-agent is updated properly, the function default_user_agent() is used; this function fetches the default user-agent value from the URL.
Inside the variable previous-agent, the default user-agent is saved using the requests function. Using the syntax previous_agent = requests.utils.default_user_agent(), the value gets printed.
The headers that we sent is accessed by the function response.request.headers, so the new updated user-agent header is saved inside the variable updated_agent using the syntax updated_agent = response.request.headers['user-agent'], and then it is printed.
A new variable, all_headers, is created to check all headers, including the updated ones. It again uses the response.request.headers function to store the headers using requests.
import requests

url = "https://httpbin.org/get"

headers = {"User-Agent": "My User Agent 1.0", "From": "youremail@domain.example"}

response = requests.get(url, headers=headers)
print(response)

previous_agent = requests.utils.default_user_agent()
print("Default user-agent header = ", previous_agent)

updated_agent = response.request.headers["user-agent"]
print("Updated user-agent header = ", updated_agent)

all_headers = response.request.headers
print(all_headers)
Output:
C:\python38\python.exe "C:/Users/Win 10/main.py"
<Response [200]>
Default user-agent header =  python-requests/2.28.1
Updated user-agent header =  My User Agent 1.0
{'User-Agent': 'My User Agent 1.0', 'Accept-Encoding': 'gzip, deflate', 'Accept': '*/*', 'Connection': 'keep-alive', 'From': 'youremail@domain.example'}

Process finished with exit code 0
Another method to set user-agent using requests is to send the requests like a browser. In the below example, inside the header variable, the user-agent field is updated with a browser type of data.
import requests

url = "http://httpbin.org/user-agent"
headers = {
    "User-Agent": 'user-agent": "Mozilla/5.0 (Windows NT 10.0; Win64; x64) AppleWebKit/537.36 (KHTML, '
    "like Gecko) Chrome/105.0.0.0 Safari/537.36"
}

response = requests.get(url.strip(), headers=headers, timeout=10)

previous_agent = requests.utils.default_user_agent()
print("Default user-agent header = ", previous_agent)

updated_agent = response.request.headers["user-agent"]
print("Updated user-agent header = ", updated_agent)
Output:
C:\python38\python.exe "C:/Users/Win 10/main.py"
Default user-agent header =  python-requests/2.28.1
Updated user-agent header =  user-agent": "Mozilla/5.0 (Windows NT 10.0; Win64; x64) AppleWebKit/537.36 (KHTML, like Gecko) Chrome/105.0.0.0 Safari/537.36

Process finished with exit code 0
Another simple method to set user-agent using requests is to use the module session, which removes the need to set headers repeatedly.
An object variable session uses the function requests.Session() to load the URL session. It is similar to the get requests that earlier programs used.
The new user-agent header is updated via the session.headers.update() function.
Then, the session.get() function loads the header info from the URL. Lastly, the session.headers['user-agent']) syntax is printed to get the updated info of the set user-agent using requests.
import requests

session = requests.Session()
session.headers.update({"User-Agent": "Custom user agent"})

session.get("https://httpbin.org/headers")

print(session.headers["user-agent"])
After the program sets the user-agent using requests and session, it prints the updated header loaded inside the session.
Output:
C:\python38\python.exe "C:/Users/Win 10/main.py"
Custom user agent

Process finished with exit code 0
This article has thoroughly explained how to set user-agent using requests and how to get them. The reader can easily set user-agent using requests in Python after going through the article.