How to Downgrade Python 3.9 to 3.8
-
Downgrade Python 3.9 to 3.8 With the
virtualenvModule - Downgrade Python 3.9 to 3.8 With Anaconda
- Downgrade Python 3.9 to 3.8 With the Control Panel
-
Downgrade Python Version 3.9 to 3.8 With
pyenv - Downgrading Python Version 3.9 to 3.8 With Manual Installation
- Conclusion

Managing Python versions is a crucial aspect of development, ensuring compatibility and adherence to specific project requirements. At times, the need to downgrade from Python 3.9 to Python 3.8 arises due to compatibility issues or project constraints.
In this post, we’ll explore several effective methods to downgrade Python, providing step-by-step instructions and example codes for each approach.
From utilizing powerful tools like pyenv to creating isolated environments with virtual environments, manually installing Python 3.8, and leveraging package managers, this guide covers a range of techniques. Each method offers a distinct way to transition from Python 3.9 to 3.8, accommodating diverse preferences and system configurations.
Downgrade Python 3.9 to 3.8 With the virtualenv Module
virtualenv is a Python module that facilitates the creation of isolated Python environments. These environments allow you to install specific versions of Python, libraries, and packages without affecting the system-wide Python installation.
This isolation ensures project-specific dependencies are met, making it an ideal tool for downgrading Python versions.
The virtualenv method is used to create and manage different virtual environments for Python on a device; this helps resolve dependency issues, version issues, and permission issues among various projects.
Suppose we are dealing with a project that requires a different version of Python to run. In that case, we can use the virtualenv module to create a new virtual environment for that specific project and install the required version of Python inside that virtual environment.
To create a virtual environment, we first have to install the virtualenv module. The following command installs this module:
pip install virtualenv
Now, we can create our virtual environment using the virtualenv module. The command to create a new virtual environment is given below.
virtualenv \path\to\env -p \path\to\python_install.exe
Here, \path\to\env is the path of the virtual environment, and \path\to\python_install.exe is the path where the required version of Python is already installed. For this command to work, we have to install the required version of Python on our device first.
Upon installation, you just have to activate our virtual environment. You can do so by executing the following command:
\path\to\env\Scripts\activate.bat
Here, \path\to\env is the path of the virtual environment.
Downgrade Python 3.9 to 3.8 With Anaconda
We can also use Anaconda, just like virtualenv, to downgrade a Python version. First, you need to install Anaconda on your device.
After the installation, we can create a new virtual environment for our project using the conda package manager. The command to create a virtual environment with conda is given below:
conda create -n downgrade python=3.8 anaconda
This command creates a new virtual environment called downgrade for our project with Python 3.8. The next step is activating our virtual environment.
The command to start a virtual environment using conda is given below.
activate downgrade
The command above activates the downgrade virtual environment. Now, we can install all the packages required for our special project.
This approach is very similar to the virtualenv method. However, the conda method is simpler and easier to use than the previous approach.
We don’t even need to install another Python version manually; the conda package manager automatically installs it for us.
Downgrade Python 3.9 to 3.8 With the Control Panel
This method only works for devices running the Windows Operating System. This approach involves manually uninstalling the previously existing Python version and then reinstalling the required version.
We can uninstall Python by doing these steps: Go to Control Panel -> Uninstall a program -> Search for Python -> Right click on the result -> Select Uninstall.
Now that the previous version of Python is uninstalled from your device, you can install your desired software version by going to the official Python download page.
This approach is the least preferred one among the ones discussed in this tutorial. It’s because this approach only works for Windows and should only be used when we don’t need the previous version of Python anymore.
The best approach for downgrading Python or using a different Python version, aside from the one already installed on your device, is using Anaconda. The commands for using Anaconda are very simple, and it automates most of the processes for us.
Downgrade Python Version 3.9 to 3.8 With pyenv
pyenv stands as a versatile tool for managing multiple Python versions concurrently on a single system. It offers the flexibility to install, manage, and switch between various Python versions effortlessly.
Prerequisites
Before beginning the downgrade process, ensure the following prerequisites are met:
-
Installation of
pyenv: If you haven’t installedpyenvyet, execute the appropriate installation command for your system. For instance, on macOS using Homebrew:brew install pyenvOr using bash:
curl https://pyenv.run | bash
- Installation of Required Dependencies: Depending on your operating system, additional dependencies might be necessary. Refer to the
pyenvdocumentation for detailed instructions.
Check Available Python Versions
To view the list of available Python versions, use the following command:
pyenv install --list
This command displays a comprehensive list of Python versions available for installation via pyenv.
Install Python 3.8
Choose the desired Python 3.8 version from the list and install it using pyenv:
pyenv install 3.8.x
Replace 3.8.x with the specific version number you wish to install (e.g., 3.8.12). pyenv handles the download, compilation, and installation process seamlessly.
Set Global Python Version
Once Python 3.8 is installed, set it as the global default version using:
pyenv global 3.8.x
This command ensures that Python 3.8 is the default version used across the system.
Verify the Installation
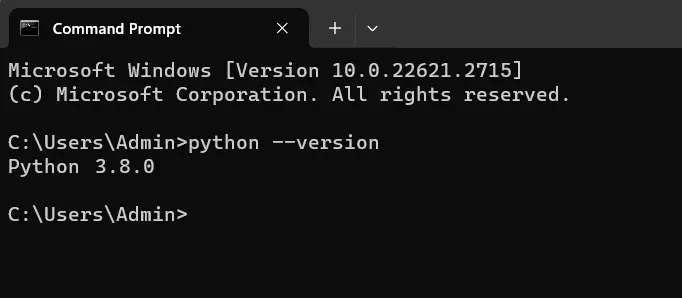
To confirm the successful installation and version switch, execute the following:
python --version
This command should display the Python version set as the global default, confirming the downgrade to Python 3.8.
Downgrading Python Version 3.9 to 3.8 With Manual Installation
Download Python 3.8 Installer
- Access the Python Website: Visit the official Python website at python.org.
- Navigate to Python 3.8 Downloads: Find the section for Python 3.8 downloads. It’s essential to download the correct installer based on your operating system and architecture (32-bit or 64-bit).
- Select the Installer: Choose the installer suitable for your system. For Windows, the installer usually ends with
.exe, and for Unix-based systems, it might be a.tar.gzfile.
Run the Installer
For Windows:
- Launch the Installer: Double-click the downloaded
.exefile to initiate the installation process. - Follow Installation Steps: Follow the prompts provided by the Python installer. It’s advisable to select the option to
Add Python 3.8 to PATHduring installation.
For Unix-based Systems:
-
Extract the Downloaded File: Use a terminal to navigate to the directory containing the downloaded
.tar.gzfile. Extract the contents using the following command:tar -xzf Python-3.8.x.tar.gzReplace
Python-3.8.x.tar.gzwith the actual filename. -
Run Configuration and Installation Commands:
cd Python-3.8.x
./configure
make
sudo make install
These commands configure, compile, and install Python 3.8 respectively. Adjust permissions or use
sudoas required for installation.
Verify Python 3.8 Installation
After the installation completes, it’s crucial to verify that Python 3.8 is installed and set as the default version.
Verification Steps:
-
Open a Terminal/Command Prompt: Launch a new terminal or command prompt window.
-
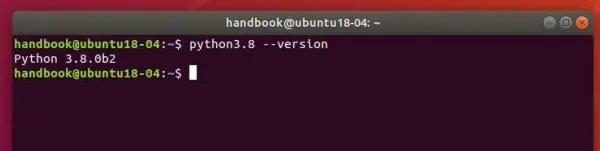
Check Python Version:
python3.8 --versionThis command should display the installed Python 3.8 version.
Conclusion
This post explored various methods to downgrade from Python 3.9 to 3.8, catering to different preferences and system configurations.
virtualenv: Allows isolated Python environments for specific versions, ensuring project-specific dependencies.conda: Simplifies version management by automating the creation of virtual environments with specific Python versions.- Control Panel Approach: Manually uninstalling and reinstalling Python, primarily for Windows, but less preferred due to lack of automation.
pyenv: Stands out as a powerful Python version manager, enabling seamless installation, management, and switching between Python versions. Detailed steps included prerequisites, installation, setting the global version, and verification.
Each method offers distinct advantages, catering to diverse project requirements. Choosing the most suitable approach streamlines the downgrade process, ensuring compatibility and smooth transition while adapting to evolving needs.
Another post to downgrade the Python version (3.11 to 3.10) is in this link.

Maisam is a highly skilled and motivated Data Scientist. He has over 4 years of experience with Python programming language. He loves solving complex problems and sharing his results on the internet.
LinkedIn