How to Fix the Error: Failed to Create the Java Virtual Machine

In this article, let’s see the Failed to create the Java Virtual Machine error in Eclipse IDE and how we can resolve it.
This error message typically occurs when Eclipse cannot launch because it cannot create a Java Virtual Machine (JVM), and this sort of error message happens when the installer does not find our JRE or JDK.
Fix the Failed to create the Java Virtual Machine Error in Java
This can be caused by several factors, including:
-
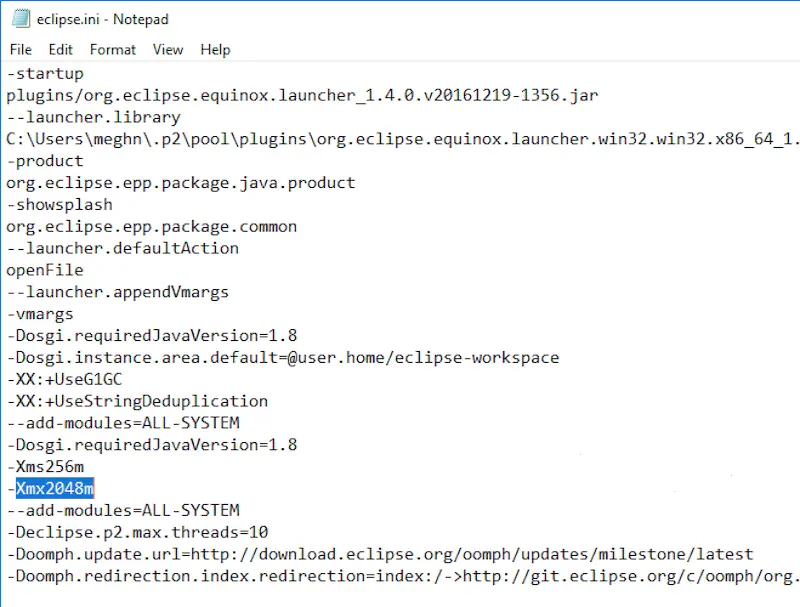
Insufficient memory allocated to Eclipse
Try increasing the amount of memory allocated to Eclipse in the
eclipse.inifile.
-
Conflicting Java versions
Make sure that the version of Java that Eclipse is using is compatible with your operating system and computer.
-
Corrupted JVM
Reinstall the version of Java that Eclipse is using.
-
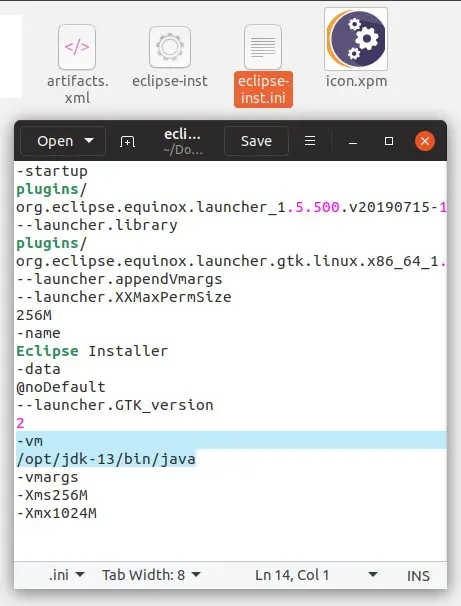
Pointing to the wrong JDK bin path
This is the most common reason for the error to come up. By default, the Eclipse installer searches for JRE or JDK installation in a path relative to where the installation is being run.
To fix this default behavior, the
-vmflag is added to theeclipse-inst.inifile and points to the Java utility’s location in the JDK installer’s/binfolder.
Trying the above steps one by one may help resolve the issue.
Related Article - Java Error
- How to Fix the Missing Server JVM Error in Java
- How to Fix the 'No Java Virtual Machine Was Found' Error in Eclipse
- How to Fix Javax.Net.SSL.SSLHandShakeException: Remote Host Closed Connection During Handshake
- How to Fix the Error: Failed to Create the Java Virtual Machine
- How to Fix Java.Lang.VerifyError: Bad Type on Operand Stack
