How to Add Space Between Buttons in HTML
- Purpose of HTML Buttons
- Exploring Ways to Add Space Between Buttons in HTML
- Methods to Add Space Between Buttons
- Best Practices of Adding Spaces Between Buttons
- Conclusion
The article comprehensively addresses the HTML button element, examining methods and best practices for adding space between buttons through various CSS techniques and strategic HTML structuring.
Purpose of HTML Buttons
HTML buttons serve the purpose of enabling user interaction on webpages. By using the <button> element, developers can create clickable elements that trigger actions, such as form submissions or JavaScript functions.
Buttons are essential HTML elements for user engagement, providing a visual cue for actions users can take. Developers can style and arrange buttons using CSS properties like margin and text-align to enhance their appearance and layout.
Proper spacing and alignment (e.g. right-align, left-align, etc.) contribute to a well-designed interface, ensuring a seamless and user-friendly experience. Buttons are a fundamental component, allowing websites to incorporate interactive features and improve overall usability.
Exploring Ways to Add Space Between Buttons in HTML
Exploring ways to add space between buttons in HTML is vital for achieving an aesthetically pleasing and well-organized user interface. Utilizing properties like margin-right and margin-bottom in CSS code, along with creating spacing through HTML elements, ensures a clean layout.
This practice is crucial for enhancing readability, preventing visual clutter, and creating a seamless user experience. Incorporating proper spacing aligns with good design principles, allowing developers to control the arrangement of elements within a container.
Whether using inline styles or external CSS files, mastering techniques to add space between buttons is fundamental for creating visually appealing and user-friendly web designs.
Adding space between buttons in HTML is crucial for enhancing visual appeal and user experience. Proper spacing ensures a clean and organized layout, preventing elements from appearing crowded or overwhelming.
Whether it’s improving readability, aligning elements, or adhering to design principles, incorporating space between buttons is a fundamental aspect of creating polished and user-friendly interfaces in HTML.
Methods to Add Space Between Buttons
Margin-Right Method in HTML and CSS
Ensuring appropriate space between buttons in HTML is vital for a visually appealing and well-organized layout. By employing the margin-right property in the CSS code, developers can precisely control the distance between button elements, creating a balanced and aesthetically pleasing design.
This method is implemented by defining margins in the CSS file, leveraging the margin-right property, and following good practices for HTML and CSS styling. The result is a clean and structured arrangement of buttons within the HTML structure, enhancing readability and user experience.
Proper spacing, achieved through the margin-right method, contributes to a polished and professional appearance in web design.
Code Example Using the Margin-Right Method:
<!DOCTYPE html>
<html lang="en">
<head>
  <meta charset="UTF-8">
  <meta name="viewport" content="width=device-width, initial-scale=1.0">
  <title>Button Spacing Example</title>
  <style>
    .button {
      margin-right: 30px; /* Adjust the value as needed */
    }
  </style>
</head>
<body>
  <button class="button">Button 1</button>
  <button class="button">Button 2</button>
</body>
</html>
Breaking down the HTML code, we start with the DOCTYPE declaration specifying the HTML version. The <html> tag signifies the document’s root, with the lang attribute set to English.
Meta tags in the <head> section define character set and viewport settings, ensuring cross-device compatibility. The <title> tag provides a browser tab title.
Inside the <style> tags, a CSS class named button is defined, applying a margin-right property of 10 pixels for space between buttons. In the <body> section, two <button> elements use the button class, implementing the specified margin.
This approach ensures a clean and organized layout, adhering to good spacing practices in HTML.
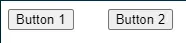
Output:
Implementing the margin-right method provides a straightforward solution to add HTML space between buttons. This method enhances the visual appeal of your webpage, making it more user-friendly and organized.
By adjusting the margin value, you can easily customize the spacing according to your design preferences.
Upon rendering this HTML document, you will observe two buttons with a 10-pixel space between them. This output demonstrates the effective use of the margin-right method to achieve a clean and well-organized button layout.
Flexbox in HTML and CSS
In this second method, utilizing the Flexbox method to add space between buttons is essential for creating flexible and visually appealing layouts. By applying the justify-content property in the CSS code, developers can precisely control the spacing between button elements within a container.
This method promotes responsiveness and adaptability, ensuring consistent and well-distributed space between buttons, regardless of the screen size. Incorporating the Flexbox approach in HTML allows for efficient use of available space, resulting in a clean and organized button arrangement.
It aligns with good practices in web design, offering a straightforward solution to achieve desired spacing and enhance the overall user experience.
Code Example Using the Flexbox Method:
<!DOCTYPE html>
<html lang="en">
<head>
  <meta charset="UTF-8">
  <meta name="viewport" content="width=device-width, initial-scale=1.0">
  <title>Flexbox Button Spacing Example</title>
  <style>
    .button-container {
      display: flex;
      gap: 30px; /* Adjust the value as needed */
    }
  </style>
</head>
<body>
  <div class="button-container">
    <button>Button 1</button>
    <button>Button 2</button>
  </div>
</body>
</html>
Breaking down the following CSS code and HTML code, we start with the DOCTYPE declaration specifying the HTML version and language. Meta tags ensure proper rendering and responsiveness.
The <title> tag provides a title for the webpage. Inside the <style> tags, a CSS class named button-container is created. The display: flex; property transforms child elements into flex items, and gap: 10px; introduces a 10-pixel space between them.
In the <body> section, a <div> with the class button-container wraps two <button> HTML elements, inheriting the Flexbox properties. This method offers a straightforward way to control spacing, enhancing the layout and visual appeal of HTML buttons.
Utilizing the Flexbox method for button spacing in HTML and CSS provides a powerful and flexible layout solution. The display: flex; property allows for easy alignment and distribution of space between buttons, creating a visually appealing and responsive design.
Output:

Upon rendering the HTML document, you’ll observe two buttons horizontally aligned with a 10-pixel space between them. This output showcases the effectiveness of the Flexbox method in achieving consistent and aesthetically pleasing button spacing, adapting seamlessly to different screen sizes.
Grid Method in HTML and CSS
Implementing the Grid method in HTML is crucial for adding space between buttons, offering precise control over layout and aesthetics. By defining grid properties in the CSS code, developers can seamlessly create spacing consistently between buttons, contributing to a visually appealing design.
This method allows for easy customization, accommodating various button sizes and maintaining responsiveness. With the Grid method, web designers can efficiently allocate space within a container, ensuring an organized and user-friendly button arrangement.
Aligning with good practices in HTML and CSS, integrating the Grid method enhances the overall layout and readability, creating a polished interface for a positive user experience.
Code Example Using the Grid Method:
<!DOCTYPE html>
<html lang="en">
<head>
  <meta charset="UTF-8">
  <meta name="viewport" content="width=device-width, initial-scale=1.0">
  <title>Grid Button Spacing Example</title>
  <style>
    .button-container {
      display: grid;
      grid-template-columns: repeat(2, auto); /* Adjust the number of columns as needed */
      gap: 50px; /* Adjust the value as needed */
    }
  </style>
</head>
<body>
  <div class="button-container">
    <button>Button 1</button>
    <button>Button 2</button>
  </div>
</body>
</html>
Let’s dive into this simple example code step by step. The DOCTYPE declaration sets the HTML version, while the <html> tag serves as the document’s root with the language specified as English.
Meta tags in the <head> section ensure proper rendering and responsiveness. The <title> tag provides a title for the webpage, visible in the browser tab.
Inside the <style> tags, a CSS class named button-container is created. The display: grid; property transforms child elements into a grid, and grid-template-columns: repeat(2, auto); establishes a two-column grid with auto-sized columns. The gap: 10px; introduces a 10-pixel space between these grid items.
In the <body> section, a <div> with the class button-container wraps two <button> elements, organizing them within the defined grid.
Output:

Leveraging the Grid method in HTML and CSS for button spacing provides a sophisticated and highly customizable layout solution. The ability to define column sizes and introduce gaps between grid items enhances the visual appeal and responsiveness of your design.
Upon rendering the HTML document, you’ll observe two buttons organized in a grid layout, each column auto-sized and separated by a 10-pixel space. This output exemplifies the effectiveness of the Grid method in achieving precise control over button spacing, creating a polished and well-structured design.
Margin-Right and :not(:last-child) Selector in HTML and CSS
In HTML, employing the Margin-Right and :not(:last-child) selector method is essential for achieving precise and visually appealing space between buttons. By utilizing the margin-right property in the CSS code and the :not(:last-child) selector, developers can create space consistently without undesired gaps.
This method ensures a clean layout, adhering to good practices in web design. The Margin-Right and :not(:last-child) selector method provides a straightforward solution for designers to customize and control button spacing in HTML, enhancing both the aesthetics and user experience.
Integrating this method aligns with best practices, contributing to a polished and professional interface.
Code Example Using the Margin-Right and :not(:last-child) Selector Method:
<!DOCTYPE html>
<html lang="en">
<head>
  <meta charset="UTF-8">
  <meta name="viewport" content="width=device-width, initial-scale=1.0">
  <title>Margin-Right and :not(:last-child) Button Spacing Example</title>
  <style>
    .button {
      margin-right: 10px;
    }

    .button:not(:last-child) {
      margin-right: 30px; /* Adjust the value as needed */
    }
  </style>
</head>
<body>
  <button class="button">Button 1</button>
  <button class="button">Button 2</button>
</body>
</html>
Let’s walk through the code step by step. The DOCTYPE declaration sets the HTML version, and the <html> tag marks the document’s root with English as the language.
Meta tags in the <head> section ensure proper rendering and responsiveness. The <title> tag provides a title for the webpage, visible in the browser tab.
Inside the <style> tags, two CSS rules are established. The .button class applies a margin-right: 10px; property, creating space to the right of each button. The .button:not(:last-child) selector adjusts this margin for the last button, preventing extra space to its right.
In the <body> section, two <button> elements with the button class will adhere to these CSS rules. Utilizing the margin-right property in conjunction with the :not(:last-child) selector provides an elegant solution for adding space between buttons in HTML and CSS.
Output:

This method allows for precise control over button spacing while ensuring a clean and consistent layout. Upon rendering the HTML document, you’ll observe two buttons with a 10-pixel space between them.
The last button seamlessly integrates without any additional margin to its right. This output exemplifies the effectiveness of the margin-right property and :not(:last-child) selector in achieving harmonious button spacing, creating a visually pleasing and well-organized design.
Empty <div> Element in HTML
In HTML, adding space between buttons using the empty <div> element method is crucial for achieving a well-organized and visually appealing layout. By strategically placing an empty <div> between buttons in the HTML structure and applying CSS styles, developers can control the spacing precisely.
This method offers flexibility and simplicity, allowing for easy adjustments to meet design requirements. Utilizing the empty <div> ensures a clean separation between buttons, contributing to enhanced readability and user experience.
It aligns with good practices in HTML and CSS, providing a straightforward solution to create desired spacing and promote a polished design in web interfaces.
Code Example Using the Empty <div> Element:
<!DOCTYPE html>
<html lang="en">
<head>
  <meta charset="UTF-8">
  <meta name="viewport" content="width=device-width, initial-scale=1.0">
  <title>Empty <div> Button Spacing Example</title>
  <style>
    .button {
      display: inline-block;
      margin-right: 30px; /* Adjust the value as needed */
    }

    .spacer {
      width: 10px; /* Adjust the value as needed */
      display: inline-block;
    }
  </style>
</head>
<body>
  <button class="button">Button 1</button>
  <div class="spacer"></div>
  <button class="button">Button 2</button>
</body>
</html>
Let’s go through the code in a simplified manner. The DOCTYPE declaration and <html> tag set the document type and language.
Meta tags ensure proper rendering and responsiveness. The <title> tag provides a title for the webpage.
Inside the <style> tags, two CSS classes are defined: .button for buttons and .spacer for an empty <div> acting as a spacer.
Buttons with the button class are styled to display as inline-block elements with a right margin. The empty <div> with the spacer class creates precise spacing between buttons in the <body> section, contributing to a clean and organized layout.
Output:

Leveraging an empty <div> element for button spacing provides a straightforward and customizable solution. This method allows developers to exert fine control over the spacing between buttons, contributing to a well-organized and visually appealing layout.
Upon rendering the HTML document, you’ll observe two buttons with a 10-pixel space between them. The empty <div> element strategically placed acts as a spacer, effectively achieving precise and clean button spacing.
This output highlights the effectiveness of using an empty <div> for spacing in HTML, offering a versatile approach to layout design.
Best Practices of Adding Spaces Between Buttons
Utilize margin right Property
Apply the margin-right property in the CSS code for buttons to create space to the right, ensuring a consistent and visually appealing layout.
Consider margin bottom Property
Employ the margin-bottom property to add space below buttons, maintaining a clean and well-organized appearance.
Use Container div With Inline Styles
Implement a container <div> with inline styles to control spacing between buttons, offering flexibility and precision in design.
Leverage the Empty div Element
Introduce an empty <div> element strategically between buttons to create space, achieving a simple yet effective spacing method.
Ensure Responsive Design
Consider responsive design principles, adjusting spacing techniques for various screen sizes to maintain a cohesive and user-friendly layout.
Optimize Using Flexbox
Explore the use of Flexbox for efficient spacing, employing properties like justify-content within a container to align and space buttons dynamically.
Apply Good CSS Practices
Adhere to good CSS practices, including maintaining a consistent font size, defined borders, and appropriate padding properties for buttons.
Use Class Names
Utilize class names in the HTML and CSS code to apply consistent spacing practices across multiple buttons or button groups.
By incorporating these best practices, developers can ensure effective and visually pleasing spacing between buttons in HTML, contributing to an enhanced user experience.
Conclusion
Understanding the HTML button element is pivotal for creating interactive and engaging web interfaces. Exploring effective ways to add space between buttons involves employing various methods such as margin properties, container divs, and strategic use of HTML and CSS.
The article delves into practical methods for adding space, emphasizing best practices like leveraging responsive design, optimizing with Flexbox, and applying consistent CSS practices. By following these guidelines, developers can ensure a visually pleasing and well-organized layout, enhancing user experience and contributing to a polished and user-friendly HTML button implementation.

Subodh is a proactive software engineer, specialized in fintech industry and a writer who loves to express his software development learnings and set of skills through blogs and articles.
LinkedIn