How to Create a GUI Using Electron API in Go
This tutorial demonstrates how to create a GUI using the electron API in GoLang.
Create a GUI Using Electron API in Go
The Electron API or Astilectron is used to create GUI for GoLang; the Astilectron is a package powered by the Electron. This API is provided on GitHub, a version of Electron API to generate applications using HTML, CSS, Javascript, and GoLang.
Before using the Electron package, we need to get it from GitHub. Let’s try to get and run the official demo of the Electron package.
Get the Electron Package and Run the Demo
Follow the steps to install and run the Astilectron demo:
-
The first step is to import the Astilectron. Run the following command in cmd in your project
srcdirectory:go get -u github.com/asticode/go-astilectron -
Once the
go-astilectronis downloaded, the next step is to get the demo. Run the following command to get the demo:go get -u github.com/asticode/go-astilectron-demo/...
-
When the electron demo is downloaded, the next step is to remove the
bind.gofile from theYourProject/src/github.com/asticode/go-astilectron-demo/directory. Delete the file so we can bind it later. -
The next step is to install the
astilectron bundler. Run the below commands to download and install the bundler:go get -u github.com/asticode/go-astilectron-bundler/... go install github.com/asticode/go-astilectron-bundler/astilectron-bundler
-
Now, go to
C:\Users\Sheeraz\go\src\github.com\asticode\go-astilectron-demodirectory and run the following command:#go to the directory cd C:\Users\Sheeraz\go\src\github.com\asticode\go-astilectron-demo # astilectron-bundler command astilectron-bundler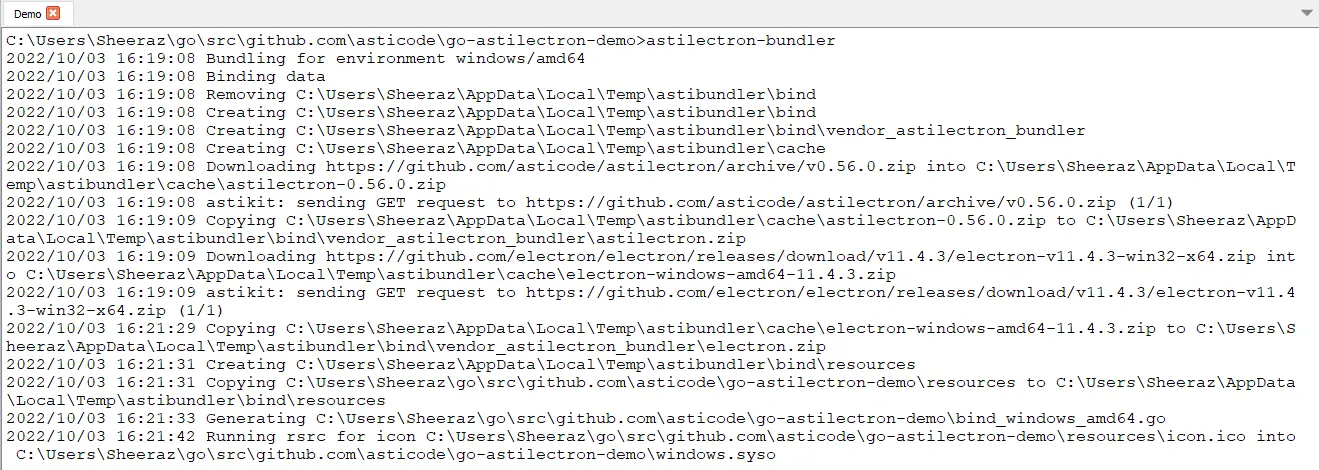
-
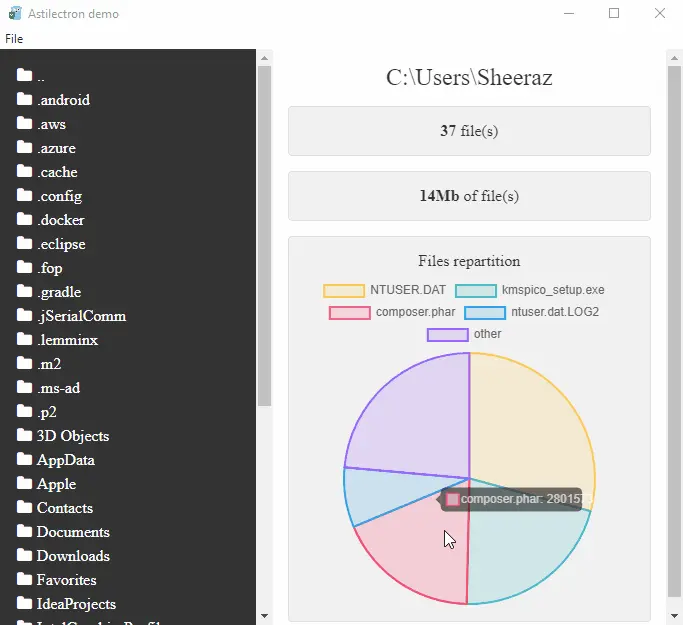
Once the Bundler command is successful, we can test the demo. Go to the
C:\Users\Sheeraz\go\src\github.com\asticode\go-astilectron-demo\output\windows-amd64directory and run theAstilectron demo.exefile: -
As of now, we can see the demo for Astilectron on Windows, which shows the memory structure for the opened folder, but we can also bundle the demo for other operating systems. Add the following part to your
bundler.jsonfile in thego-astilectron-demodirectory: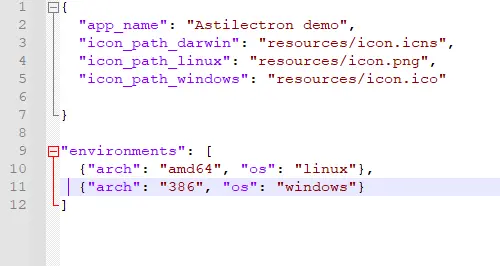
-
After adding the environments, we must repeat the process to create new
Astilectron demo.exefiles for the required operating systems.
HTML Example Using Astilectron
After the above steps of installing the Astilectron, we can now create our own GUI for the application. Let’s try a basic example with HTML and CSS:
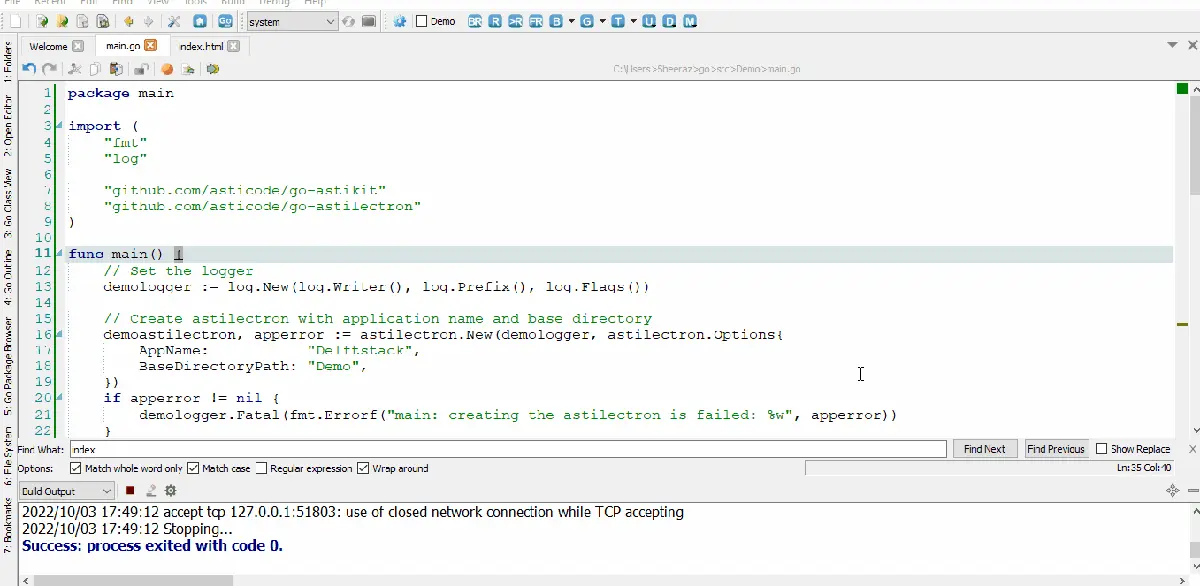
The GoLang code for building and running the HTML app:
package main

import (
	"fmt"
	"log"

	"github.com/asticode/go-astikit"
	"github.com/asticode/go-astilectron"
)

func main() {
	// Set the logger
	demologger := log.New(log.Writer(), log.Prefix(), log.Flags())

	// Create astilectron with the application name and base directory
	demoastilectron, apperror := astilectron.New(demologger, astilectron.Options{
		AppName:           "Delftstack",
		BaseDirectoryPath: "Demo",
	})
	if apperror != nil {
		demologger.Fatal(fmt.Errorf("main: creating the astilectron is failed: %w", apperror))
	}
	defer demoastilectron.Close()

	// Handle the signals
	demoastilectron.HandleSignals()

	// Start Creating the app
	if apperror = demoastilectron.Start(); apperror != nil {
		demologger.Fatal(fmt.Errorf("main: starting the astilectron is failed: %w", apperror))
	}

	// Create a New Window
	var win *astilectron.Window
	if win, apperror = demoastilectron.NewWindow("index.html", &astilectron.WindowOptions{
		Center: astikit.BoolPtr(true),
		Height: astikit.IntPtr(800),
		Width:  astikit.IntPtr(800),
	}); apperror != nil {
		demologger.Fatal(fmt.Errorf("main: new window creation is failed: %w", apperror))
	}
	if apperror = win.Create(); apperror != nil {
		demologger.Fatal(fmt.Errorf("main: new window creation is failed: %w", apperror))
	}

	// Blocking pattern
	demoastilectron.Wait()
}
The above code also uses the github.com/asticode/go-astikit, which will be downloaded by the IDE while running the app. The code for HTML is:
<!DOCTYPE html>
<html lang="en" >
<head>
    <meta charset="UTF-8">
    <title>Delftstack Login Form</title>

<style>
body {
    background-color: lightgreen;
    font-size: 1.6rem;
    font-family: "Open Sans", sans-serif;
    color: #2b3e51;
}

h2 {
    font-weight: 300;
    text-align: center;
}

p {
    position: relative;
}

input {
    display: block;
    box-sizing: border-box;
    width: 100%;
    outline: none;
    height: 60px;
    line-height: 60px;
    border-radius: 4px;
}

input[type="text"],
input[type="email"] {
    width: 100%;
    padding: 0 0 0 10px;
    margin: 0;
    color: #8a8b8e;
    border: 1px solid #c2c0ca;
    font-style: normal;
    font-size: 16px;
    position: relative;
    display: inline-block;
    background: none;
}


input[type="submit"] {
    border: none;
    display: block;
    background-color: lightblue;
    color: #fff;
    font-weight: bold;
    text-transform: uppercase;
    font-size: 18px;
    text-align: center;
}
#login-form {
    background-color: #fff;
    width: 35%;
    margin: 30px auto;
    text-align: center;
    padding: 20px 0 0 0;
    border-radius: 4px;
    box-shadow: 0px 30px 50px 0px rgba(0, 0, 0, 0.2);
}

#create-account {
    background-color: #eeedf1;
    color: #8a8b8e;
    font-size: 14px;
    width: 100%;
    padding: 10px 0;
    border-radius: 0 0 4px 4px;
}
</style>
</head>
<body>

<div id="login-form">
    <h2>Delftstack.com Login</h2>
    <form >
        <p>
            <input type="text" id="username" name="username" placeholder="Username" required><i class="validation"><span></span><span></span></i>
        </p>
        <p>
            <input type="email" id="email" name="email" placeholder="Email Address" required><i class="validation"><span></span><span></span></i>
        </p>
        <p>
            <input type="submit" id="login" value="Login">
        </p>
    </form>
        <div id="create-account">
            <p>Don't have an account? <a href="#">Register Here</a><p>
        </div>
</div>
</body>
</html>
The above Go code will run the given HTML code in the go-astilectron window. See the output:

Sheeraz is a Doctorate fellow in Computer Science at Northwestern Polytechnical University, Xian, China. He has 7 years of Software Development experience in AI, Web, Database, and Desktop technologies. He writes tutorials in Java, PHP, Python, GoLang, R, etc., to help beginners learn the field of Computer Science.
LinkedIn Facebook