How to Add the WSL Bash Shell to Windows
- Initial Requirements
- Install WSL for Recent Versions of Windows
- Running the WSL Bash Shell for the First Time

Microsoft’s recent embrace of Linux has produced some great features in Windows. The capstone feature of this effort is the Windows Subsystem for Linux (WSL), a lightweight virtual machine capable of running a full Linux distribution entirely within Windows, taking away the work of setting up a virtual machine or dual-boot setup from the user.
Installing WSL gives the user access to a command-line shell, in most cases Bash, allowing UNIX-literate developers to start using their favorite tools immediately once WSL has been set up by simply starting Bash in a new window.
This tutorial will show how to set up the Windows Subsystem for Linux (WSL) to add a Bash shell to Windows. The following information is from Microsoft’s info page on installing WSL.
Initial Requirements
To ensure that we have a recent version of Windows, press Windows key + R and type winver. You should see at least Windows 10 (Version 2004), or Windows 11, in the window that appears.
If you have an older version, you may wish to consider upgrading to a newer version. If that is too inconvenient, you may follow Microsoft’s instructions for installing WSL on the older Windows versions here.
Install WSL for Recent Versions of Windows
If you see a recent or newer version, you may install WSL by opening an administrator PowerShell window and typing in the command as explained below. The pictures are from Windows 11, but the same instructions apply to Windows 10.
-
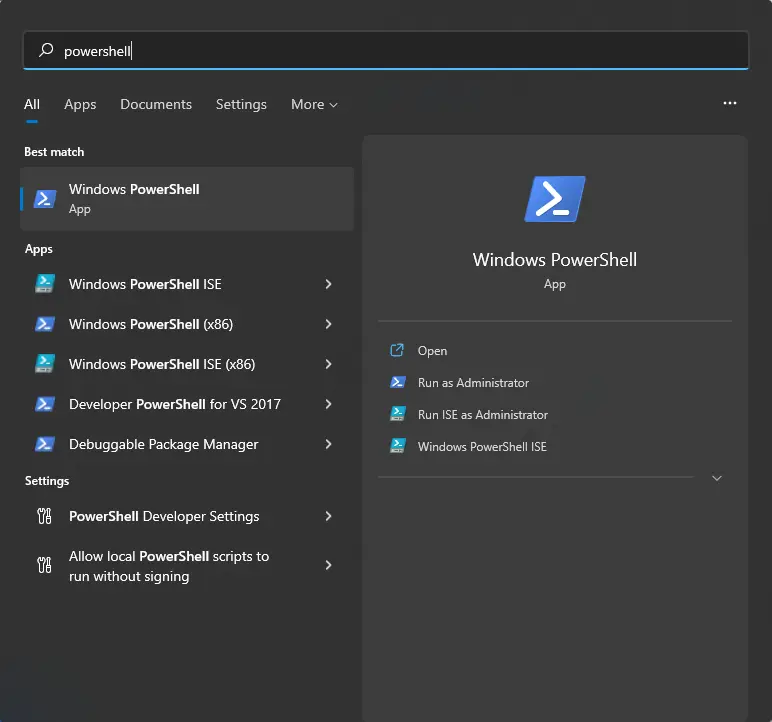
Open the Start menu.
-
Start typing in
powershell. -
You should see the following appear.
-
Press Ctrl+Shift+Enter to start an administrator PowerShell window.
-
Accept the User Access Control that may appear, and the blue PowerShell prompt should appear as shown.

Into this window, type wsl --install. By default, it will install WSL and set it up with the Ubuntu distribution, which is very commonly used.
Additionally, you can install another Linux distribution by listing available ones by typing wsl --list --online and then typing wsl --install -d <linux_distribution>.

For example, if you’d like to install Debian instead of Ubuntu, you would type wsl --install -d Debian.
Once the command has finished running, it may direct you to restart your computer. When you have done so, open the Start menu, and type in wsl. Press Enter to launch WSL. You can even launch WSL by typing in wsl at a PowerShell window.
Running the WSL Bash Shell for the First Time
When running for the first time, WSL may require login information - keep in mind that you have just installed a full Linux distribution, so it needs a username and password. Enter these details, and keep in mind that they do not have to be the same as your Windows username and password.
Once WSL is set up, it should start the Bash shell, which should look similar to the following image.
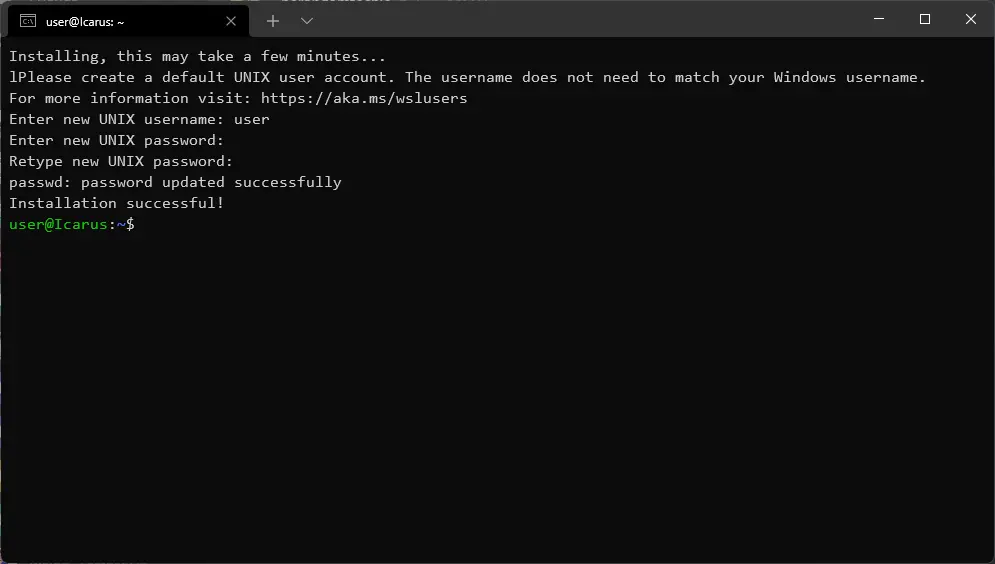
You should be able to try some basic commands on your newly acquired Bash shell - creating a folder with mkdir, creating a file with touch, editing it with nano, listing the files in the Windows home directory (which is where the WSL Bash shell will start by default).
To copy files from the C:\\ drive, navigate the mount at /mnt/c.