How to Change Pages in JavaScript
-
document.locationVSwindow.locationin JavaScript -
Use
window.open()to Change Page in JavaScript -
Use
window.locationto Change Page in JavaScript -
Use
<a>Tags to Change Page in JavaScript -
Use
HistoryAPI to Change Page in JavaScript - Conclusion

JavaScript is a versatile programming language that enables dynamic and interactive web applications. One crucial aspect of web development is navigating between pages.
This can be achieved using various methods, each with strengths and use cases. In this guide, we will explore different methods for changing pages in JavaScript.
document.location VS window.location in JavaScript
The location interface represents the location (URL) of the object to which it is linked. document and window interfaces have a linked location that can be reached via the document.location or the window.location.
The biggest distinction between each is their compatibility with the browsers. The window.location is read/write on all compliant browsers.
The document.location is read-only in IE; however, in Gecko-based browsers like Firefox, it’s read/write.
JavaScript provides the most important window object representing the browser window to communicate with the browser.
All global variables functions become members of the window object. The window position object is used to get the current page’s URL and change the redirect URL.
Use window.open() to Change Page in JavaScript
The window.open() is a window interface method provided by JavaScript, which loads the specified URL/resource into a new tab or an existing browser with the specified name. This method will generate a new window to open a specified URL.
Each time the window.open() method returns, the window contains about:blank. The URL will be loaded once the script block has finished executing.
Syntax:
window.open(url, windowName, windowFeatures);
url: Required parameter that accepts valid URLs, image paths, or other resources browsers support. If an empty string passes, a new tab will open with an empty URL.windowName: Optional parameter that specifies the browsing context’s name. It does not set the window title. In addition, the name of this window must not contain spaces.windowFeatures: Optional parameter that accepts comma-separated window properties of a new tab in the formname=valueornameif the property is Boolean. Some options are the default position and size of the window object.
Below is an example of using window.open() to change a page in JavaScript. We have two code blocks: an HTML code (where we create the button to be clicked) and a JavaScript code (where we define the function).
<button type="button" id="btn" onclick="openGoogleByMethod()">Open Google</button>
function openGoogleByMethod() {
  window.open('https://www.google.com');
}
The window.open() method opens a new browser window or tab. By providing a URL as an argument, you can navigate to a different page, in this case "https://www.google.com".
Use window.location to Change Page in JavaScript
Window.location is a property of the global window object in JavaScript. It provides information about the current URL and allows you to interact with it.
The location object has various properties such as below:
href: The complete URL.protocol: The protocol (e.g.,http,https).hostname: The domain name.pathname: The path after the domain.search: The query string.hash: The fragment identifier.
You can also directly access the window.location properties using location because the window object always remains at the top of the scope chain. Users can use the href property or the assign method of the location object to load/open another URL/resource.
Syntax:
window.location = URL_PATH;
window.location.href = URL_PATH;
window.location.assign(URL_PATH);
URL_PATH is a required parameter that accepts a valid URL that must be opened. This URL can be an absolute URL, a relative URL, an anchor URL, or a new protocol.
Below is an example of using window.location to change a page in JavaScript. We have two code blocks: an HTML code (where we create the button to be clicked) and a JavaScript code (where we define the function).
<button type="button" id="btn" onclick="openGoogle()">Open Google</button>
function openGoogle() {
  window.location = 'https://www.google.com';
  window.location.href = 'https://www.google.com';
}
This code sets up a button in an HTML document; when clicked, it triggers a JavaScript function that navigates the browser to Google’s homepage using window.location. The code provides two equivalent ways to do this by using either window.location or window.location.href (either way, it achieves the same result).
Use <a> Tags to Change Page in JavaScript
The <a> tag, short for anchor, is an HTML element used to create hyperlinks. It allows users to navigate to another page, a specific section within a page, or even to an external resource.
Basic Structure:
<a href="https://www.example.com">Click Here</a>
The <a> element is created with an href attribute that specifies the destination URL. When clicked, it navigates the user to the linked page.
The href attribute contains the URL to which the link points. It can be an absolute URL (e.g., https://www.example.com) or a relative URL (e.g., about.html) within the same website.
You can use JavaScript to simulate a click on an anchor, effectively navigating to the linked page. Below, we have two code blocks: a JavaScript code (where we simulate a click event) and an HTML code (where we have the anchor element).
// Simulate a click on an anchor with the id "myLink"
document.getElementById('myLink').click();
<!-- HTML anchor element -->
<a id="myLink" href="https://www.example.com">Click Me</a>
This code essentially automates a click on an anchor element with the id myLink. When executed, it triggers the same behavior as if a user had manually clicked the link. In this case, it would navigate to https://www.example.com because that’s where the anchor element is pointing.
Keep in mind that this code would be useful in situations where you want to trigger a navigation programmatically, for example, in response to a certain event or condition in your JavaScript code.
Use History API to Change Page in JavaScript
The History API provides a programmatic way to interact with the browser’s session history. It allows you to manipulate the browser’s history stack, enabling you to navigate forward and backward in the user’s history.
Example 1: Pushing a State
history.pushState({page: 1}, 'Title 1', '?page=1');
history.pushState(state, title, url): Allows you to push a new state onto the history stack.state: An object representing the state of the application.title: The title of the new state (often ignored by browsers).url: The URL associated with the new state.
Example 2: Moving Backward
history.back();
history.back() navigates back one step in the session history, effectively equivalent to clicking the browser’s back button.
Example 3: Navigating Forward
history.forward();
history.forward() navigates forward one step in the session history, equivalent to clicking the browser’s forward button.
Example 4: Navigating to a Specific State
history.go(2);
history.go(n) allows you to navigate to a specific step in the session history. n can be positive (forward) or negative (backward).
Example 5: Replacing the Current State
history.replaceState({page: 2}, 'Title 2', '?page=2');
history.replaceState(state, title, url) replaces the current state in the history stack with a new state.
Here’s a full example of how you can use the History API in JavaScript to change pages without a full page reload.
<!DOCTYPE html>
<html lang="en">
<head>
    <meta charset="UTF-8">
    <meta name="viewport" content="width=device-width, initial-scale=1.0">
    <title>History API Example</title>
</head>
<body>

    <button onclick="changePage('page1')">Go to Page 1</button>
    <button onclick="changePage('page2')">Go to Page 2</button>

    <script>
        function changePage(page) {
            var stateData = { page: page }; // Data to associate with the state

            // Push a new state onto the history stack
            history.pushState(stateData, null, page + '.html');

            // Update the content without full page reload
            updateContent(page);
        }

        function updateContent(page) {
            // Simulated content update for demonstration purposes
            var contentDiv = document.getElementById('content');
            contentDiv.innerHTML = '<h1>' + page + '</h1>';
        }

        // Listen for the popstate event
        window.addEventListener('popstate', function(event) {
            var state = event.state;
            if (state) {
                updateContent(state.page);
            }
        });
    </script>

    <div id="content"></div>

</body>
</html>
In this example, we have two buttons, each of which triggers the changePage() function when clicked.
The changePage() function takes a parameter page, which represents the page we want to navigate to. It creates a state object (stateData) to associate with the state.
It then uses history.pushState() to push a new state onto the history stack. This changes the URL without triggering a full page reload.
The updateContent() function simulates updating the content of the page based on the selected page.
We also listen for the popstate event, which is fired when the user navigates through the history using the browser’s back/forward buttons. When this happens, we retrieve the state data and update the content accordingly.
Output:
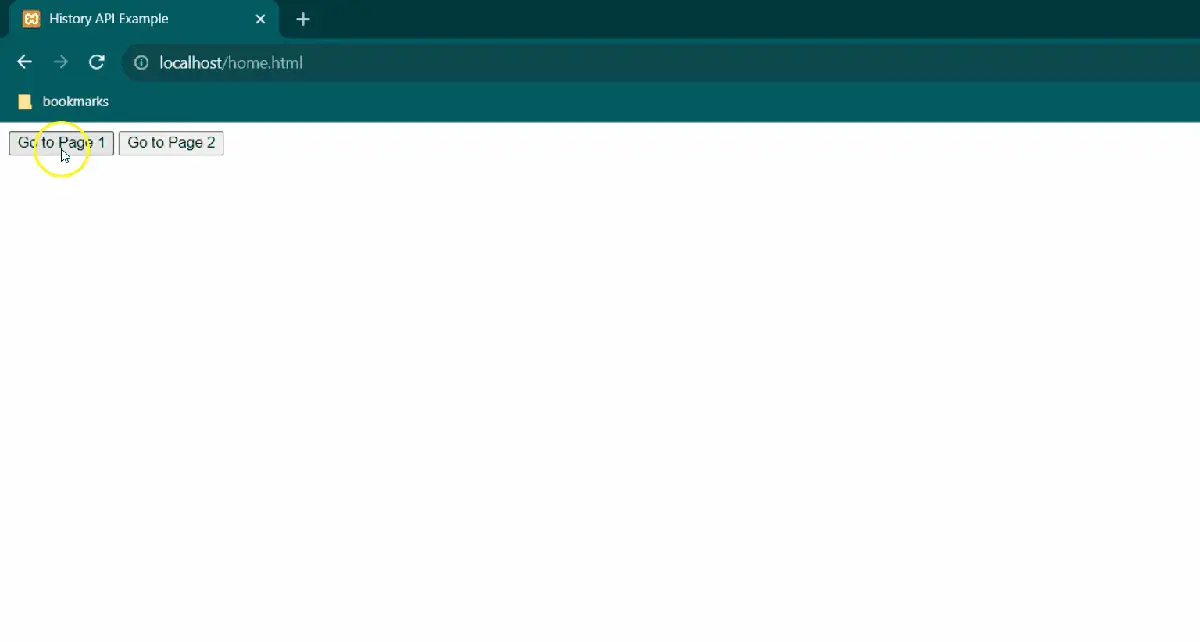
Note that this is a simplified example. In a real application, you would likely fetch and load content dynamically based on the state data.
When you click the buttons, the page content will be updated without a full page reload, and the URL will reflect the current state. This provides a smooth and interactive user experience.
Conclusion
This guide provides an overview of various methods for changing pages in JavaScript. It covers using window.open() to open new windows or tabs, window.location for dynamic URL changes, and simulating clicks on <a> tags to trigger navigation. Additionally, it delves into leveraging the History API for seamless page transitions without full reloads.
Each method has distinct use cases, offering developers versatile options to enhance user experiences. It’s crucial to consider factors like security and browser compatibility when implementing these techniques. With this knowledge, developers can create modern and engaging web interfaces effectively.

Shraddha is a JavaScript nerd that utilises it for everything from experimenting to assisting individuals and businesses with day-to-day operations and business growth. She is a writer, chef, and computer programmer. As a senior MEAN/MERN stack developer and project manager with more than 4 years of experience in this sector, she now handles multiple projects. She has been producing technical writing for at least a year and a half. She enjoys coming up with fresh, innovative ideas.
LinkedIn