How to Add Files to a Git Repository

This article discusses the process of adding new files to a Git repository. If you have created a fresh Git repository, you have to follow a certain multi-stage process to add your files to the repository.
If you are new to Git, this article will guide you step by step, and at the end, you should be able to navigate through your repository freely.
Add Files to a Git Repository
For easier context, we will start by creating a local Git repository. We will open Git Bash and create a folder called Awesome-Project.
The folder will host our Git repository.
$ mkdir Awesome-Project
We will then open this folder with the cd command.
$ cd Awesome-Project
The next step is to initialize a Git repository in the folder. We will run the git init command.
$ git init
Initialized empty Git repository in C:/Awesome-Project/.git/
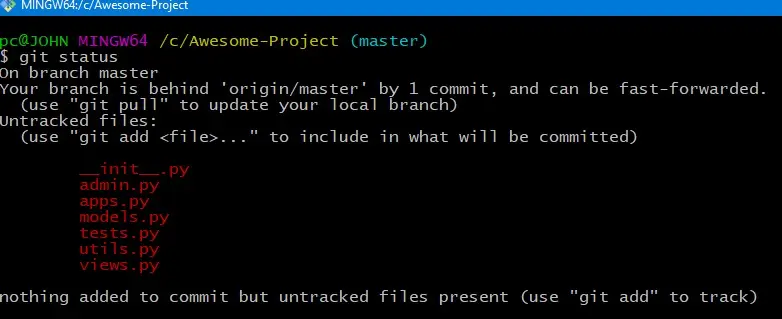
We will then open File Explorer and copy and paste the files we want to add to our repository. Once done, we can check the state of our working space using the git status command.
$ git status

Our added files are currently under the untracked files category.
We will have to add the files to the index for commit. The index is simply the staging area.
As illustrated below, you can run the command if you only have one file.
$ git add myfile.txt
In our case, we have multiple files. We could add these files one by one, but that will take a lot of time.
Instead, we will feed the . at the end of the git add command to add all files to the index, as shown below.
$ git add .
Make sure to leave a space between the command and the dot. This will add all the files to the index.
We can now commit the files using the git commit command, as illustrated below.
$ git commit -m "Initial Commit"
We use the -m flag to include a commit message rather than the pain of editing the commit message in the text editor.
You can push your commit to the remote if you have a remote repository linked to your local repository. Suppose you have not followed these steps to add your remote.
In our example, we will host our remote repository on GitHub. To create a remote repo in GitHub, open your personal Web GitHub account and select New Repository.
Give your repository a name, and do not include any of the suggested files; leave it bare. Once done, copy the URL for your repository.
Run the git remote add origin command with the URL, as shown below.
$ git remote add origin https://github.com/Wachira11ke/Awesome-Project.git
We can then push it to the remote repository.
$ git push origin master
When adding new files to a Git repository, we use the git add command. If you are having issues when adding files, delete the .git folder and initialize your repository afresh using the git init command.
John is a Git and PowerShell geek. He uses his expertise in the version control system to help businesses manage their source code. According to him, Shell scripting is the number one choice for automating the management of systems.
LinkedIn