How to View Child in Angular
The @ViewChild is a decorator in Angular that is most commonly used. It is one of the first decorators we run into while learning Angular.
@ViewChild has many features discussed in this tutorial, with practical examples for each use case.
The @ViewChild is a property decorator that configures a view query. The property is updated if the view DOM changes and a new child matches the selector.
We can use @ViewChild with directives, DOM Elements, and Child components. We can understand how to use @ViewChild with them in examples.
Let’s create a new application by using the following command.
# angular
ng new my-app
After creating our new application in angular, we will go to our application directory using this command.
# angular
cd my-app
Now, let’s run our app to check if all dependencies are installed correctly.
# angular
ng serve --open
Let’s create a directive, LanguageDirective. This directive will look for elements with the attribute appLanguage and prepend the text in the element with the word Language.
There are two ways to generate a directive using @angular/cli or creating a file language.directive.ts.
# Angular
ng generate directive language --skip-tests
This command will create a language.directive.ts file and add the directive to the app.module.ts file. And we will use ElementRef and Renderer2 to rewrite the text.
So, our code in language.directive.ts will look like below.
# angular
import {
  Directive,
  ElementRef,
  Renderer2
} from '@angular/core';

@Directive(
  { selector: '[appLanguage]' }
)
export class LanguageDirective {
  language = 'NodeJs';

  constructor(elem: ElementRef, renderer: Renderer2) {
    let language = renderer.createText('Language ');
    renderer.appendChild(elem.nativeElement, language);
  }
}
And code in app.module.ts will look like below.
# Angular
import { NgModule } from '@angular/core';
import { BrowserModule } from '@angular/platform-browser';
import { FormsModule } from '@angular/forms';
import { AppComponent } from './app.component';
import { HelloComponent } from './hello.component';
import { LanguageDirective } from './language.directive';

@NgModule({
  imports: [BrowserModule, FormsModule],
  declarations: [AppComponent, HelloComponent, LanguageDirective],
  bootstrap: [AppComponent],
})
export class AppModule {}
Add appLanguage attribute to li containing text in the component template. So, our code in app.component.html will look like below.
# Angular
<h2>Programming Languages</h2>
<ul>
  <li appLanguage>Angular</li>
  <li appLanguage>React</li>
  <li appLanguage>React Native</li>
</ul>
Output:
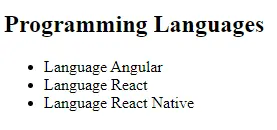
The word Language before the element’s contents can also access the instance variable of LanguageDirective and set an extraLanguage instance variable with its value.
So, our code in app.component.ts will look like below.
# Angular
import { Component, ViewChild, AfterViewInit } from '@angular/core';
import { LanguageDirective } from './language.directive';
@Component({
selector: 'my-app',
templateUrl: './app.component.html',
styleUrls: ['./app.component.css'],
})
export class AppComponent implements AfterViewInit {
extraLanguage!: string;
@ViewChild(LanguageDirective)
set appLanguage(directive: LanguageDirective) {
this.extraLanguage = directive.language;
}
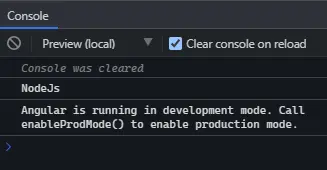
ngAfterViewInit() {
console.log(this.extraLanguage); // NodeJs
}
}
We have used a setter in the above code to set the extraLanguage variable.
Now, you will notice that it will wait for the AfterViewInit lifecycle hook to access the variable because child components and directives become available after the initial view is loaded.
Output:
The above output shows that the parent component could access the value from the directive using @ViewChild.
Use the ViewChild With DOM Elements in Angular
We will go through DOM Elements and access them using @ViewChild in this example. @ViewChild allows us to access the native DOM elements with a template reference variable.
Let’s create a new application by using the following command.
# angular
ng new my-app
After creating our new application in angular, we will go to our application directory using this command.
# angular
cd my-app
Now, let’s run our app to check if all dependencies are installed correctly.
# angular
ng serve --open
For example, we have an input tag in app.component.html with the #forViewChild reference variable shown below in code.
# Angular
<input #forViewChild placeholder="Your favorite Programming Language">
We will also add some CSS in app.component.css.
# Angular
p {
  font-family: Lato;
}
input {
  padding: 5px 10px;
}
label {
  font-size: 20px;
  padding-right: 10px;
}
Output:

Now, we can access the input with @ViewChild and set the value. Our code in app.component.ts will look like below.
# angular
import { Component, ViewChild, AfterViewInit, ElementRef } from '@angular/core';

@Component({
  selector: 'my-app',
  templateUrl: './app.component.html',
  styleUrls: ['./app.component.css'],
})
export class AppComponent implements AfterViewInit {
  @ViewChild('forViewChild') forViewChild!: ElementRef;
  ngAfterViewInit() {
    this.forViewChild.nativeElement.value = 'Angular!';
  }
}
So, when ngAfterViewInit executes, the input value will be changed and set to Angular! as shown in the example below.
Output:

As you can see in the above example, the parent component sets the value of the child DOM element using @ViewChild.
Use the ViewChild With Child Components in Angular
With @ViewChild, we can access a child component and call methods or instance variables available to the child. Now we will go through an example to understand how we can use @ViewChild with child components in Angular.
Let’s create a new application by using the following command.
# angular
ng new my-app
After creating our new application in angular, we will go to our application directory using this command.
# angular
cd my-app
Now, let’s run our app to check if all dependencies are installed correctly.
# angular
ng serve --open
Now, let’s create a new component as HelloComponent.
We can create a new component in two ways. By using a @angular/cli and running the following command.
# Angular
ng generate component hello --flat --skip-tests
Using this command, hello.component.ts, hello.component.html, and hello.component.css files will be created. Or we can create these files manually.
Now, in app.module.ts, we need to add the newly created component. Our code in app.module.ts will look like below.
# Angular
import { NgModule } from '@angular/core';
import { BrowserModule } from '@angular/platform-browser';
import { FormsModule } from '@angular/forms';

import { AppComponent } from './app.component';
import { HelloComponent } from './hello.component';

@NgModule({
  imports:      [ BrowserModule, FormsModule ],
  declarations: [ AppComponent, HelloComponent ],
  bootstrap:    [ AppComponent ]
})
export class AppModule { }
We will add a GreetingMessage method to HelloComponent to return a message.
# Angular
import { Component, OnInit } from '@angular/core';

@Component({
  selector: 'hello',
  templateUrl: './hello.component.html',
  styleUrls: ['./hello.component.css'],
})
export class HelloComponent implements OnInit {
  constructor() {}

  GreetingMessage() {
    return 'Hello Member!';
  }

  ngOnInit(): void {}
}
Now, we will reference the child component in the app.component.html using <hello>. So, our code will look like below.
# Angular
<hello>It Works</hello>
We will call the GreetingMessage method from the parent component class app.component.ts with @ViewChild. So, our code will look like below.
# Angular
import { Component, ViewChild, AfterViewInit } from '@angular/core';
import { HelloComponent } from './hello.component';
@Component({
selector: 'my-app',
templateUrl: './app.component.html',
styleUrls: ['./app.component.css'],
})
export class AppComponent {
@ViewChild(HelloComponent) hello!: HelloComponent;
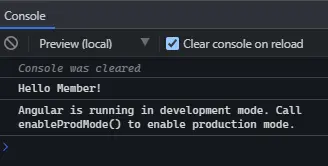
ngAfterViewInit() {
console.log(this.hello.GreetingMessage());
}
}
Output:
This tutorial taught us how to use @ViewChild in different situations with examples.

Rana is a computer science graduate passionate about helping people to build and diagnose scalable web application problems and problems developers face across the full-stack.
LinkedIn