How to Use Radio Buttons in Angular

We will introduce how to add radio buttons and bind and validate radio buttons in Angular with examples.
Radio Buttons in Angular
We used the Angular Material library to make UI/UX in Angular. Angular material delivers a lot of built-in modules for our projects.
Components such as autocomplete, date picker, slider, menus, grids, toolbars, and radio buttons are generally used using Angular Material.
Create Radio Buttons Using HTML5 in Angular
A radio button is a simple input element with a type property set to radio. The syntax of radio buttons is shown below.
# Angular
<input id="radio" type="radio" value="1">
<label for="radio">My Radio</label>
Output:
We need to specify a name for all HTML input elements because the element will not be identifiable without the name. If the radio button has been selected, we want to set a value and send this value to the server.
Let’s discuss this with an example as shown below.
# Angular
<input type="radio" name="fruits" value="Apple">
The name attribute is used to establish an entire group of radio objects. A single radio button does not make sense.
We need a group of radio buttons. We can use a checkbox for a single item, but radio buttons make no sense when they are used as a single item.
Important Points on Radio Buttons in Angular
- Radio buttons occur in groups. They only make sense when put in the groups.
- One element can be selected, and one radio button deselects the others.
- The id of each radio button is special. We must have a unique id for each radio button used on a page.
- The radio element also has the
nameattribute. Thenameattribute can establish a whole group of radio objects. - The radio buttons in the group have the same name because HTML uses the
nameattribute to figure out from which group this radio button is from to assure that only one button in the group is selected.
Bind Radio Buttons in Angular
The <mat-radio-button> gives the same function as a native <input type="radio"> increase with material design styling and animations. In the radio button, users can select only one value at a time.
That’s why radio buttons with the same name include a set, and only one may be selected at one time.
The radio-button label is provided to fulfill the <mat-radio- button> element. We can place the label before or after a radio button by setting the label position property before or after.
If we don’t need the label to emerge next to the radio button, we can use the aria-label or aria-labelledby to specify an applicable label.
Radio buttons are generally placed inside the <mat-radio-group> unless the DOM network would make that impossible. The radio group has the valuable property of remembering the currently selected radio button inside the group.
Unique radio buttons inside the radio group will inherit the name of this group.
The <mat-radio-group> is well suited with @angular/forms and carries both the Forms and Reactive Forms modules.
Now we will create an Angular project and install the Angular material libraries. We have the latest Angular CLI.
Below is the command we will use to create an Angular project.
# Angular
ng new project
We will install hammer.js using these commands.
# Angular
npm install --save hammerjs
Now, we can install Angular material using the command shown below.
# Angular
npm install --save @angular/material
Now, we can install Angular animations using the command shown below.
# angular
npm install --save @angular/animations
We can install Angular CDK using the command shown below.
# angular
npm install --save @angular/cdk
We can include hammerjs inside the angular.json file. We can find the file at the root of a project.
# Angular
"scripts": [
     "./node_modules/hammerjs/hammer.min.js"
]
Now, let’s create a group of radio buttons and try to get the value of the selected radio button. First, we will import the FormsModule and ReactiveFormsModule inside app.module.ts, as shown below.
# angular
import { BrowserModule } from '@angular/platform-browser';
import { NgModule } from '@angular/core';
import { FormsModule, ReactiveFormsModule } from '@angular/forms';
import { BrowserAnimationsModule } from '@angular/platform-browser/animations';
import { AppComponent } from './app.component';

@NgModule({
  declarations: [
    AppComponent
  ],
  imports: [
    BrowserModule,
    FormsModule,
    ReactiveFormsModule,
    BrowserAnimationsModule
  ],
  providers: [],
  bootstrap: [AppComponent]
})
export class AppModule { }
We will now create the frontend in the app.component.html file, as shown below.
# angular
<div *ngFor="let fruit of fruits">
<label for="{{fruit}}">
<input id="{{fruit}}" [value]='fruit' type="radio" name="fruits" [(ngModel)]="favFruit">
{{fruit}}
</label>
</div>
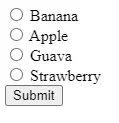
<button (click)='radioFun'>Submit</button>
<div>
<p>The selected Fruit is <b>{{favFruit}}</b></p>
</div>
Output:
Now we will bind the radio buttons to display the selected radio button. We will edit the app.component.ts file, and the updated code is shown below.
# angular
import { Component } from '@angular/core';
@Component({
selector: 'my-app',
templateUrl: './app.component.html',
styleUrls: ['./app.component.css'],
})
export class AppComponent {
favFruit: string;
fruits: string[] = ["Banana", "Apple", "Guava", "Strawberry"];
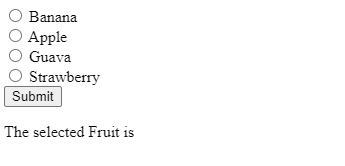
radioFun(){
return console.log(this.favFruit);
}
}
Output:

Rana is a computer science graduate passionate about helping people to build and diagnose scalable web application problems and problems developers face across the full-stack.
LinkedIn