OpenCV創建圖像

圖像處理中的一個任務是創建圖像,可以從頭開始創建,也可以通過加載現有圖像並對其進行修改來創建。本教程將討論在OpenCV中常用的創建圖像的方法。
使用OpenCV中NumPy的zeros()函數創建圖像
圖像由放置在矩陣中的像素組成。每個像素都包含一個BGR三元組的顏色值。
BGR三元組值包含從0到255的三個值,在8位圖像中。第一個值對應於藍色的強度,第二個和第三個BRG三元組值對應於綠色和紅色。
我們可以設置這三種顏色的值以得到任何顏色。
在8位圖像中,單個像素可以有256乘以256乘以255種不同的顏色。我們可以使用NumPy的zeros()函數創建一個黑色圖像。
zeros()函數根據矩陣的行數和列數生成僅包含零的矩陣。
樣例程式碼1:
import cv2
import numpy as np

# Define the dimensions of the image
height = 512
width = 512

# Create a black image with the specified dimensions
img = np.zeros((height, width, 3), np.uint8)

# Display the image
cv2.imshow("Binary", img)

# Wait until a key is pressed and then close the image window
cv2.waitKey(0)
輸出:

上述圖像中的每個像素的BGR三元組值將為(0,0,0),即黑色。我們還可以通過將每個像素值設置為BGR三元組值來更改圖像的顏色。
現在,讓我們將上述圖像的顏色更改為藍色。
樣例程式碼2:
import cv2
import numpy as np

# Define the dimensions of the image
height = 512
width = 512

# Create a black image with the specified dimensions
img = np.zeros((height, width, 3), np.uint8)

# Fill the entire image with a blue color
img[:, :] = (255, 0, 0)

# Display the image
cv2.imshow("image", img)

# Wait until a key is pressed and then close the image window
cv2.waitKey(0)
輸出:
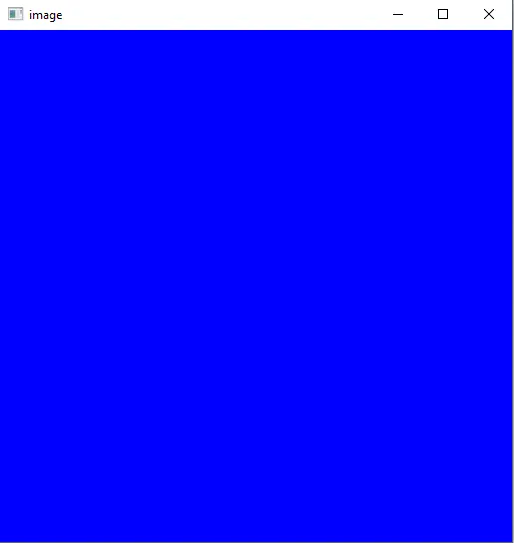
上述程式碼中的冒號(:)符號用於所有行和列。第一個冒號對應於列,第二個冒號對應於img矩陣中的行。
冒號還可以定義範圍,例如0到100可以寫作0:100。我們可以在圖像中設置某些像素的顏色,而不是設置所有像素的顏色。
例如,讓我們將上述圖像的不同部分設置為不同的顏色。
樣例程式碼3:
import cv2
import numpy as np

# Define the dimensions of the image
height = 512
width = 512

# Create a black image with the specified dimensions
img = np.zeros((height, width, 3), np.uint8)

# Fill the entire image with blue color (BGR format)
img[:, :] = (255, 0, 0)

# Fill a region in the top-left corner with yellow color
img[0:100, 0:100] = (255, 255, 0)

# Fill the right half of the image with red color
img[:, width // 2 : width] = (0, 0, 255)

# Display the resulting image
cv2.imshow("image", img)

# Wait for a key press and close the image window
cv2.waitKey(0)
輸出:
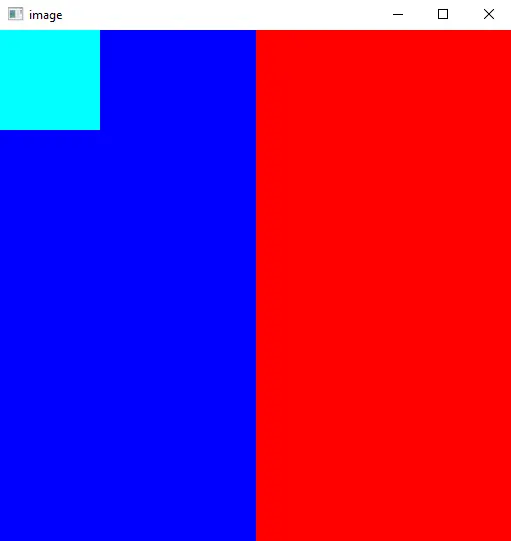
在上述程式碼中,我們將第一個100列和第一個100行的顏色設置為青色,並將圖像的右側顏色設置為紅色,使用了圖像的寬度。
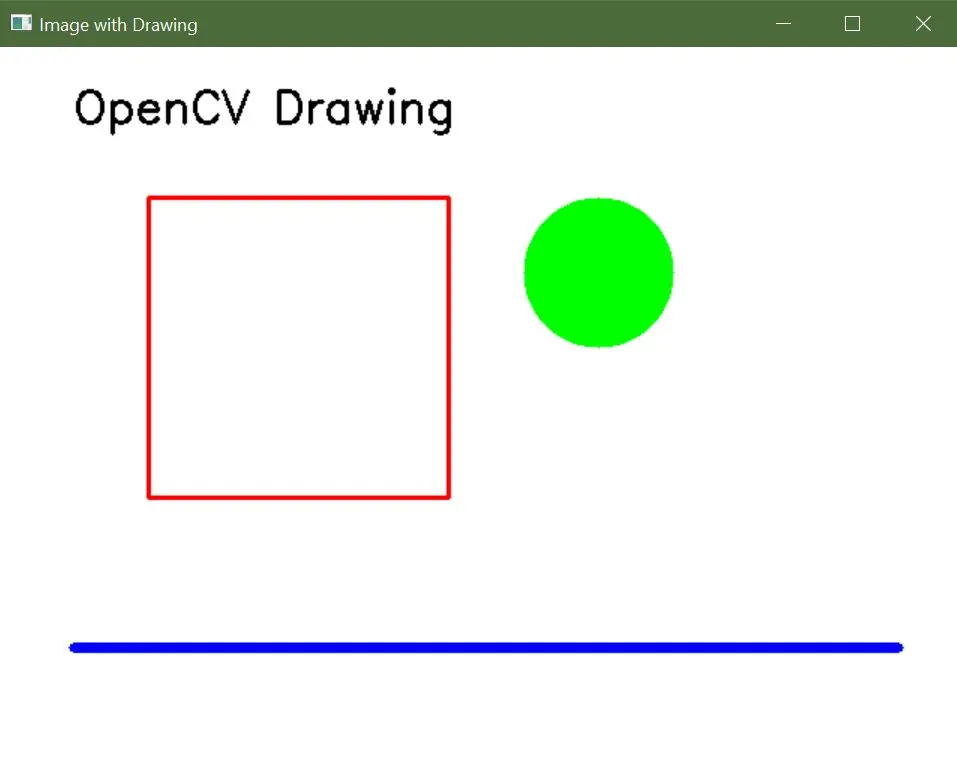
使用OpenCV中的繪圖函數創建圖像
OpenCV提供了一系列的繪圖函數,可以將圖形元素添加到圖像中。使用以下函數,您可以創建帶有形狀、線條和文本的圖像。
-
cv2.line():在兩點之間繪製一條直線。 -
cv2.rectangle():繪製指定尺寸的矩形。 -
cv2.circle():繪製具有給定中心和半徑的圓。 -
cv2.ellipse():繪製具有指定參數的橢圓。 -
cv2.polylines():繪製多邊形或一系列連接的線條。 -
cv2.putText():向圖像中添加文本。
樣例程式碼:
import cv2
import numpy as np

# Create a blank image with a white background
width, height = 640, 480
blank_image = np.zeros((height, width, 3), dtype=np.uint8)
blank_image[:] = (255, 255, 255)  # White color in BGR format

# Draw a red rectangle
start_point_rect = (100, 100)
end_point_rect = (300, 300)
red_color = (0, 0, 255)  # Red color in BGR format
thickness_rect = 2
cv2.rectangle(blank_image, start_point_rect, end_point_rect, red_color, thickness_rect)

# Draw a green circle
center_circle = (400, 150)
radius_circle = 50
green_color = (0, 255, 0)  # Green color in BGR format
thickness_circle = -1  # Negative thickness fills the circle
cv2.circle(blank_image, center_circle, radius_circle, green_color, thickness_circle)

# Draw a blue line
start_point_line = (50, 400)
end_point_line = (600, 400)
blue_color = (255, 0, 0)  # Blue color in BGR format
thickness_line = 5
cv2.line(blank_image, start_point_line, end_point_line, blue_color, thickness_line)

# Add text to the image
text = "OpenCV Drawing"
font = cv2.FONT_HERSHEY_SIMPLEX
font_scale = 1
font_color = (0, 0, 0)  # Black color in BGR format
font_thickness = 2
text_position = (50, 50)
cv2.putText(
    blank_image, text, text_position, font, font_scale, font_color, font_thickness
)

# Display the image
cv2.imshow("Image with Drawing", blank_image)
cv2.waitKey(0)
cv2.destroyAllWindows()
輸出: