Crear imágenes en OpenCV
-
Crear imágenes usando la función
zeros()deNumPyen OpenCV - Crear imágenes con funciones de dibujo en OpenCV
Una de las tareas en el procesamiento de imágenes es crear imágenes, ya sea desde cero o cargando imágenes existentes y modificándolas. Este tutorial discutirá las formas comunes de crear una imagen en OpenCV.
Crear imágenes usando la función zeros() de NumPy en OpenCV
Una imagen está compuesta por píxeles que se colocan en una matriz. Cada píxel contiene un valor de color como una tripleta BGR.
Un valor de tripleta BGR contiene tres valores que van de 0 a 255 en una imagen de 8 bits. El primer valor corresponde a la intensidad del color azul, y los valores de la tripleta BRG segundo y tercero corresponden a los colores verde y rojo.
Podemos establecer el valor de estos tres colores para hacer cualquier color.
En una imagen de 8 bits, un solo píxel puede tener 256 multiplicado por 256 multiplicado por 255 colores diferentes. Podemos usar la función zeros() de NumPy para crear una imagen negra.
La función zeros() crea una matriz que solo contiene ceros dados el número de filas y columnas de la matriz.
Código de muestra 1:
import cv2
import numpy as np

# Define the dimensions of the image
height = 512
width = 512

# Create a black image with the specified dimensions
img = np.zeros((height, width, 3), np.uint8)

# Display the image
cv2.imshow("Binary", img)

# Wait until a key is pressed and then close the image window
cv2.waitKey(0)
Salida:

Cada píxel en la imagen anterior tendrá el valor de tripleta BGR de (0,0,0), que es negro. También podemos cambiar el color de la imagen estableciendo el valor de cada píxel en un valor de tripleta BGR.
Ahora, cambiemos el color de la imagen anterior a azul.
Código de muestra 2:
import cv2
import numpy as np

# Define the dimensions of the image
height = 512
width = 512

# Create a black image with the specified dimensions
img = np.zeros((height, width, 3), np.uint8)

# Fill the entire image with a blue color
img[:, :] = (255, 0, 0)

# Display the image
cv2.imshow("image", img)

# Wait until a key is pressed and then close the image window
cv2.waitKey(0)
Salida:
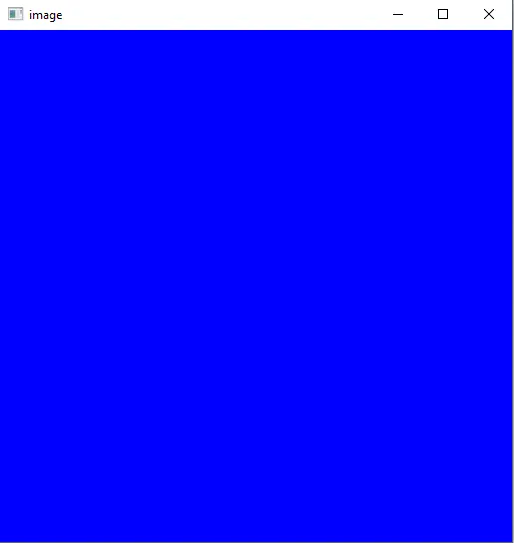
El símbolo de dos puntos (:) en el código anterior se utiliza para todas las filas y columnas. El primer colon corresponde a la columna y el segundo colon corresponde a las filas en la matriz img.
Los dos puntos también definen rangos como 0 a 100 como 0:100. En lugar de establecer el color de todos los píxeles, podemos establecer el color de algunos píxeles en la imagen.
Por ejemplo, establezcamos diferentes colores para diferentes partes de la imagen anterior.
Código de muestra 3:
import cv2
import numpy as np

# Define the dimensions of the image
height = 512
width = 512

# Create a black image with the specified dimensions
img = np.zeros((height, width, 3), np.uint8)

# Fill the entire image with blue color (BGR format)
img[:, :] = (255, 0, 0)

# Fill a region in the top-left corner with yellow color
img[0:100, 0:100] = (255, 255, 0)

# Fill the right half of the image with red color
img[:, width // 2 : width] = (0, 0, 255)

# Display the resulting image
cv2.imshow("image", img)

# Wait for a key press and close the image window
cv2.waitKey(0)
Salida:
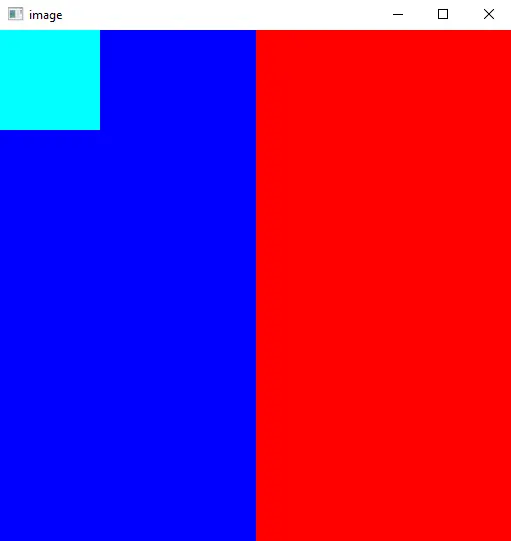
En el código anterior, establecemos el color de las primeras 100 columnas y las primeras 100 filas en color cian y el color del lado derecho de la imagen en color rojo usando el ancho de la imagen.
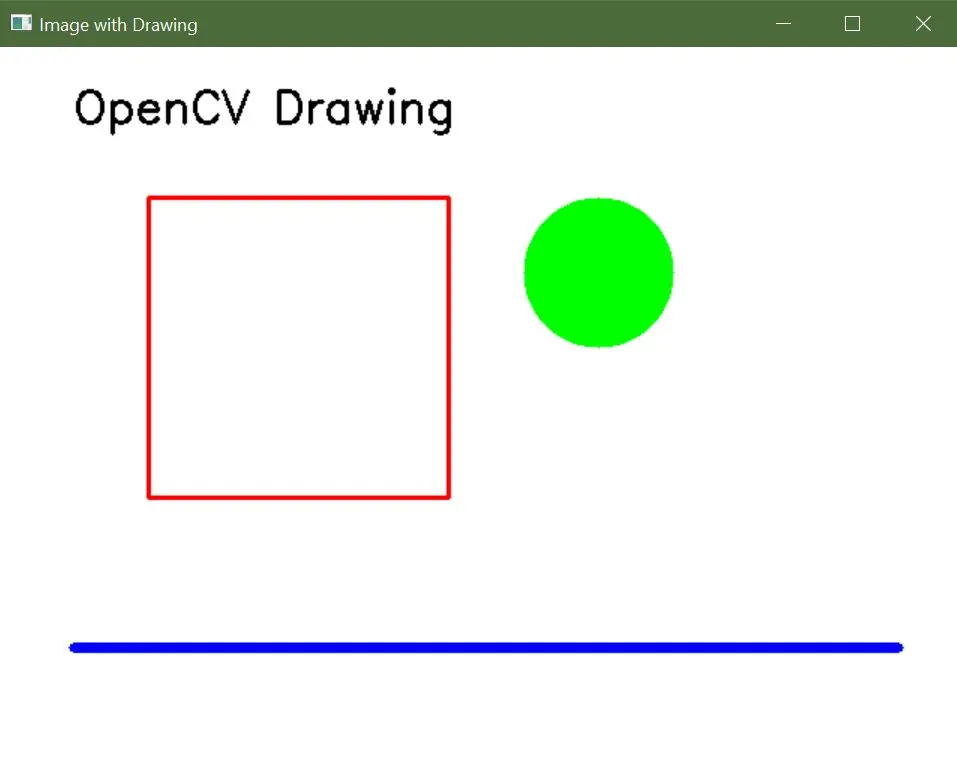
Crear imágenes con funciones de dibujo en OpenCV
OpenCV proporciona una variedad de funciones de dibujo que le permiten agregar elementos gráficos a las imágenes. Usando las siguientes funciones, puede crear imágenes con formas, líneas y texto.
-
cv2.line(): Dibuja una línea recta entre dos puntos. -
cv2.rectangle(): Dibuja un rectángulo con dimensiones especificadas. -
cv2.circle(): Dibuja un círculo con un centro y radio dados. -
cv2.ellipse(): Dibuja una elipse con parámetros especificados. -
cv2.polylines(): Dibuja un polígono o una serie de líneas conectadas. -
cv2.putText(): Agrega texto a una imagen.
Código de muestra:
import cv2
import numpy as np

# Create a blank image with a white background
width, height = 640, 480
blank_image = np.zeros((height, width, 3), dtype=np.uint8)
blank_image[:] = (255, 255, 255)  # White color in BGR format

# Draw a red rectangle
start_point_rect = (100, 100)
end_point_rect = (300, 300)
red_color = (0, 0, 255)  # Red color in BGR format
thickness_rect = 2
cv2.rectangle(blank_image, start_point_rect, end_point_rect, red_color, thickness_rect)

# Draw a green circle
center_circle = (400, 150)
radius_circle = 50
green_color = (0, 255, 0)  # Green color in BGR format
thickness_circle = -1  # Negative thickness fills the circle
cv2.circle(blank_image, center_circle, radius_circle, green_color, thickness_circle)

# Draw a blue line
start_point_line = (50, 400)
end_point_line = (600, 400)
blue_color = (255, 0, 0)  # Blue color in BGR format
thickness_line = 5
cv2.line(blank_image, start_point_line, end_point_line, blue_color, thickness_line)

# Add text to the image
text = "OpenCV Drawing"
font = cv2.FONT_HERSHEY_SIMPLEX
font_scale = 1
font_color = (0, 0, 0)  # Black color in BGR format
font_thickness = 2
text_position = (50, 50)
cv2.putText(
    blank_image, text, text_position, font, font_scale, font_color, font_thickness
)

# Display the image
cv2.imshow("Image with Drawing", blank_image)
cv2.waitKey(0)
cv2.destroyAllWindows()
Salida: