PyQt5 チュートリアル - メニューバー
メニューバーは通常、GUI の左上隅とタイトルバーの下にあります。ユーザーがメニューの項目をクリックすると、ファイルを開く、ファイルを保存する、アプリケーションを終了するなどのアクションを実行できます。
メニューバーを開始し、アクションをメニューにバインドし、ショートカットを追加し、ステータステキストを表示します。方法を学習します。
PyQt5 メニューバー基本の例
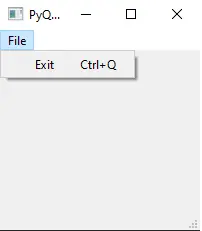
ほとんどのエディターと同様に、File メニューを持つ最初の PyQt5 メニューバーの例を作成します。簡単にするために、Exit サブメニューのみを含めます。
import sys
from PyQt5.QtWidgets import QMainWindow, QAction, qApp, QApplication


class basicMenubar(QMainWindow):
    def __init__(self, *args, **kwargs):
        super().__init__(*args, **kwargs)

        self.initUI()

    def initUI(self):

        self.setGeometry(200, 200, 200, 200)

        exitAction = QAction("&Exit", self)
        exitAction.setShortcut("Ctrl+Q")
        exitAction.setStatusTip("Exit application")
        exitAction.triggered.connect(qApp.quit)

        self.statusBar()

        menubar = self.menuBar()
        fileMenu = menubar.addMenu("&File")
        fileMenu.addAction(exitAction)

        self.setWindowTitle("PyQt5 Basic Menubar")
        self.show()


if __name__ == "__main__":

    app = QApplication(sys.argv)
    ex = basicMenubar()
    sys.exit(app.exec_())
menubar = self.menuBar()
QMainWindow には、メニューバーを作成するためのメソッド menuBar() があります。
fileMenu = menubar.addMenu("&File")
fileMenu.addAction(exitAction)
fileMenu は File という名前でメニューバーに追加され、QAction オブジェクトに関連付けられたメニューエントリ exitAction で構成されます。
exitAction = QAction("&Exit", self)
exitAction.setShortcut("Ctrl+Q")
exitAction.setStatusTip("Exit application")
exitAction.triggered.connect(qApp.quit)
アプリケーションを終了するための QAction オブジェクトを作成し、このオブジェクトを変数 exitAction に保存します。
この QAction オブジェクトの名前は&Exit であり、ショートカット Ctrl+Q に関連付けられています。
exitAction.setStatusTip("Exit application")
ユーザーがこのメニューエントリの上にマウスポインタを置くと、ステータスバーself.statusBar に追加のメッセージが表示されます。
exitAction.triggered.connect(qApp.quit)
この終了アクションがトリガーされるイベントを、アプリケーションの終了スロットに接続します。
PyQt5 メニューバーメニュー項目アイコン
PyQt5 メニューバーのメニュー項目のアイコンを設定するには、2つの方法があります。
PyQt5 デフォルトスタイルの標準ピックスマップ
デフォルトのスタイルの標準ピックスマップを使用して、標準アイコンでメニュー項目アイコンを設定できます。
self.style().standardIcon(QStyle.SP_DialogCancelButton)
上記のコードは、ダイアログキャンセルの標準アイコンを選択します。
![]()
import sys
from PyQt5.QtWidgets import QMainWindow, QAction, qApp, QApplication, QStyle


class basicMenubar(QMainWindow):
    def __init__(self, *args, **kwargs):
        super().__init__(*args, **kwargs)

        self.initUI()

    def initUI(self):

        self.setGeometry(200, 200, 200, 200)

        exitAction = QAction(
            self.style().standardIcon(QStyle.SP_DialogCancelButton), "&Exit", self
        )
        exitAction.setShortcut("Ctrl+Q")
        exitAction.setStatusTip("Exit application")
        exitAction.triggered.connect(qApp.quit)

        self.statusBar()

        menubar = self.menuBar()
        fileMenu = menubar.addMenu("&File")
        fileMenu.addAction(exitAction)

        self.setWindowTitle("PyQt5 Basic Menubar")
        self.show()


if __name__ == "__main__":

    app = QApplication(sys.argv)
    ex = basicMenubar()
    sys.exit(app.exec_())
QIcon で画像ファイルを使用する
QStyle のデフォルトのアイコンを使用する上記のメソッドに加えて、QIcon クラスを使用してアイコンとして任意の画像ファイルを使用することもできます。
QIcon("exit.png")
画像ファイル exit.png をアイコンに設定します。exit.png ファイルは python スクリプトファイルと同じフォルダーにある必要があります。
![]()
import sys
from PyQt5.QtWidgets import QMainWindow, QAction, qApp, QApplication, QStyle
from PyQt5.QtGui import QIcon


class basicMenubar(QMainWindow):
    def __init__(self, *args, **kwargs):
        super().__init__(*args, **kwargs)

        self.initUI()

    def initUI(self):

        self.setGeometry(200, 200, 200, 200)

        exitAction = QAction(QIcon("exit.png"), "&Exit", self)
        exitAction.setShortcut("Ctrl+Q")
        exitAction.setStatusTip("Exit application")
        exitAction.triggered.connect(qApp.quit)

        self.statusBar()

        menubar = self.menuBar()
        fileMenu = menubar.addMenu("&File")
        fileMenu.addAction(exitAction)

        self.setWindowTitle("PyQt5 Basic Menubar")
        self.show()


if __name__ == "__main__":

    app = QApplication(sys.argv)
    ex = basicMenubar()
    sys.exit(app.exec_())
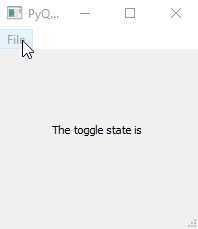
PyQt5 メニューバーのチェック可能なメニュー項目
チェック可能なメニュー項目はチェックまたはチェック解除でき、ユーザーがクリックするたびに状態が切り替わります。
QAction オブジェクトを作成するときにメニュー項目をチェック可能にするには、キーワード引数 checkable を True に設定する必要があります。
import sys
from PyQt5.QtWidgets import QMainWindow, QAction, qApp, QApplication, QLabel
from PyQt5.QtGui import QIcon
from PyQt5.QtCore import Qt


class basicMenubar(QMainWindow):
    def __init__(self):
        super().__init__()

        self.initUI()

    def initUI(self):

        self.setGeometry(200, 200, 200, 200)

        self.label = QLabel("The toggle state is ")
        self.label.setAlignment(Qt.AlignCenter)

        self.setCentralWidget(self.label)

        toggleAction = QAction("&Toggle Label", self, checkable=True)
        toggleAction.setStatusTip("Toggle the label")
        toggleAction.triggered.connect(self.toggleLabel)

        exitAction = QAction(QIcon("exit.png"), "&Exit", self)
        exitAction.setShortcut("Ctrl+Q")
        exitAction.setStatusTip("Exit application")
        exitAction.triggered.connect(qApp.quit)

        self.statusBar()

        menubar = self.menuBar()
        fileMenu = menubar.addMenu("&File")
        fileMenu.addAction(toggleAction)
        fileMenu.addAction(exitAction)

        self.setWindowTitle("PyQt5 Basic Menubar")
        self.show()

    def toggleLabel(self, state):
        self.label.setText("The toggle state is {}".format(state))


if __name__ == "__main__":

    app = QApplication(sys.argv)
    ex = basicMenubar()
    sys.exit(app.exec_())
toggleAction = QAction("&Toggle Label", self, checkable=True)
checkable プロパティは、QAction オブジェクトを開始するときにメニュー項目をチェック可能にするために True に設定する必要があります。
または、オブジェクトの作成後に setCheckable() メソッドを使用できます。
self.setCheckable(True)
チェック可能なアイテムの状態は、コールバック関数のパラメーターです。したがって、関数を定義するときに引数にリストする必要があります。お気に入り
def toggleLabel(self, state):
state はブール型で、選択されている場合は True、選択されていない場合は False の値になります。
