How to Use OpenCV in Rust
Rust is the programming language that helps with writing rapid (in terms of execution speed) and more authentic software. It deals with memory management with a substantial type system and ownership model.
It is a static compiled language, meaning if we write a Rust program, we can compile it into a binary executable file, and this file can run in any other system where Rust is not installed. This varies from other languages since they need an interpreter to run the code.
It is also good at handling errors, catching bugs, data representation and concurrency. This language is not recommended for beginners; you should be familiar with one or more programming languages for better understanding.
Rust Commands
First, let’s get a basic overview of some Rust commands:
rustc: Therustcis a Rust compiler used for compiling the Rust code. It takes the input code in Rust and compiles it into binary code/machine-readable code.rustup: Therustupcommand is used to install and update Rust.cargo: This is the Rust build system and package manager, similar to other languages likepipfor Python,gemfor Ruby andnpmfor JavaScript.
The rest of the commands can be checked using cargo in the terminal.
Install Rust
You can skip this step if you already have installed Rust on your system. If you don’t have Rust installed on your system, you can follow the steps given below for your system:
For the Linux/Mac System
To install Rust in the Unix system, copy and paste the below command into your terminal and hit Enter.
curl https://sh.rustup.rs -sSf | sh
This code will download and install Rust on your system.
If it asks for installation options, we want to opt for default installation, so we select Proceed with installation (default) by typing 1 and pressing Enter.
After downloading, at the end of the screen, you can see "Rust is installed now. Great!" and below that, "Press the Enter key to continue", so we hit Enter and close the terminal.
To check whether Rust has been installed correctly, we can again open a new terminal and use the below command to show the Rust version.
rustc --version
If the version number, commit hash, and commit date appears, then we can say that Rust has been installed successfully.
Get Started With Rust
First, go to the terminal and type the following code. Remember the path where Rust is installed should be the same path in the terminal:
cargo
This will show up all the packages and commands used in Rust.
Then, type the below code for creating a new project in Rust using cargo. This is a binary coded project with the name opencv-rust.
cargo new --bin opencv-rust
Now, you will see the output "Created binary (application) opencv-rust package" on your screen. With this command, we have created a new binary file named opencv-rust.
Now, open this project using the below command.
cd opencv-rust
This will update your path and will open up your project. Now, to write code for this project, enter the following:
code .
This will open up your Visual Studio Code.
Now, go to the main.rs file in src on the left. Select and open main.rs; on the right side, we can see a boilerplate code already present. Then, go to the VSCode terminal using Ctrl+Shift+` and run the below commands.
cargo build
cargo run
This will compile packages and dependencies and run the code. In the VSCode terminal, we can see the output of the boiler code.
Use OpenCV in Rust
Before installing OpenCV, we need to install some packages compiler and project build system for OpenCV. To install, we need to install Homebrew or brew, a package manager for mac. We can install brew using this link.
After this, we now install the below packages and build systems for OpenCV one by one. First is the pkg-config, a tool used for compiling libraries.
brew install pkg-config
Second is installing the CMake system, which is a build system that provides support to build native libraries. For this, follow the below code.
brew install cmake
Now installing the OpenCV package and llvm, which includes all tools, libraries, and header files needed to process OpenCV and convert it into object files.
brew install --debug llvm-dev
brew install libopencv-dev
libopencv-dev installs OpenCV libraries. After this step, it is critical to export the environment path.
We need to create an OpenCV program to check if OpenCV works correctly. Looking at the left side, we can find the Cargo.toml file. Click on it, and the file will open on the right side, then the dependencies below.
Under dependencies, add the following code.
opencv = "0.73.0"
bytes = "1"
anyhow = "1"
To find the version name, we can visit the website crates.io, search OpenCV and find the latest version available. When writing this article, we found the latest version was 0.73.0, so we updated it in VSCode.
Now, head towards the main.rs file in src and write the simple OpenCV-Rust program below.
This is a simple Rust code that flips an image horizontally using OpenCV.
Code Snippet - (Rust):
use anyhow::Result;
use opencv::{
    core::{self, Mat, Vector},
    imgcodecs,
};

fn main() -> Result<()> {
    let source_img = imgcodecs::imread("car.png", imgcodecs::IMREAD_UNCHANGED)?;

    // Flipping image horizontally
    let mut destination_arr = Mat::default();
    core::flip(&source_img, &mut destination_arr, 1)?;

    // Creating an output image
    let arguments: Vector<i32> = Vector::new();
    imgcodecs::imwrite("final-output.png", &destination_arr, &arguments)?;
    Ok(())
}
First, we have imported a few methods from anyhow and opencv libraries: Result, Mat, Vector, and imgcodecs as shown above. Then, we have created a main function which will return a Result.
We are using Result from the anyhow library for automatically handling the errors in the output.
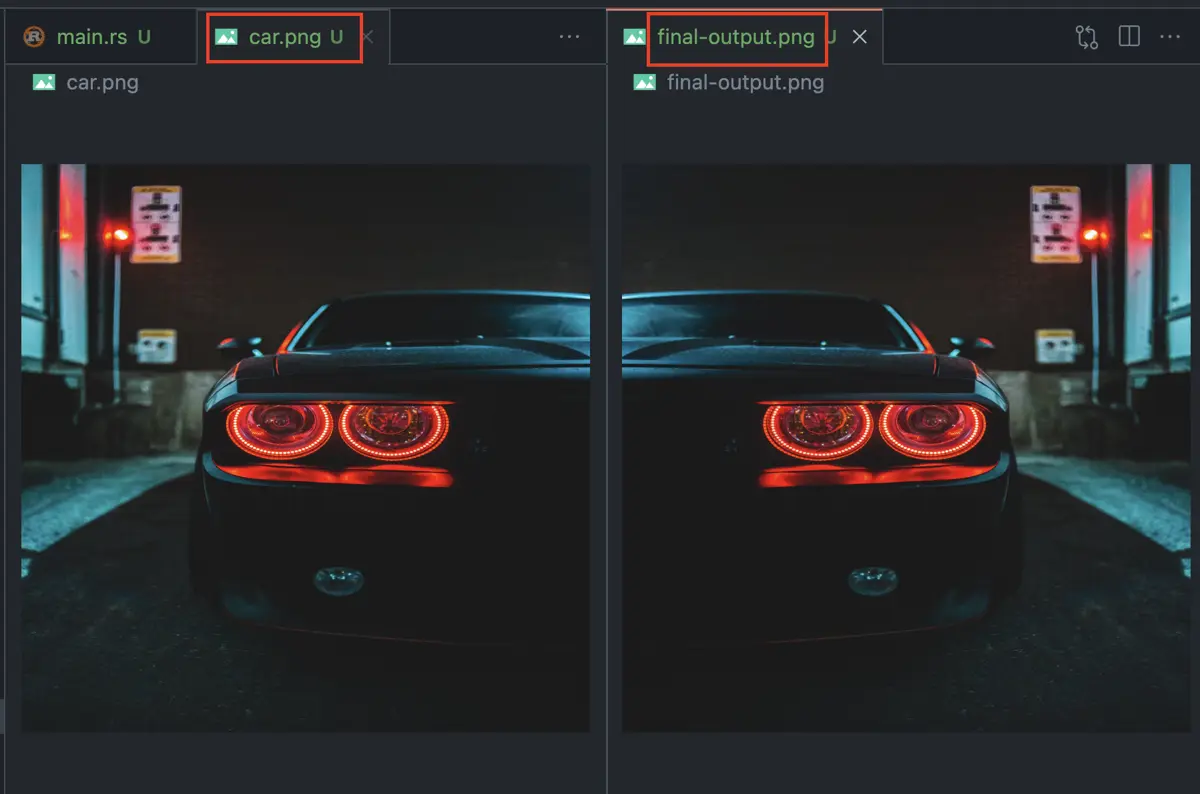
To read the source image inside our Rust code, we have to use the imread of OpenCV from the imgcodecs and store it inside the source_img variable. For this example, we will use a car image whose filename and extensions are car.png.
Now that we have read the image, we have to create a destination_Arr inside which we will pass the Mat, a multi-channel array. To flip the image horizontally, we have to use the flip from the OpenCV library and pass the source_img, destination_arr and 1 to the flip method.
The last parameter, 1, will flip the image horizontally. If you want to flip the image vertically, you can pass 0 instead of 1.
To save the flipped image as the output, we have to use the imwrite method of OpenCV. Here, you can give any name to the output file by passing the file name to the first parameter.
Finally, we are ready to run the code. We have to run the below two commands to build and run the code.
cargo build
cargo run
Output:
This will compile and run the Rust code. And the output for this command is shown above.

Sahil is a full-stack developer who loves to build software. He likes to share his knowledge by writing technical articles and helping clients by working with them as freelance software engineer and technical writer on Upwork.
LinkedIn