How to Create Navbar in React

We will demonstrate how to create a Navbar in React.
Navbar in React
A navbar is a section of a GUI intended to help visitors access your website’s information.
We will first create a new project using npx in CLI to create a navbar.
# CLI
npx create-react-app navigation
Or by using npm.
# CLI
npm init create-react-app navigation
Or by using yarn.
# CLI
yarn create react-app navigation
Once we have created a new project in React. We will open it in our VS Code by going into the navigation directory and typing the following command.
# CLI
cd navigation
code .
Using the terminal, we can start our app.
# React Terminal
npm start
Let’s create a new components folder in the src folder. Inside the components folder, we need to create another Navbar folder. In the Navbar folder, let’s create two new files called Navbar.js and Navbar.css.
In Navbar.js, we must import React and Component from React and create the Navbar class.
The code in Navbar.js will look like this.
# react
import React, { Component } from "react";

export class Navbar extends Component{
  render(){
    return{

    }
  }
}
Let’s return a basic navbar.
# react
import React from "react";
import { MenuItems } from "./MenuItems";
import { Nav } from "react-bootstrap";

export default function Navbar() {
  return (
    <Nav className="NavbarItems">
      <h1 className="Navbar-logo">React</h1>
      <div className="menu-icon"></div>
      <ul>
        <li><a href="#"></a></li>
      </ul>
    </Nav>
  );
}
We will create another file named MenuItems.js to define an array of menu items. If we want to change it in the future, we can easily change it from one file.
The code in MenuItems.js will look like this.
# react
export const MenuItems = [
  {
    Title: "Home",
    url: "#",
    cName: "nav-links"
  },
  {
    Title: "About Us",
    url: "#",
    cName: "nav-links"
  },
  {
    Title: "Our Services",
    url: "#",
    cName: "nav-links"
  },
  {
    Title: "Contact Us",
    url: "#",
    cName: "nav-links"
  },
  {
    Title: "Sign Up",
    url: "#",
    cName: "nav-links-mobile"
  }
];
The title will be the menu item’s name, whereas the URL will be the link to that page, and cName will be the class name. We can copy and paste this structure for as many menu items as we want. The last item is for the mobile menu, so add nav-links-mobile.
We will import MenuItems into Navbar.js.
# react
import { MenuItems } from "MenuItems"
We will map MenuItems. Navbar.js will look like this.
# react
import React from "react";
import { MenuItems } from "./MenuItems";
import { Nav } from "react-bootstrap";

export default function Navbar() {
  return (
    <Nav className="NavbarItems">
      <h1 className="Navbar-logo">React</h1>
      <div className="menu-icon"></div>
      <ul>
        {MenuItems.map((item, index) => {
          return (
            <li key={index}>
              <a className={item.cName} href={item.url}>
                {item.Title}
              </a>
            </li>
          );
        })}
      </ul>
    </Nav>
  );
}
We will import Navbar.js in App.js.
# react
import "./styles.css";
import Navbar from "./components/Navbar/Navbar";

export default function App() {
  return (
    <div className="App">
      <Navbar />
    </div>
  );
}
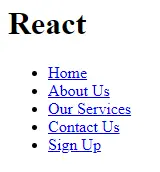
Output:
Let’s add some CSS code to make it look like a navigation menu.
# react
body {
  margin: 0;
  padding: 0;
}
.NavbarItems {
  background-color: black;
  margin: 0;
  padding: 0;
  height: 80px;
}

.NavbarItems h1 {
  color: white;
  padding: 10px;
  font-size: 25px;
}
.logo {
  width: 20%;
  float: left;
}
.navbar-ul {
  width: 80%;
  float: left;
  list-style: none;
  margin: 0px;
  padding: 0;
}
li {
  display: inline;
  list-style: none;
  font-size: 18px;
  padding: 10px;
  line-height: 80px;
}
.nav-links {
  color: white;
  text-decoration: none;
}
.nav-links-mobile {
  color: white;
  text-decoration: none;
}
li:hover {
  background-color: white;
}
li:hover .nav-links {
  color: black;
}
li:hover .nav-links-mobile {
  color: black;
}
Output:

That’s how we can make navigation in React and import it into any page using a component.

Rana is a computer science graduate passionate about helping people to build and diagnose scalable web application problems and problems developers face across the full-stack.
LinkedIn