How to Use React and PHP Together
- React and PHP Together
- Advantages Of Using React and PHP Together
- Disadvantages Of Using React and PHP Together
- Create a Contact Form Using React and PHP Together

We will introduce React and PHP in an application with advantages and disadvantages.
React and PHP Together
If you have an old website built in PHP and are looking to change the frontend of the website using React, you can use React with PHP without any issues.
There are quite a few websites built using React and PHP together.
Advantages Of Using React and PHP Together
PHP is a widely used language that supports many large websites. Using PHP as a backend in our React application has the following benefits.
- PHP is an easy language, making it easy to learn and use in our application.
- PHP is a tried and true mature language because it has been used in many websites on the web.
- PHP has tons of libraries and frameworks that we can use to accomplish many backend tasks.
- PHP is one of the old languages because it has excellent community support.
- There are plenty of ways to scale PHP.
Disadvantages Of Using React and PHP Together
Some disadvantages of using PHP as a backend language in our React application are as follows.
- PHP is not a JavaScript-based language like
Node. - PHP is slower than available JavaScript-based languages like
Node. Nodeprovides better solutions than PHP solutions at scale.NodeandReactwork better because they are both JavaScript-based languages.- Another disadvantage is that if we use React in the
MVC frameworkof PHP, React will only act as aVinMVC.
Create a Contact Form Using React and PHP Together
We will go through an example of using React and PHP together and build a contact form to use React and PHP.
We will create the frontend part in React and handle the backend in PHP. We may need to use a web server like Apache or Nginx for the backend.
You can install Wamp for windows and Mamp for mac. We will be sending an email from the contact form using PHP.
So, let’s create a new application by using the following command.
# react
npx create-react-app my-app
After creating our new application in React, we will go to our application directory using this command.
# react
cd my-app
Now, let’s run our app to check if all dependencies are installed correctly.
# react
npm start
Once it is done, we will open the project in our IDE. Then open the App.js file from ./src/App.js.
Clean up our code by deleting everything inside our div with class App. It will look like this.
# react
import "./styles.css";

export default function App() {
  return (
    <div className="App">
    </div>
  );
}
Now, let’s create a basic contact form with input fields of Name, Email, and text area for message and a button to submit the contact form. Our code in App.js will look like below.
# react
<div className="App">
      <h1>Contact Me</h1>
      <div className="container">
        <form action="/action_page.php">
          <label>Full Name</label>
          <input type="text" id="name" name="name" placeholder="Enter your name.."/>
          <br/>
          <label>Email</label>
          <input type="email" id="email" name="email" placeholder="Enter your email"/>
          <br/>
          <label>Subject</label>
          <textarea id="subject" name="subject" placeholder="Enter your message.."></textarea>
          <input type="submit" value="Submit"/>
        </form>
      </div>
    </div>
Once we have created our contact form, let’s style our contact form with CSS to look attractive. Creating React app using command already has imported a CSS file in App.js by default.
We will align the items, add widths, and color the background and button. So our code in style.css will look like below.
# react
input[type=text], input[type=email], textarea {
  width: 100%;
  padding: 12px;
  border: 1px solid #ccc;
  border-radius: 4px;
  box-sizing: border-box;
  margin-top: 6px;
  margin-bottom: 16px;
  resize: vertical;
}

input[type=submit] {
  background-color: #04AA6D;
  color: white;
  padding: 12px 20px;
  border: none;
  border-radius: 4px;
  cursor: pointer;
}

input[type=submit]:hover {
  background-color: #45a049;
}

.container {
  border-radius: 5px;
  background-color: #f2f2f2;
  padding: 20px;
}
Once we have styled our contact form, we can now use the npm start command to open the browser with localhost to see the contact form we just coded.
Output:
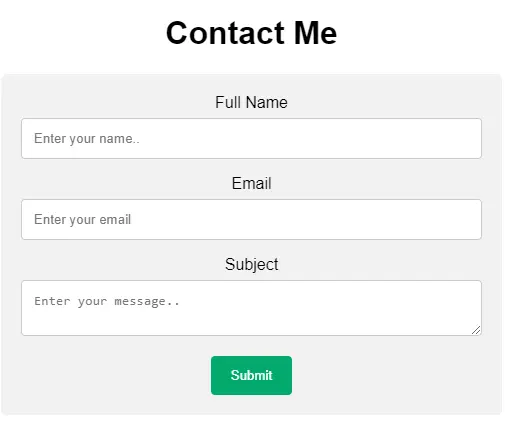
We have created a basic contact form in React. We will need an initial state and submit handler function to make it work.
In App.js, we will add a state for our contact form using a constructor.
# react
constructor(props) {
  super(props);
  this.state = {
    name: '',
    email: '',
    message: '',
  }
}
Once we have created a constructor adding the state of our contact form, we will create our form submit handler method like this.
# react
FormSubmittionHandler( event ) {
  event.preventDefault();
  console.log(this.state);
}
As you can see in the above handler, we are logging the state to check if we have all the values saved in the state using console.log.
We will set our initial states as form input values. Whenever the input is changed, it will set our state to the current input value that can be used easily in our form handler.
So our code in App.js will look like below.
# react
import "./styles.css";
import React, { Component } from "react";

export default class App extends Component {
  constructor(props) {
    super(props);
    this.state = {
      name: "",
      email: "",
      message: ""
    };
  }
  FormSubmittionHandler(event) {
    event.preventDefault();
    console.log(this.state);
  }
  render() {
    return (
      <div className="App">
        <h1>Contact Me</h1>
        <div className="container">
          <form action="#">
            <label>Full Name</label>
            <input
              type="text"
              id="name"
              name="name"
              placeholder="Enter your name.."
              value={this.state.name}
              onChange={(e) => this.setState({ name: e.target.value })}
            />
            <br />
            <label>Email</label>
            <input
              type="email"
              id="email"
              name="email"
              placeholder="Enter your email"
              value={this.state.email}
              onChange={(e) => this.setState({ email: e.target.value })}
            />
            <br />
            <label>Subject</label>
            <textarea
              id="subject"
              name="subject"
              placeholder="Enter your message.."
              value={this.state.message}
              onChange={(e) => this.setState({ message: e.target.value })}
            ></textarea>
            <input type="submit" value="Submit" onClick={e => this.FormSubmittionHandler(e)} />
          </form>
        </div>
      </div>
    );
  }
}
Now, let’s fill out the contact form and test if values from input fields are being sent or not.
Output:
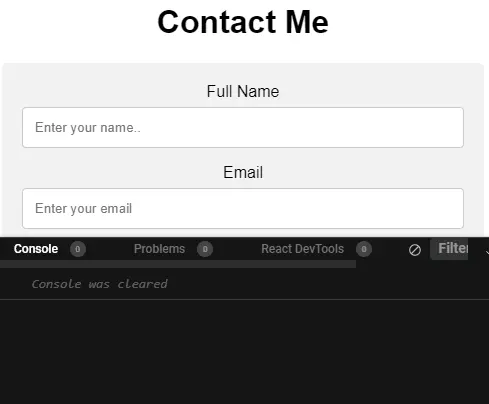
As you can see in the above example, we can send input values from our contact form to a submission handler function.
We need to add two more properties to our state error and sent.
The error will capture the value of the error if our email is not sent and sent will have true or false values based on if the email is sent or not.
# react
this.state = {
  name: '',
  email: '',
  message: '',
  sent: false,
  error: null
}
Our frontend is ready now. We need a backend language to send emails to our mailbox using that contact form information.
If you have already created this project in an Apache or Nginx folder, you can go to the root of the project and create a folder called api, and inside this, we will create an index.php file.
From the React app, we will send a post request to php api. In our contact form, we will make names and emails as required.
Because these values play a vital role in sending an email, we must check these fields. If these fields are empty, then we will throw an error.
# php
<?php
header("Access-Control-Allow-Origin: *");
$restJson = file_get_contents("php://input");
$_POST = json_decode($restJson, true);

if (empty($_POST['name']) && empty($_POST['email'])) die();

if ($_POST)
	{

	http_response_code(200);
	$mailSubject = $_POST['name'];
	$mailTo = "ranahusnain770@gmail.com";
	$mailFrom = $_POST['email'];

	$mailMsg = $_POST['number'] . $_POST['message'];

	$mailHeader = "MIME-Version: 1.0\r\n";
	$mailHeader.= "Content-type: text/html; charset=UTF-8\r\n";
	$mailHeader.= "From: <" . $from . ">";
	mail($mailTo, $mailSubject, $mailMsg, $mailHeader);

	echo json_encode(array(
		"sent" => true
	));
	}
  else
	{
	echo json_encode(["sent" => false, "message" => "Something went wrong"]);
	}
?>
As you can see in the above code, we have set the response code to 200, OK.
In the above PHP code, we are checking for the name and email, and then using the PHP mail() function, we are sending an email to my email account with the contact form data.
If we try to navigate our API folder, we will not see anything. It dies because we did not send the API’s name and email in a post request.
So, our API in PHP is ready now. We need to send the data from React contact form to our API.
We will install Axios using npm. Axios works very well with React for HTTP requests.
# react
npm install axios
Now, we will import Axios in our App.js.
# react
import axios from `axios`;
We will create a constant for our API path before the App class.
# react
const PATH = 'http://localhost/api/index.php';
Once we have created a constant for our API path, we will now use Axios inside our FormSubmittionHandler method to send our data from state to our API.
# react
  FormSubmittionHandler(event) {
    event.preventDefault();
    axios({
      method: 'post',
      url: `${PATH}`,
      headers: { 'content-type': 'application/json' },
      data: this.state
    })
      .then(result => {
        this.setState({
          sent: result.data.sent
        })
      })
      .catch(error => this.setState({ error: error.message }));
  }
Once we have added Axios in our FormSubmittionHandler method, we send emails through our contact form.
To view the results, click here.
So in this simple way, we can easily use React and PHP together in one application.

Rana is a computer science graduate passionate about helping people to build and diagnose scalable web application problems and problems developers face across the full-stack.
LinkedIn