Tkinter Photoimage
-
Use the
photoimage()Method to Display Image in Tkinter -
Use the
resize()Method to Resize an Image in Tkinter - Photoimage Zoom in Tkinter
In this article, you will be introduced to the photoimage() method and how to use it in Tkinter. Tkinter is very popular among Python programmers because it lets you do some interesting things with Python.
You can use this method for adding a picture to a button, a label, or a canvas. It makes the application more interactive, beautiful and useful.
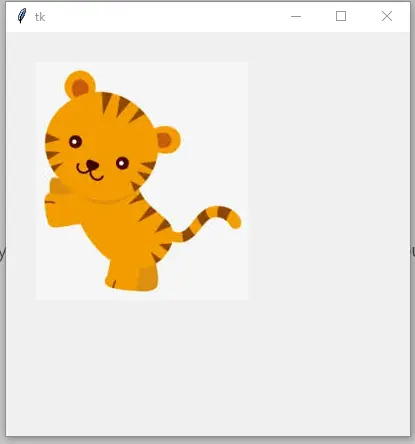
Use the photoimage() Method to Display Image in Tkinter
PhotoImage can only display images that are supported by the widget. If they cannot be displayed on the widget, it will return an error.
The general widgets to display an image are labels, buttons and canvas.
We need to install the Pillow module to use the PhotoImage() method, so install this module using this command.
pip install Pillow
from tkinter import *
from PIL import ImageTk, Image

# CreateTK object
gui = Tk()
# Create canvas object
cnv = Canvas(gui, width=400, height=400)
cnv.pack()
# create an object of PhotoImage
photo = ImageTk.PhotoImage(Image.open("lion.png"))
cnv.create_image(30, 30, anchor=NW, image=photo)
gui.mainloop()
We import the ImageTk and Image classes into this code. The ImageTk class has several methods; one is the PhotoImage() method that helps display images.
We used the open() method from the Image class. The open() method contains the file path you want to display and accepts several formats like jpg, png, gif, and more.
In this case, the canvas widget is used to display an image; in the next example, we will use the Label widget to display an image.
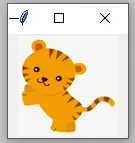
Use the resize() Method to Resize an Image in Tkinter
Sometimes we need to resize an image in GUI; fortunately, Tkinter provides the resize() method that helps to resize an image.
from tkinter import *
from PIL import Image, ImageTk

gui = Tk()

width = 100
height = 100
photo = Image.open("lion.png")
photo = photo.resize((width, height), Image.ANTIALIAS)
# create an object of PhotoImage
photoImg = ImageTk.PhotoImage(photo)
photo_label = Label(gui, image=photoImg)
photo_label.pack()
gui.mainloop()
When we work with the resize() method, we cannot pass the image in PhotoImage() directly because we will be unable to use the resize() method after passing the image in the PhotoImage() method. The resize() method takes two parameters, the width and the height.
The resized image has passed in this code’s PhotoImage() method. The Label widget displays an image using the image attribute.
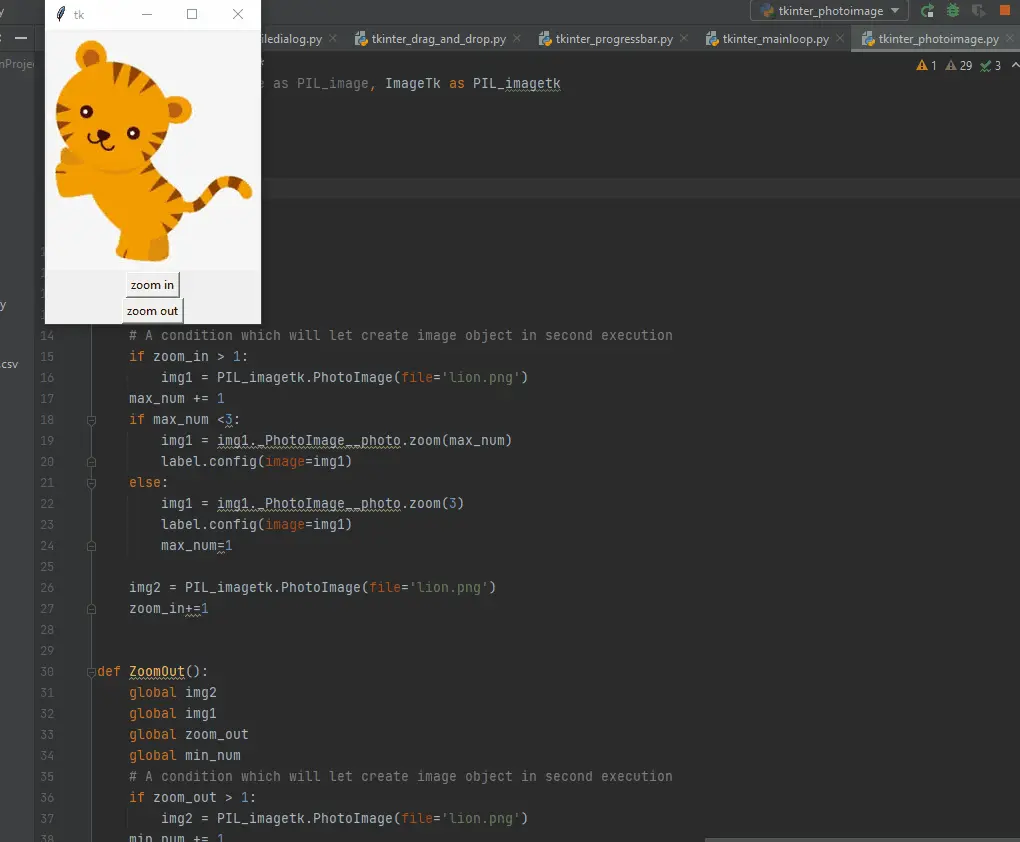
Photoimage Zoom in Tkinter
In this code, you will learn how to use the zoom feature in Tkinter.
The ZoomIn() function helps to zoom in on the image. The zoom_in variable restrains to create an image object until the second execution.
img1 = img1._PhotoImage__photo.zoom(max_num)
Since we are using a global image object, we set the if condition by the zoom_in variable. The _PhotoImage__photo.zoom() method helps zoom in the image; this method takes an integer.
We passed the max_num variable in this method; this variable will be incremented by 1 when the ZoomIn() function calls.
Let’s demonstrate the ZoomOut() function, this function works the same as ZoomIn() function.
img2 = img2._PhotoImage__photo.subsample(min_num)
The _PhotoImage__photo.subsample() method makes it different from ZoomIn() function.
This method helps to reduce an image; the method takes an integer. In short, when the ZoomOut() function calls the image, it will be reduced.
from tkinter import *
from PIL import Image as PIL_image, ImageTk as PIL_imagetk

window = Tk()
zoom_in = 1
zoom_out = 1
max_num = 1
min_num = 1


def ZoomIn():
    global img1
    global img2
    global zoom_in
    global max_num
    # A condition which will let create image object in second execution
    if zoom_in > 1:
        img1 = PIL_imagetk.PhotoImage(file="lion.png")
    max_num += 1
    if max_num < 3:
        img1 = img1._PhotoImage__photo.zoom(max_num)
        label.config(image=img1)
    else:
        img1 = img1._PhotoImage__photo.zoom(3)
        label.config(image=img1)
        max_num = 1

    img2 = PIL_imagetk.PhotoImage(file="lion.png")
    zoom_in += 1


def ZoomOut():
    global img2
    global img1
    global zoom_out
    global min_num
    # A condition which will let create image object in second execution
    if zoom_out > 1:
        img2 = PIL_imagetk.PhotoImage(file="lion.png")
    min_num += 1
    if min_num < 3:
        img2 = img2._PhotoImage__photo.subsample(min_num)
        label.config(image=img2)
    else:
        img2 = img2._PhotoImage__photo.subsample(3)
        label.config(image=img2)
        min_num = 1

    img1 = PIL_imagetk.PhotoImage(file="lion.png")
    zoom_out += 1


img1 = PIL_imagetk.PhotoImage(file="lion.png")

img2 = PIL_imagetk.PhotoImage(file="lion.png")
label = Label(window, image=img1)
label.pack()

btn = Button(window, text="zoom in", command=ZoomIn)
btn.pack()

btn2 = Button(window, text="zoom out", command=ZoomOut)
btn2.pack()
window.mainloop()
Output:

Hello! I am Salman Bin Mehmood(Baum), a software developer and I help organizations, address complex problems. My expertise lies within back-end, data science and machine learning. I am a lifelong learner, currently working on metaverse, and enrolled in a course building an AI application with python. I love solving problems and developing bug-free software for people. I write content related to python and hot Technologies.
LinkedIn