How to Create and Store Configurations in Node.js
Managing configuration files can be a daunting task in Node.js for novice developers. It’s true despite having libraries such as convict, husks, or config that make the development and management of configuration files easier.
One of the best practices that make the storage and management of configuration files easier is creating a centralized file that stores the files and ensures that the files can be changed without affecting the code.
Having a centralized file that can then be extended across other environments makes life easier for other developers reading your code besides promoting reusability.
In Node.js, configuration files are normally stored in a default configuration file; however, they can be overridden and extended by external sources or environmental variables.
Configuration files can be in different file formats; these include the common ones such as the .json, YAML, and others such as .json5 or .hjson.
Install node-config to Create and Store Configurations in Node.js
Node-config is an npm package that allows us to create and store different deployment configuration files. We can define default parameters to extend to development, production, or staging environments using this package.
We can install and set up Node-config using the npm package manager. However, we first need to create a simple express server and then navigate to the application’s folder, as shown here.
Once the application server is in place, we can install the config package by running the command below.
$ npm install config
The command above will add the config package as one of our dependencies in the package.json file, as shown below.
{
  'name': 'myapp', 'version': '1.0.0', 'description': '', 'main': 'index.js',
      'scripts': {'test': 'echo "Error: no test specified" && exit 1'},
      'author': 'Isaac Tony', 'license': 'MIT',
      'dependencies': {'config': '^3.3.7', 'express': '^4.17.2'}
}
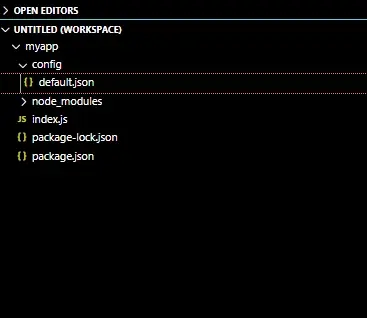
We can now create a file that will house all our default configuration files by first creating a folder that we will name config and then creating a file named default.json, as shown in the application structure below.
As shown above, although when using Node-config, we have the flexibility in choosing the type of file that will store our configurations, we have chosen to stick to the .json format as it is the default format.
Now in the file default.json, we can add our configuration setting in our application. Here are some basic configs that we can add to the default.json file.
{
  'server': {'port': 3000},
      'db': {'host': 'localhost', 'port': 27017, 'name': 'mongodb'}
}
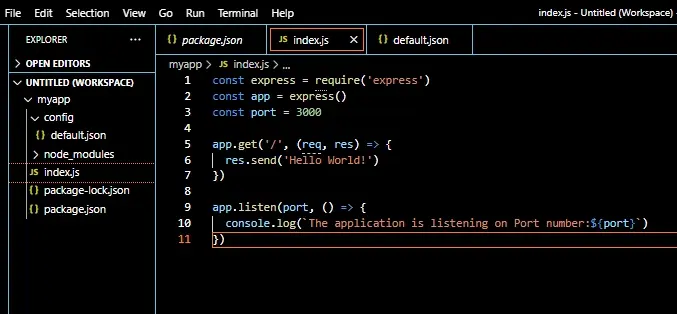
Now using the config.get function, we can retrieve these parameters and settings and use them in our application, as shown in the index.js file below.
const express = require('express')
const app = express()

const config = require('config');
const port = config.get('server.port');
const host = config.get('db.host');


app.get('/', (req, res) => {res.send('Hello World!')})

app.listen(
    port, host,
    () => {console.log(`The application is listening on ${host}:${port}`)})
Once we have this default configuration file in place, we can easily extend these configuration settings to production, testing, etc., by creating configuration files for the respective environment.
We can also perform environment-specific overrides by repeating config variables in the default config file in another environment-specific configuration file or through the command line by creating the NODE-CONFIG variable before starting the application.

Isaac Tony is a professional software developer and technical writer fascinated by Tech and productivity. He helps large technical organizations communicate their message clearly through writing.
LinkedIn