How to Create Read-Only User in MySQL
- Create a Read-Only User in MySQL
- Create a New MySQL User Account
-
Give the User Access to the
SELECTCommand - Conclusion
It could frequently be required for a user to create access using read-only credentials to a database. The user is only allowed to see or read the data kept in the database; they are not allowed to change its contents or the way it is set up.
This article mainly discusses how to create a read-only user in MySQL. You need to make a user who can only access a database in read-only mode.
Create a Read-Only User in MySQL
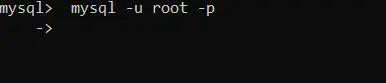
To create the read-only user in MySQL, use the following command at your terminal or command prompt to log in as a MySQL administrator.
mysql -u root -p
The password entry prompt will appear. Then enter the root account’s password.
Output:
Create a New MySQL User Account
CREATE USER 'report'@'%' IDENTIFIED BY 'secret';
The user report may use the % in the above command, as shown, to join from any host. You can restrict access after specifying the host from which the user can connect.
The user will only be able to join from the same machine if this information is omitted.
Output:

Give the User Access to the SELECT Command
GRANT SELECT ON database_name.* TO 'report'@'%';
You must possess both of these privileges you are granting and the GRANT OPTION privilege to use GRANT. (Alternatively, you can give any account any privilege if you have the UPDATE privilege for the MySQL system schema grant tables).
With this command, the user is granted only read-only access to the database on the local host. Type the following command if you are sensible of the hostname or IP address of the host where the collector will install.
Output:

GRANT SELECT ON database_name.* TO 'report'@'host_name or IP_address';
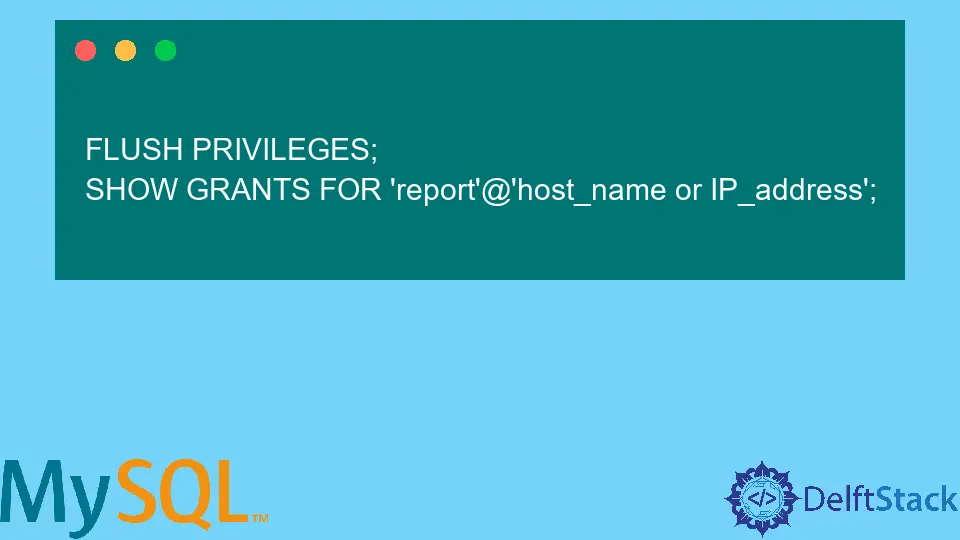
To save and apply the privilege adjustments, run the following command.
FLUSH PRIVILEGES;
SHOW GRANTS FOR 'report'@'host_name or IP_address';
Enter the word quite at the end, and display the user’s authorized privileges to confirm.
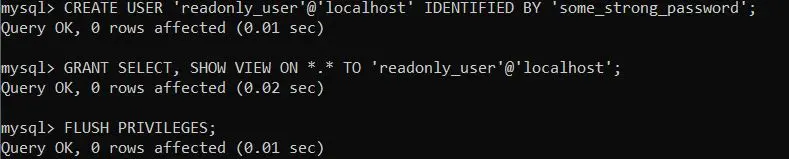
Because MySQL 8 differs from previous versions, we must follow the instructions. But you have to do it in two phases, sequentially:
CREATE USER 'readonly_user'@'localhost' IDENTIFIED BY 'some_strong_password';
GRANT SELECT, SHOW VIEW ON *.* TO 'readonly_user'@'localhost';
FLUSH PRIVILEGES;
MySQL developers want additional features, and MySQL 8.0 delivers a number of them in the fields of SQL, JSON, regular expressions, and GIS.
UTF8MB4 has been used as the default character set in version 8.0 because developers also want to be able to store Emojis.
Finally, there are enhancements to Datatypes, including enhanced IPv6 and UUID capabilities and bit-wise operations on BINARY datatypes.
Output:
The following are further read-only permissions.
| Read-Only Permissions | Description |
|---|---|
SHOW VIEW |
Allows them to show view schema. |
SHOW DATABASES |
Allows them to show databases. |
REPLICATION CLIENT |
Allows them to check replication/slave status. But they need to permit all DB. |
PROCESS |
Allows them to check the running process. It will work with all DB only. |
The following are several permissions you may give a user.
| Permissions | Description |
|---|---|
ALL |
This would allow a MySQL user all access. |
ALL PRIVILEGES |
MySQL users would have complete access. |
CREATE |
Enables them to develop new databases or tables. |
DROP |
Enables them to remove databases or tables. |
DELETE |
Enables them to remove rows from tables. |
INSERT |
Enables them to insert rows into tables. |
SELECT |
Enables them to read through a database using the SELECT command. |
SHOW VIEW |
Enables them to show view schema. |
REPLICATION CLIENT |
Enables them to check replication/slave status, but they need to permit all DB. |
PROCESS |
Enables them to check the running process. It will work with all DB only. |
UPDATE |
Enables them to update table rows. |
GRANT OPTION |
Enables them to grant or remove other user privileges. |
Use the below framework to provide permission to a particular user:
GRANT [type of permission list separated by a comma] ON [database name].[table name] TO ‘[username]’@'[hostname]’;
Conclusion
Throughout this article, We discussed creating a read-only user in MySQL. Using this, the user only accesses the database for read-only purposes and can only access it from the local host.
A password always identifies the read-only user. As mentioned before, we can use several commands in the MySQL command line to create a user to access read-only data in the database.

Nimesha is a Full-stack Software Engineer for more than five years, he loves technology, as technology has the power to solve our many problems within just a minute. He have been contributing to various projects over the last 5+ years and working with almost all the so-called 03 tiers(DB, M-Tier, and Client). Recently, he has started working with DevOps technologies such as Azure administration, Kubernetes, Terraform automation, and Bash scripting as well.