Vanilla JavaScript
- Set Vanilla JavaScript to the Web Page
- Vanilla JavaScript Selectors
- Vanilla JavaScript with Arrays
- Add, Remove, Toggle and Check Classes on an Element
- CSS Style with Vanilla JavaScript
- Conclusion

JavaScript is the most popular language for web designing with HTML and CSS technologies.
This article includes Vanilla JS, which refers to plain JavaScript.
In other words, we can use JavaScript without any additional libraries. Everyone initializes Vanilla JavaScript as one of the lightest-weight frameworks.
We can learn Vanilla JavaScript easily. Vanilla JavaScript creates significant and impactful web applications, and most famous websites currently use Vanilla JS for their websites.
Facebook, Google, YouTube, Yahoo, Wikipedia, LinkedIn, Microsoft, Apple, etc., are websites that mention Vanilla script on their home page. Let’s look at how to set up Vanilla JavaScript.
Set Vanilla JavaScript to the Web Page
JavaScript executes with CSS and HTML. So, to get a JavaScript function works, it should be inside an HTML document or connect with an HTML document.
<!DOCTYPE html>
<html>
    <title>Vanilla JavaScript</title>
    </html>
<body>
<script>
        var myName = "Rashmi";
		alert(myName);
    </script>
</body>
Insert a <script> anywhere between the <body> tag. Also, there is another way to add a JavaScript file to an HTML file.
We can add a JavaScript source file within the HTML document’s <head> tag.
<head>
    <script src="script.js"></script>
</head>
Adding the <script> tag with the path of the source JavaScript file with the src tag.
Vanilla JavaScript Selectors
Selectors use to get elements in DOM. Some of them include getElementById, getElementByClassName, getElementByTagName, etc.
We can use getElementById() to get elements by their id. HTML uses an id for each component we need.
When adding a JavaScript function to that element, we can call that element in the script file with the function getElementById.
Let’s take a look at the following instance.
<!DOCTYPE html>
<html>
    <title>Vanilla JavaScript</title>

<body>
    <h3>Hello Vanilla Javascript</h3>
    <p id="demo">vanilla javascript</p>
        <script>
            document.getElementById("demo").innerHTML= 5+6;
            console.log('no errors');
        </script>
</body>
</html>
Its main target is creating an id and getting it by calling the function getElementById. The id was created as a naming demo.
Inside a script, we called document.getElementById("demo") to get a demo element by its id.
So this JavaScript function adds two numbers and outputs a result by calling its id.
Output:

Vanilla JavaScript with Arrays
JavaScript Vanilla offers a for loop to iterate and access values within the array and node list items.
<!DOCTYPE html>
<html>
    <title>Vanilla JavaScript</title>

    <body>
  <h3>My javascript</h3>
        <p id="demo">vanilla javascript</p>
        <script>
            var countries = ["Netherlands","Canada","USA"];
			for(var i=0;i<countries.length;i++)
                console.log(i)

        </script>
</body>
 </html>
The above code used a for loop for iterating over the string array of countries.
Inside the for loop, it declared a counter variable representing the array’s current value. It has assigned the value 0.
The for loop iterates over the end of the elements in the array using the length keyword.
After each iterating, i++ should be executed. It means one should be added to the counter after each iteration.
Output:

Add, Remove, Toggle and Check Classes on an Element
Vanilla JavaScript offers the classList API, similar to the jQuery class manipulation API. The classList is read-only but performs add, remove, toggle and check for classes.
<!DOCTYPE html>
<html>
    <head>
    <title>class list</title>
    </head>
    <style>
        .myStyle {
            background-color: cornflowerblue;
            padding: 16px;
        }
    </style>
        <body>
            <button onclick="addFunc()">Add</button>
            <button onclick="removeFunc()">Remove</button>
            <button onclick="toggleFunc()">Toggle</button>

            <div id="classlist" class="myStyle">
                <p>Classlist perform</p>
            </div>
            <script>
                function addFunc() {
                    const list = document.getElementById("classlist").classList;
                    list.add("myStyle");
                    }

                function removeFunc() {
                    const listRemove = document.getElementById("classlist").classList;
                    listRemove.remove("myStyle");
                    }

                function toggleFunc() {
                    const listToggle = document.getElementById("classlist").classList;
                    listToggle.toggle("myStyle");
                    }
            </script>
        </body>
</html>
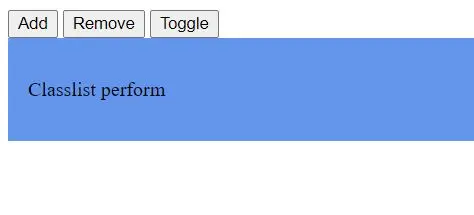
Considering the above code, it performs add, remove and toggle DOM elements on paragraph element <p>Classlist perform</p>. When clicking the button, the appearance of the <p> elements will be changed.
Inside a <script>, there are three functions created for add, remove, and toggle. addFunc() function adds a CSS style to the <p> element.
To do this, we can assign a variable to getElementByID for the classlist.
Afterward, we can call the add method to the declared variable (list.add()).It will add a background color and padding property to the <p> element.
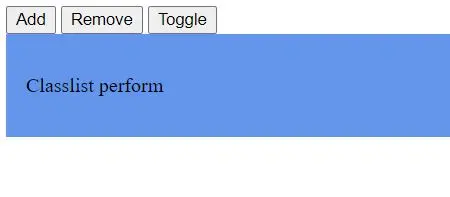
So the removeFunc will remove style properties from the <p> element, and toggleFunc toggle myStyle on and off when clicking the toggle button. We can get outputs as follows.
Add:
Remove:

Toggle:
Remember, the classList property does not support earlier versions of the Internet Explorer 9 version.
CSS Style with Vanilla JavaScript
We use the <style> element to set CSS style to HTML elements. So, Vanilla JavaScript offers a Camel case version to add CSS styles.
Use .style to get and set the inline style for HTML elements. Look at the following example.
<!DOCTYPE html>
<html lang="en">
<head>
    <meta charset="utf-8">
    <title>JS Set Inline Styles Demo</title>
</head>
<body>
    <p id="intro">Inline style setting with Vanilla Javascript</p>


    <script>

    const phara = document.getElementById("intro");

    // Appling inline styles on element
    phara.style.color = "blue";
    phara.style.fontSize = "30px";
    phara.style.backgroundColor = "yellow";
    </script>
</body>
</html>
This example set inline style using Vanilla JavaScript by adding the .style property. We can get output as follows.

Conclusion
This article went through some of the Vanilla JavaScript attributes and methods.
There are more methods and functions in Vanilla JavaScript other than these. Vanilla JavaScript is faster than other languages.
It’s recommended to learn Vanilla JavaScript before studying the JS framework. Therefore, Vanilla JavaScript is a high-level overview for beginners.
There are a few pros to using Vanilla JavaScript. We can create rich interfaces and speed execution and execution on the client side, therefore, reducing the involvement of the server.
Also, small applications do not need a server at all.

Nimesha is a Full-stack Software Engineer for more than five years, he loves technology, as technology has the power to solve our many problems within just a minute. He have been contributing to various projects over the last 5+ years and working with almost all the so-called 03 tiers(DB, M-Tier, and Client). Recently, he has started working with DevOps technologies such as Azure administration, Kubernetes, Terraform automation, and Bash scripting as well.