How to Upload Image Using JavaScript

A user can upload an image starting from an HTML file by creating an input field of the file type in the body section.
In this article, we’ll show examples of how to upload an image using JavaScript.
JavaScript Upload Image
A div tag will be used with an id of display_image to display the image that will be uploaded as an output with defined width and height.
Syntax:
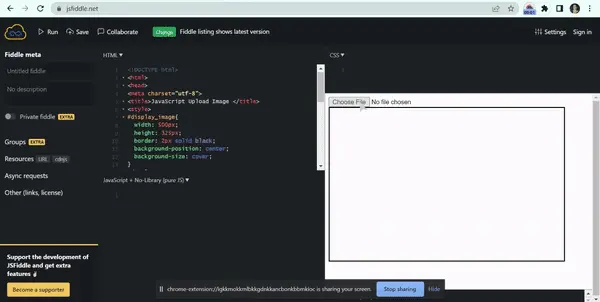
<input type ="file" id ="image_input" accept ="image/jpeg, image/png, image/jpg">
<div id="display_image"></div>
To ensure that the uploaded image is perfectly fitted inside, the image properties should be added to a CSS file with proper values. Here, the border is not an essential property that should be added but will make the user see where the image appears easily.
#display-image{
width: 500px;
height: 325px;
border: 2px solid black;
background-position: center;
background-size: cover;
}
Next, a JavaScript file should be created to get access to the input field and attach a "change" event listener, which is an event that executes when the user has changed the value of an element. Under this listener, a user should get access to the FileReader object that will let the web applications read the contents of files or raw data buffers stored in the local machine of the user and attach a "load" event listener occurs when the whole page is completely loaded including all the dependent sources like images, CSS files and JavaScript files.
In a nutshell, the uploaded image is translated into a displayable format. The uploaded image will be stored in the uploadImage variable, and this variable will be used to initialize the backgroundImage property in CSS.
const image_input = document.querySelector('#image_input');

image_input.addEventListener('change', function() {
  const file_reader = new FileReader();
  file_reader.addEventListener('load', () => {
    const uploaded_image = file_reader.result;
    document.querySelector('#display_image').style.backgroundImage =
        `url(${uploaded_image})`;
  });
  file_reader.readAsDataURL(this.files[0]);
});
Full Source Code:
<!DOCTYPE html>
<html>
<head>
<meta charset="utf-8">
<title>JavaScript Upload Image </title>
<style>
#display_image{
  width: 500px;
  height: 325px;
  border: 2px solid black;
  background-position: center;
  background-size: cover;
}
</style>
</head>

<body>

  <input type="file" id="image_input" accept="image/jpeg, image/png, image/jpg">
  <div id="display_image"></div>

<script>
const image_input = document.querySelector("#image_input");

image_input.addEventListener("change", function() {
  const file_reader = new FileReader();
  file_reader.addEventListener("load", () => {
    const uploaded_image = file_reader.result;
    document.querySelector("#display_image").style.backgroundImage = `url(${uploaded_image})`;
  });
  file_reader.readAsDataURL(this.files[0]);
});
</script>
</body>
</html>
Output:
JavaScript Upload Image Without Defined Width or Height
We can also upload an image without a defined width or height in its original size in JavaScript. Follow the steps below.
-
Start by creating an HTML file and set the input type file assigning the id as a file with the onchange function
filevalidation()that will call on the uploaded image. -
Next, use the document method
.getElementById()inside thefilevaildation()function in order to select the element by its ids throughvar image = document.getElementById(‘uploaded image’);. -
Add a static method
URL.createObjectURL()on to the program in order to pass the URL to theuploaded_image.srcthat will load the uploaded image by the user on the browser asuploaded_image.src=URL.createObjectURL(event.target.files[0]);. -
In order to check if any file is selected by the user a loop as
if(selected_file.files.length>0)and in order to get the size of the selected fileconst file_size=selected_file.files.item(i).size;can be used. -
Next, the file size will be converted into bytes. With the usage of
Math.round((file_size/1024));function it can be converted into any unit.
Full Source Code:
<!DOCTYPE html>
<html>
<head>
    <meta charset="utf-8">
    <title>JavaScript Upload Image</title>
</head>
<body>
    <input type="file" id="file" onchange="FileValidation(event)" >
    <br><br><br>
    <h2>Uploaded Image by the User</h2>
    <img id="uploaded image">
</body>
<script>
    FileValidation = (event) => {
        var uploaded_image = document.getElementById('uploaded image');
    uploaded_image.src = URL.createObjectURL(event.target.files[0]);
        const selected_file = document.getElementById("file");
        if (selected_file.files.length > 0) {
            for (const i = 0; i <= selected_file.files.length - 1; i++) {
                const file_size = selected_file.files.item(i).size;

                const file = Math.round((file_size / 1024));
                }
                }
                }
</script>
</html>
Output:
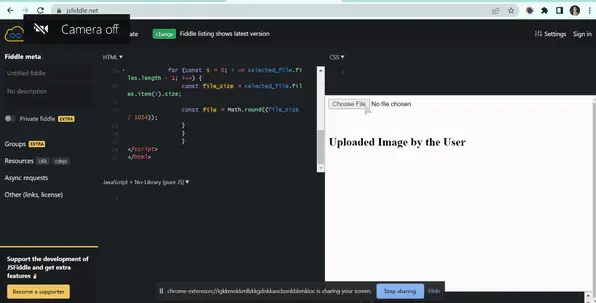
From the above code, any file type can be selected by the user and uploaded, but it cannot be displayed. With further implementations, multiple image uploads can be done by adding more coding to the above programs per the requirement.

Nimesha is a Full-stack Software Engineer for more than five years, he loves technology, as technology has the power to solve our many problems within just a minute. He have been contributing to various projects over the last 5+ years and working with almost all the so-called 03 tiers(DB, M-Tier, and Client). Recently, he has started working with DevOps technologies such as Azure administration, Kubernetes, Terraform automation, and Bash scripting as well.