Introduction to OpenCV JavaScript

This tutorial will discuss OpenCV in JavaScript using the opencv.js binding of OpenCV.
Introduction to OpenCV JavaScript
OpenCV is being used in image processing and computer vision applications. OpenCV support many programming languages like Python, Java, and C++, which we can use to build computer vision applications.
In web development, we can build websites with computer vision and image processing applications using the opencv.js binding of OpenCV. In addition, we can use OpenCV with JavaScript to build websites for multimedia processing applications.
We can use a subset of OpenCV functions for web development, like the vision functions of OpenCV. However, to use OpenCV functions in a webpage, we have to link the opencv.js binding with the webpage using the <script> tag of HTML.
We can link the address of the file, or we can download it and then link it with the .html file.
If we link the address of the file in the .html file, we’ll require the internet to load the file every time we run the .html file. However, if we download and link the opencv.js file with the .html file, the internet will not be required to lead the file.
For example, we can use the below line of code to link the opencv.js file using the address of the file using the <script> tag in the .html file. See the code below.
<script async src="https://docs.opencv.org/4.5.0/opencv.js" type="text/javascript"></script>
In the above code, we can also see the version number of OpenCV in the link address, which we can change depending on the version we want to use. Finally, we have to use a graphical container to display our image on a webpage.
We can use the <canvas> tag of HTML, which is a graphical container to display our image using the imshow() function of OpenCV. We must pass the id of the canvas container and the image we read with the imread() function inside the imshow() function to display it.
For example, let’s create a simple webpage using HTML and use the imread() and imshow() functions of OpenCV to read and display an image on a webpage. See the code below.
<!DOCTYPE html>
<html>

<head>
  <meta charset="utf-8">
  <title>Introduction to OpenCV JavaScript</title>
</head>

<body>
  <h2>Introduction to OpenCV JavaScript</h2>
  <div>
    <div class="inputoutputDiv">
      <img id="SourceImage" alt="" />
      <div class="caption">imagesrc <input type="file" id="InputfileName" name="file" /></div>
    </div>
    <div class="inputoutputDiv">
      <canvas id="canvasOutputContainer"></canvas>
      <div class="caption">canvasOutputContainer</div>
    </div>
  </div>

  <script type="text/javascript">
    let imgElement = document.getElementById('SourceImage');
    let inputElement = document.getElementById('InputfileName');
    inputElement.addEventListener('change', (e) => {
      imgElement.src = URL.createObjectURL(e.target.files[0]);
    }, false);
    imgElement.onload = function () {
      let mat = cv.imread(imgElement);
      cv.imshow('canvasOutputContainer', mat);
      mat.delete();
    };
  </script>
  <script async src="https://docs.opencv.org/4.5.0/opencv.js" type="text/javascript"></script>
</body>

</html>
Output:
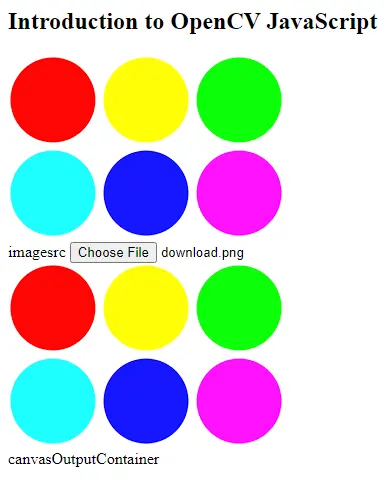
To Run the above code, we have to store it in a .html file and open it with a web browser.
We have used the onload() function in the above code, which will be executed when we load the input image, and inside this function, we have read and displayed the image using OpenCV.
