Java Graph Libraries
A graph is a data structure in Java consisting of nodes and their edges. A node represents the data, while the edges tell the relationship between the nodes.
In the sections below, we will check out two libraries that help us implement the concept of a graph in Java.
Use the JGraphtT Library to Create a Graph in Java
JGraphT is a third-party library containing classes and methods to implement different graphs like a directed graph, weighted graph, pseudograph, etc. We can perform various operations like traversal using graph algorithms.
In the program, we create an object of the DefaultDirectedGraph class, a graph structure class in JGraphT, and return an instance of Graph. We pass an edge class DefaultEdge in the constructor of the DefaultDirectedGraph class.
The Graph takes two type parameters for the node type and the edge type, where we use String as the type of data in the node while the edge should be DefaultEdge.
We add the vertices or nodes to the graph using the addVertex() method. Next, we need to specify the edges between the nodes using the addEdge() function.
We pass two arguments in the addEdges() function: the edge’s source and target. The first edge goes from the node with data a to the node with b.
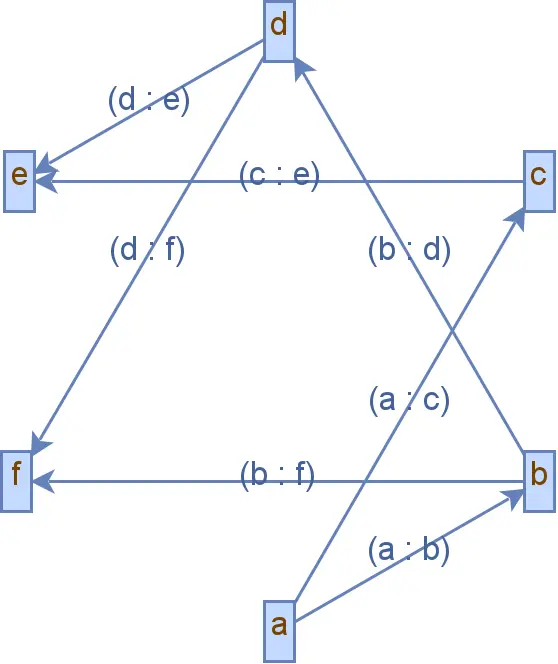
We have a graph with both vertices and edges. Still, we can also use the JGraphT library to visualize the graph using the JGraphX library, which can be imported into the project using the following maven dependency.
<dependency>
    <groupId>com.github.vlsi.mxgraph</groupId>
    <artifactId>jgraphx</artifactId>
    <version>4.2.2</version>
</dependency>
After we import the JGraphX library, we create an object of JGraphXAdapter and pass the graph object in its constructor that returns the jGraphXAdapter reference. Now we need to set the layout to display the nodes and edges.
It is done using the mxCircleLayout object that extends mxGraphLayout, and we pass the jGraphXAdapter to the constructor of mxCircleLayout class that returns a reference of type mxGraphLayout.
We execute the layout using the mxGraphLayout.execute() that takes the parent of the layout as an argument.
Now we call createBufferedImage() of the mxCellRenderer class that takes six arguments: the JGraphXAdapter object, the number of cells, the scale or size of the image, the background of the generated image, to enable or disable anti-aliasing, and to clip the image.
We pass all the respective arguments and get a BufferedImage object.
Finally, we create a file where the generated file will be stored using the File() object and pass the file name and its path in it on writing the image; we use ImageIO.write() that takes the BufferedImage object, the format of the image to be written and the File object.
import com.mxgraph.layout.*;
import com.mxgraph.util.*;
import java.awt.*;
import java.awt.image.BufferedImage;
import java.io.File;
import java.io.IOException;
import javax.imageio.ImageIO;
import org.jgrapht.Graph;
import org.jgrapht.ext.JGraphXAdapter;
import org.jgrapht.graph.DefaultDirectedGraph;
import org.jgrapht.graph.DefaultEdge;

public class JavaExample {
  public static void main(String[] args) throws IOException {
    Graph<String, DefaultEdge> graph = new DefaultDirectedGraph<>(DefaultEdge.class);

    graph.addVertex("a");
    graph.addVertex("b");
    graph.addVertex("c");
    graph.addVertex("d");
    graph.addVertex("e");
    graph.addVertex("f");

    graph.addEdge("a", "b");
    graph.addEdge("a", "c");
    graph.addEdge("b", "d");
    graph.addEdge("b", "f");
    graph.addEdge("d", "f");
    graph.addEdge("d", "e");
    graph.addEdge("c", "e");

    JGraphXAdapter<String, DefaultEdge> jGraphXAdapter = new JGraphXAdapter<>(graph);

    mxIGraphLayout mxIGraphLayout = new mxCircleLayout(jGraphXAdapter);
    mxIGraphLayout.execute(jGraphXAdapter.getDefaultParent());

    BufferedImage bufferedImage =
        mxCellRenderer.createBufferedImage(jGraphXAdapter, null, 3, Color.WHITE, true, null);

    File newFIle = new File("graph.png");
    ImageIO.write(bufferedImage, "PNG", newFIle);
  }
}
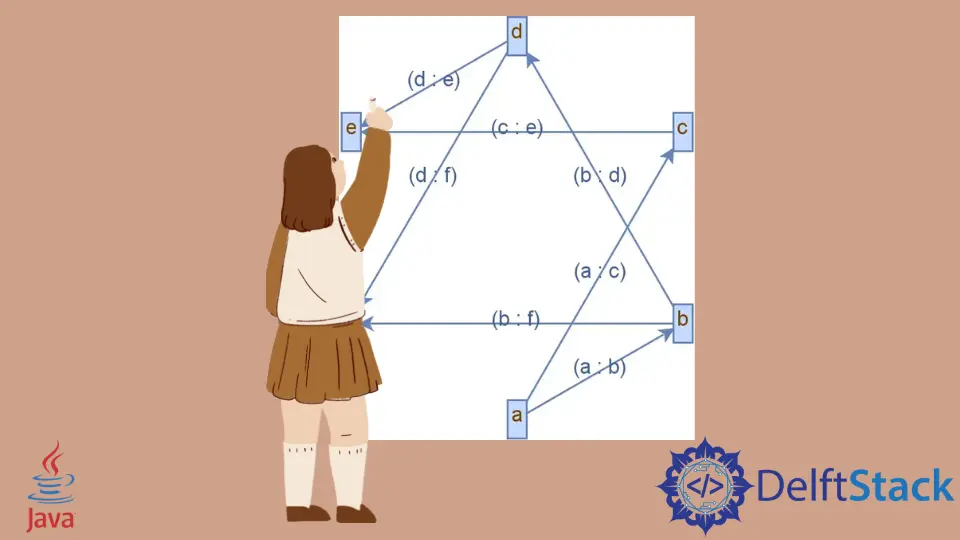
Output:
Use the Guava Library to Create a Graph in Java
Another library to implement a graph in Java is the Guava library that we can use in our project using the following maven dependency.
<dependency>
    <groupId>com.google.guava</groupId>
    <artifactId>guava</artifactId>
    <version>31.0.1-jre</version>
</dependency>
Once the dependency is set, we can move to the program.
We use the GraphBuilder to call its static method directed(), which is used to build directed graphs, and call the build() method that returns an empty MutableGraph object. We set the type of the node data as String.
We add the node data using the addNode method and the edges using the putEdge() method. In the putEdge() function, we pass the source vertex and the target vertex.
After adding the nodes and their edges, we create a traversable graph by calling the forGraph() method of the Traverser class and passing the mutableGraph object.
We can perform different types of traversal algorithms, but for this example, we traverse the graph using the breadth-first approach by calling the breadthFirst() function and pass the node data from where to start the traversal.
The breadthFirst() returns an Iterable instance that can iterate using a loop and print the nodes.
import com.google.common.graph.GraphBuilder;
import com.google.common.graph.MutableGraph;
import com.google.common.graph.Traverser;

public class JavaExample {
  public static void main(String[] args) {
    MutableGraph<String> mutableGraph = GraphBuilder.directed().build();

    mutableGraph.addNode("root");
    mutableGraph.addNode("l1");
    mutableGraph.addNode("r1");
    mutableGraph.addNode("l2");
    mutableGraph.addNode("r2");
    mutableGraph.addNode("l3");
    mutableGraph.addNode("r3");
    mutableGraph.addNode("l4");
    mutableGraph.addNode("r4");

    mutableGraph.putEdge("root", "l1");
    mutableGraph.putEdge("root", "r1");
    mutableGraph.putEdge("l1", "l2");
    mutableGraph.putEdge("l1", "r2");
    mutableGraph.putEdge("r1", "l3");
    mutableGraph.putEdge("r1", "r3");
    mutableGraph.putEdge("l3", "l4");
    mutableGraph.putEdge("l3", "r4");

    Traverser<String> traversedGraph = Traverser.forGraph(mutableGraph);
    Iterable<String> getDepthFirstResult = traversedGraph.breadthFirst("root");

    for (String s : getDepthFirstResult) {
      System.out.println(s);
    }
  }
}
Output:
root
l1
r1
r2
l2
r3
l3
l4
r4

Rupam Saini is an android developer, who also works sometimes as a web developer., He likes to read books and write about various things.
LinkedIn