How to Execute Multiple Commands in Docker-Compose

Docker makes it easier for developers to build, test and deploy applications without worrying about dependencies by wrapping them in standardized units called containers. Docker-compose is an advanced essential tool for managing multi-container applications.
You can define instructions to manage services that rely on multiple Docker containers using docker-compose.
Besides being able to manage more than one container, docker-compose also offers other benefits such as isolated environments for your application services and preserving volume data when creating containers.
Execute Multiple Commands in Docker-Compose
Docker-compose runs on the Docker engine, installed alongside Docker in Mac and Windows machines. The command below lets you verify if docker-compose is properly set up in your machine.
$ docker-compose version
Docker Compose version v2.2.3
In the following example, we will explore how to set up a Django, PostgreSQL application using docker-compose. We will explore how to execute multiple commands in docker-compose.
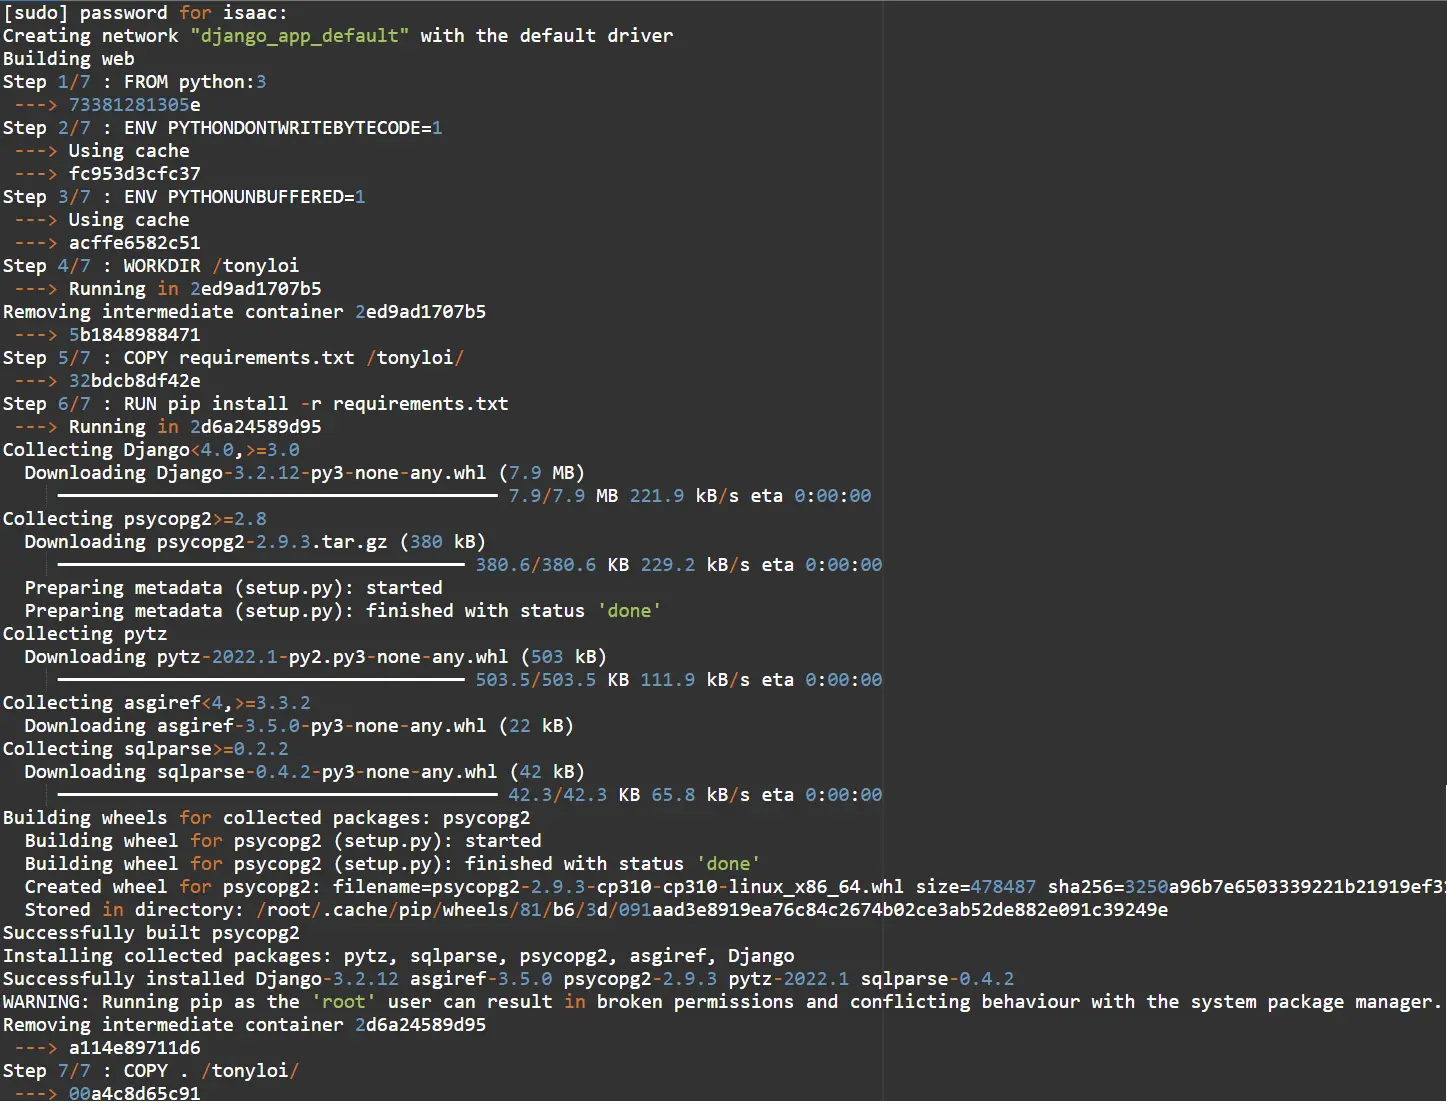
First, we will create a simple Dockerfile with simple entries, as shown below. The file outlines commands that will be executed to create our Docker image.
FROM python:3
ENV PYTHONDONTWRITEBYTECODE=1
ENV PYTHONUNBUFFERED=1
WORKDIR /tonyloi
COPY requirements.txt /code/
RUN pip install -r requirements.txt
COPY . /tonyloi/
The Dockerfile defines Python3 as the base image; however, we have also defined a requirements.txt file to state other requirements needed for the project to work.
Django>=3.0,<4.0
psycopg2>=2.8
Now that you have these two files in place, you can create the docker-compose.yml file in the root directory of this project. This file describes the application’s services that we intend to build: the database and the webserver.
In addition to this, we will also be defining the Docker images used by these services and any other Docker volume that you may wish to mount. Finally, we also need to specify the ports that the services will expose.
Since this is a Django application, we also have to specify commands that will allow us to run migrations and start the development server. There are a couple of ways to do this, either using the sh or bash.
In this case, we will be using sh due to its availability in Unix-based systems.
docker-compose.yml:
version: "3.9"

services:
  DB:
    image: Postgres
    volumes:
      - ./data/db:/var/lib/postgresql/data
    environment:
      - POSTGRES_DB=postgres
      - POSTGRES_USER=postgres
      - POSTGRES_PASSWORD=postgres
  web:
    build: .
    command: >
      sh -c "
             python manage.py migrate &&
             python manage.py runserver 0.0.0.0:8080"
    volumes:

      - .:/tonyloi
    ports:
      - "8080:8080"
    environment:
      - POSTGRES_NAME=postgres
      - POSTGRES_USER=postgres
      - POSTGRES_PASSWORD=password
    depends_on:
      - DB
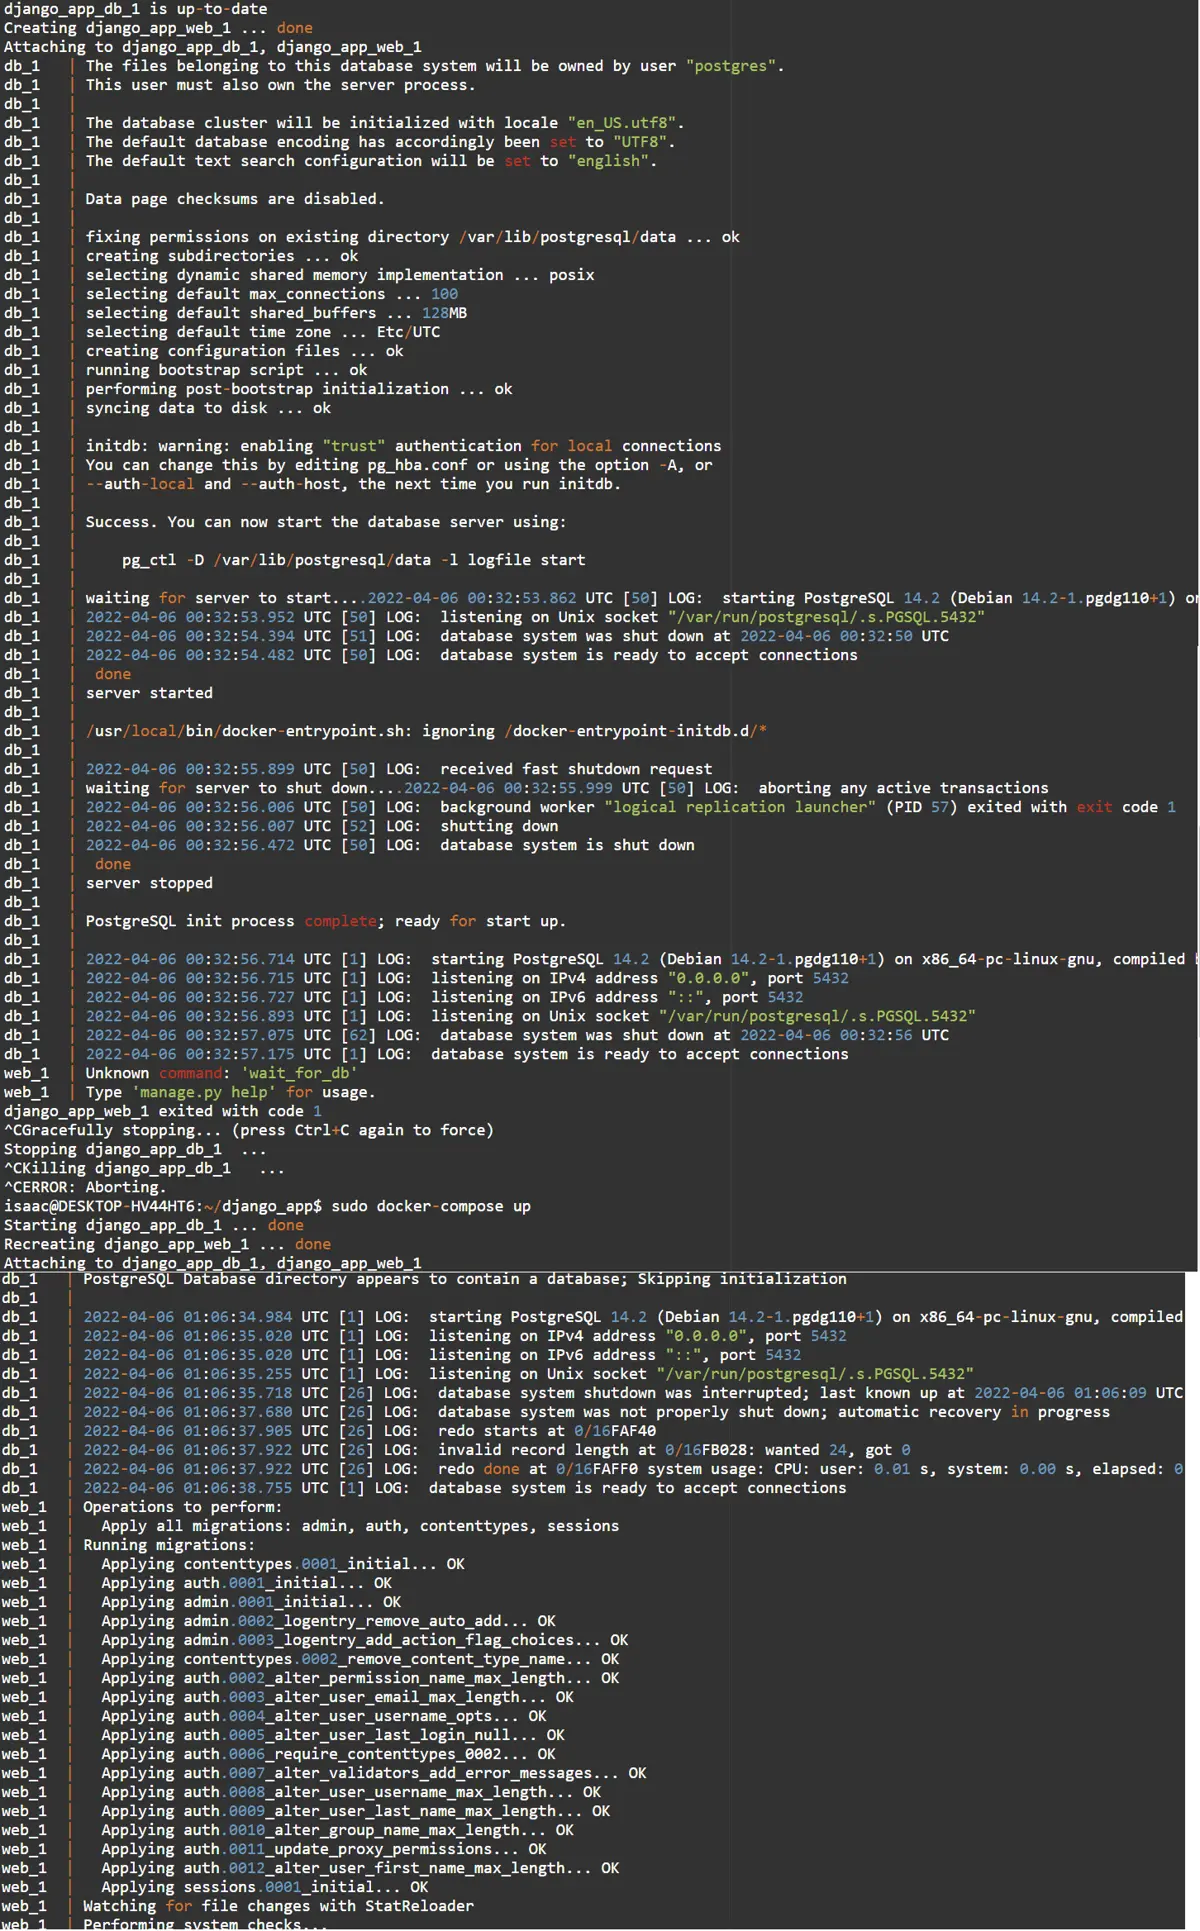
We will run the docker-compose run command below to create this Django project. Before executing this command, you must ensure that you’re in the root directory.
If not, please navigate to the root directory using the cd command.
~/django_app$ sudo docker-compose run web Django-admin startproject new_app .
Output:
Successfully built 00a4c8d65c91
Successfully tagged django_app_web:latest
WARNING: Image for service web was built because it did not already exist. To rebuild this image you must use `docker-compose build` or `docker-compose up --build`.
Creating django_app_db_1 ... done
Creating django_app_web_run ... done
This command uses the docker-compose and Docker files to create a Django project. In this instance, we have named the project new_app.
You can now navigate into the project and list the project files.
isaac@DESKTOP-HV44HT6:~/django_app$ cd new_app
isaac@DESKTOP-HV44HT6:~/django_app/new_app$ ls
__init__.py  asgi.py  settings.py  urls.py  wsgi.py
isaac@DESKTOP-HV44HT6:~/django_app/new_app$
This article highlighted how one could execute multiple commands in the docker-compose file using sh. Alternatively, you can also use bash -c as shown below.
command: bash -c "
   python manage.py migrate  &&
   python manage.py runserver 0.0.0.0:8080
 "
We can finish creating the rest of the Django application by configuring the database settings in the settings.py file.
Django uses SQLite during development by default; therefore, we need the necessary configurations below since we use PostgreSQL. Be sure to replace the database and username with your own.
DATABASES = {
    'default': {
        'ENGINE': 'django.db.backends.postgresql',
        'NAME': os.environ.get('postgres'),
        'USER': os.environ.get('postgres'),
        'PASSWORD': os.environ.get('enter_your database'),
        'HOST': 'db',
        'PORT': 5432,
    }
}
Finally, to startup, the application executes the sudo docker-compose up command in the project’s main directory. It starts the development server at http://0.0.0.0:8080/ as we specified in the docker-compose file.
~/django_app$ sudo docker-compose up

Isaac Tony is a professional software developer and technical writer fascinated by Tech and productivity. He helps large technical organizations communicate their message clearly through writing.
LinkedInRelated Article - Docker Compose
- Difference Between Stop, Down, Up, and Start in Docker Compose
- How to Add a Network Mode in Docker Compose
- How to Recreate Containers From New Images Using Docker-Compose
- Difference Between Docker and Docker Compose
- How to View Specific Docker Compose Service Logs
- How to Update Existing Images With Docker Compose