Date Picker in Angular
- Using the Date Picker in Angular
-
Using the
inputTag to Create a Simple Date Picker in Angular -
Using the
onChangeEvent to Get the Selected Date of the Date Picker in Angular -
Using the
onClickEvent to Save the Date After a Button Is Clicked in Angular -
Using the
DatePipeto Change the Date Format in Date Picker in Angular
We will introduce an easy way to add a date picker in our Angular application with examples.
We will also introduce the Angular date picker library to display a date picker in Angular.
Using the Date Picker in Angular
In this modern era of management systems, the date picker is one of the most common form elements. The date picker allows a user to pick a known date, such as date of birth or event date.
A date picker can let us select the date consisting of a day, month, and year in our custom user interface. It is a variation of an input form element.
Let’s go through an example to understand how we can use a date picker to select and get the date selected on onChange and onSubmit events.
The difference between these events is that it would be better to get values from the form onSubmit event if we have more than one field.
But if we only have a date picker and want to get the date once the user selects it, we can use the onChange event to get the value.
Using the input Tag to Create a Simple Date Picker in Angular
Let’s create a new application by using the following command.
# angular
ng new my-app
After creating our new application in Angular, we will go to our application directory using this command.
# angular
cd my-app
Now, let’s run our app to check if all dependencies are installed correctly.
# angular
ng serve --open
We will now create a date picker in the app.component.html file using the input tag.
# Angular
<input type="date" />
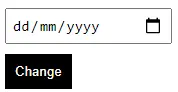
This one line of code will create a date picker, as shown below.
Output:
So, we can create this type of date picker using this simple one line of code. Now, let’s get the selected date whenever we select the date.
Using the onChange Event to Get the Selected Date of the Date Picker in Angular
In app.component.ts, we will create a function SendDataonChange that will take an event as a parameter and console.log the selected data.
# Angular
SendDataonChange(event: any) {
console.log(event.target.value);
}
Now, let’s set this function in the template, which will be triggered whenever the date is changed.
# Angular
<input type="date" (change)="SendDataonChange($event)" />
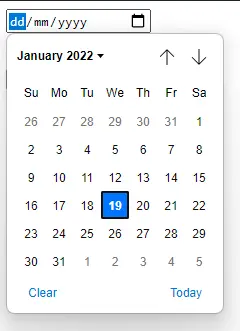
Output:
Using the onClick Event to Save the Date After a Button Is Clicked in Angular
Suppose we want to save the date after a button is clicked. We can create a button in app.component.html and bind it with a function onClick() created in app.component.ts.
So, our code in app.component.html will look like below.
# Angular
<input type="date" (change)="SendDataonChange($event)" />
<br>
<button (click)="onClick()">Change</button>
We need to bind our date picker with [(ngModel)]. So our code will look like below.
# Angular
<input type="date" (change)="SendDataonChange($event)" [(ngModel)]="changed" />
<br>
<button (click)="onClick()">Change</button>
Now, let’s add some CSS to make our button and date picker look elegant. So, our code in app.component.css will look like below.
# Angular
button {
padding: 10px;
background-color: black;
border: none;
color: white;
margin-top: 10px;
}
input{
padding: 5px;
font-size: 15px;
}
Output:
In app.component.ts, we will define the variable we bind our date picker.
# Angular
changed: Date;
Now, we will create a function onClick that will console.log the value from the date picker once the button is clicked.
# Angular
onClick() {
console.log(this.changed);
}
Output:

Using the DatePipe to Change the Date Format in Date Picker in Angular
Now, let’s discuss how we can change the format of the date.
Many developers are stuck working with different date formats because the best software developer develops software to work efficiently and error-free.
The best way to change our date format is to create a function to save the date and retrieve it. So the format in the database remains the same, but we can easily display it in any format necessary using functions.
First, we will import DatePipe in app.component.ts, as shown below.
# Angular
import { DatePipe } from '@angular/common';
Now, we will define a new variable, newDate, that will be used to save the value of the date after the format is changed and returned.
Let’s create a function changeFormat() that will take changed as a parameter and transform the date format into the required format using DatePipe.
We will define a variable pipe that will store the date’s timezone.
Our code in app.component.ts will look like below.
# Angular
import { Component, VERSION } from '@angular/core';
import { DatePipe } from '@angular/common';

@Component({
selector: 'my-app',
templateUrl: './app.component.html',
styleUrls: ['./app.component.css'],
})
export class AppComponent {
name = 'Angular ' + VERSION.major;
changed: Date;
pipe = new DatePipe('en-US');
newDate: string;
changeFormat(changed){
let ChangedFormat = this.pipe.transform(this.changed, 'dd/MM/YYYY');
this.newDate = ChangedFormat;
}

onClick() {
console.log(this.changed);
}
SendDataonChange(event: any) {
console.log(event.target.value);
}
}
We will now pass the date value from our function onClick() and console.log the new date value with a new format.
# Angular
onClick() {
this.changeFormat(this.changed);
console.log(this.newDate);
}
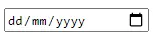
Output:
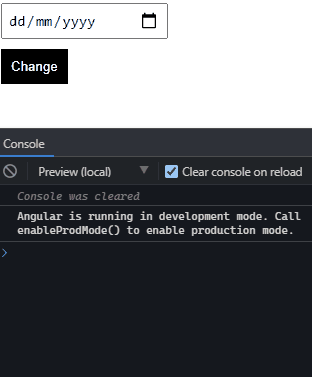
As you see in the example above, when we select the date, it displays 2022-01-19, but when we click on the button, it calls the changeFormat() function inside the onClick() function and returns the date with the changed format.
In this way, we can use a date picker in our application to save the date value on selecting the date or save the value when the button is clicked. And we also learned how we could change the date format using DatePipe.
You can check the full code here.

Rana is a computer science graduate passionate about helping people to build and diagnose scalable web application problems and problems developers face across the full-stack.
LinkedIn