How to Get the Current Route in Angular
- The Definition and Use of Routes on the Internet
- Steps to Get the Current Route in Angular
- Create an HTML Template to Get the Current Route in Angular

An Angular router is a powerful tool that enables navigation of the application. It’s an essential component for building single-page applications.
This article is about the Angular router. It will be helpful for you to learn how to get the current route in Angular.
Angular provides a router for the front-end app, which provides the user with the current route and allows navigation to other routes. Moreover, the Angular Router offers two-way data binding, meaning that any data changes are reflected in both views and URLs.
The Definition and Use of Routes on the Internet
We can’t run the internet without routes. Routes are used for accessing content on the internet. It is a service that gives you access to all the articles, videos, and other content in one place.
We inform the site’s server of the page we want to see using routes. We notify www.wikipedia.com, for example, that we’re interested in /Angular (web framework).
https://en.wikipedia.org/wiki/Angular_(web_framework)
The link above brings us to the AngularJS framework. The server can precisely decide which page we wish to visit with the help of routes.
Furthermore, they are usually legible by humans. It is not just obvious to the server where to go, but it is also obvious to the user.
Replace /Angular on the link with the name of any sub-wiki you desire, and you’re done. You can get there without using the search or clicking any buttons.
Browsers can handle routes fairly well because it has been the default format for such a long period. They can easily monitor a user’s navigation and provide features such as a back button or a history.
Click here to learn more about routes.
Steps to Get the Current Route in Angular
Angular provides a powerful and comprehensive library for routing. Let’s understand the basics of Angular routing and discuss how to get your current route.
-
Create a new Angular project.
-
Add Routes to the
app.module.tsfile. -
Add Routes to
app-routing.module.tsfile. -
Work on the HTML and typescript files.
We will write a complete example of getting a current route in Angular by using the steps mentioned above.
The routing service provides a set of APIs for defining routes and route parameters. The Angular router can be configured to use multiple views for different URLs so that you can have one page with two sections, each with its view.
The RouterModule contains all routing-related information. Angular is included in this module. We must import that module into our AppModule to use routing.
So, how do we put routing into practice? As previously stated, we begin by importing the RouterModule.
import { Router, Event, NavigationStart, NavigationEnd, NavigationError} from '@angular/router';
Our app is now ready for routing. We must indicate the routes we want to be available to our application.
Simultaneously, we’ll decide which components to present on specific routes. But let’s start with the basics.
It is excellent practice to build a separate routing file to define routes; Module+.routing.ts is the most common name for this routing file. To make a routing file for the AppModule, we’d call app-routing.module.ts.
So, let’s make that file adjacent to the app.module.ts file. We build a static array in that file that contains all of the module’s routes.
import { NgModule } from '@angular/core';
import { Routes, RouterModule } from '@angular/router';
import { AboutusComponent } from './aboutus/aboutus.component';
import { AppComponent } from './app.component';

import { ServicesComponent } from './services/services.component';

const routes: Routes = [
  {path: '', redirectTo: 'AppComponent', pathMatch: 'full'},

  {path:'aboutus', component:AboutusComponent},

  {path:'services', component:ServicesComponent},
];

@NgModule({
  imports: [RouterModule.forRoot(routes)],
  exports: [RouterModule]
})
export class AppRoutingModule { }
Here, the Routes array, which we defined, is the most crucial element. We may define our routes inside that array.
These routes are defined as objects, as you can see. There is a path property in each of them.
The path to our aboutusComponent, for example, would be /aboutus. Here, It’s also possible to construct routes with variable parameters.
For example, you might have a blog component under the blog route. However, we want this component to display different blogs depending on the route.
We do this by appending the blog’s id to the route.
Create an HTML Template to Get the Current Route in Angular
After doing the mentioned steps, now it’s time to work on the HTML file to get the current route. For that, we use a router link.
Using the routerLink attribute, we can directly link our app’s routes from the HTML document. Place the directive within an HTML Element.
Angular will show the current route when the visitors click on the component.
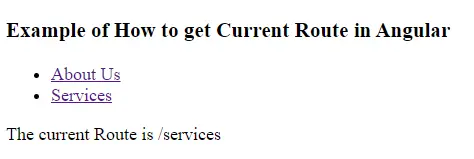
<h3>Example of How to get Current Route in Angular</h3>

<ul>
   <li routerLinkActive="active">
      <a [routerLink]="['/aboutus']">About Us</a>
   </li>
   <li routerLinkActive="active">
      <a [routerLink]="['/services']">Services</a>
   </li>

</ul>

The current Route is {{currentRoute}}

<router-outlet></router-outlet>
Moreover, here we used a router outlet. The outlet for the router, router-outlet, is a property generated by RouterModule that serves as a placeholder for the router, indicating where the matched component should be inserted.
The application shell refers to the component that contains the router outlet.
<router-outlet></router-outlet>
In the same application, the Angular router allows many outlets. The primary outlet is the main (or top-level) outlet.
Lastly, the outlet attribute enables you to define a target outlet for a route specification.
Let’s work on the final step of getting the current route in Angular. For that, let’s create an app.component.ts file.
Remember that we have created two routes in our application, about us and services. Because we want our module to be as self-contained as possible, all of its sub-routes are defined in a separate file within the module.
import { Component } from '@angular/core';
import { Router, Event, NavigationStart, NavigationEnd, NavigationError} from '@angular/router';
@Component({
  selector: 'app-root',
  templateUrl: './app.component.html',
  styleUrls: ['./app.component.sass']
})
export class AppComponent {
  currentRoute: string;
  constructor(private router: Router) {
    this.currentRoute = "Demo";
    this.router.events.subscribe((event: Event) => {

        if (event instanceof NavigationEnd) {
            this.currentRoute = event.url;
              console.log(event);
        }


    });

}
}
Here, NavigationEnd is a router event-triggered or called when navigation ends smoothly. To learn more about router events, click here.
When we click on the services section, we get the current route of services, and the same happens with the about us section.
Moreover, you can also modify the sections according to your requirements.
Click here to check the live demonstration of the code mentioned above.

Muhammad Adil is a seasoned programmer and writer who has experience in various fields. He has been programming for over 5 years and have always loved the thrill of solving complex problems. He has skilled in PHP, Python, C++, Java, JavaScript, Ruby on Rails, AngularJS, ReactJS, HTML5 and CSS3. He enjoys putting his experience and knowledge into words.
Facebook