How to Export Data to Excel in Angular

This article will discuss how to export data to Excel in Angular.
Export Data to Excel in Angular
There are many situations in which we may need to use an export function in our Angular application. We may want to give an option as a button on our application for customers or clients to export the data from tables to Excel sheets or from JSON to Excel sheets.
This tutorial will discuss exporting the data from our application to Excel format with examples. For this purpose, we can use the xlsx library in Angular, which gives us the option to convert JSON data to Excel format.
Let’s go through an example in which we will create JSON data of weather seasons in the year. We have to install Angular CLI in our system first.
First, we will create a new project on Angular by running the following command in the command line.
ng new angular-app
Once our new application is successfully created, we will go to our application folder with the help of the following command.
cd ./angular-app
We will install the xlsx library using the npm module. We will use the following command to install it.
npm i xlsx --save
Now we will create a dummy list of weather seasons in a year. We create our dummy JSON data in this example, but it can be fetched through a database or some APIs.
The dummy data is shown below.
Seasons = [
{ 	"id": 1,
	"name": "Spring",
	"Fruit": "Orange" },
{	"id": 2,
	"name": "Summer",
	"Fruit": "Mango"},
{	"id": 3,
	"name": "Winter",
	"Fruit": "Apple"},
{	"id": 4,
	"name": "Autumn",
	"Fruit": "Banana"}]
Now, we will create the frontend application in which we will create the table which will display the JSON data. The updated code in the app.component.html file is shown below.
<div>
  <button (click)="exportToExcel()">Export to Excel</button>
  <table id="season-tble">
    <tr>
      <th>Id</th>
      <th>name</th>
      <th>Fruit</th>
    </tr>
    <tr *ngFor="let season of Seasons">
      <td>{{ season.id }}</td>
      <td>{{ season.name }}</td>
      <td>{{ season.fruit }}</td>
    </tr>
  </table>
</div>
Now we will create a function in the app.component.ts file to export data into Excel format, as shown below.
import { Component, VERSION } from '@angular/core';
import * as XLSX from 'xlsx';

@Component({
  selector: 'my-app',
  templateUrl: './app.component.html',
  styleUrls: ['./app.component.css'],
})
export class AppComponent {
  Seasons = [
    { id: 1, name: 'Spring', fruit: 'Orange' },
    { id: 2, name: 'Summer', fruit: 'Mango' },
    { id: 3, name: 'Winter', fruit: 'Apple' },
    { id: 4, name: 'Autumn', fruit: 'Banana' },
  ];

  name = 'ExcelSheet.xlsx';
  exportToExcel(): void {
    let element = document.getElementById('season-tble');
    const worksheet: XLSX.WorkSheet = XLSX.utils.table_to_sheet(element);

    const book: XLSX.WorkBook = XLSX.utils.book_new();
    XLSX.utils.book_append_sheet(book, worksheet, 'Sheet1');

    XLSX.writeFile(book, this.name);
  }
}
As shown below, we will add some CSS code to make our front end look good.
td{
  border: 1px solid black;
  padding: 10px;
}
button{
  background: black;
  padding: 10px;
  color: white;
  margin-bottom: 50px;
}
Now, we will run the application with the command shown below.
npm start
Output:
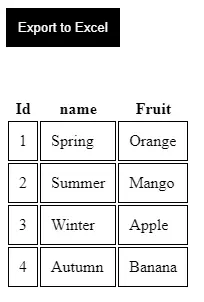
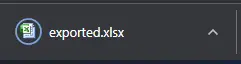
Now let’s click on the export button and check whether the program works. When we click on the button, it will download the file with the name we saved, as shown below.
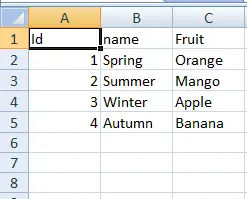
Now, let’s open this file and check how it looks, as shown below.

Rana is a computer science graduate passionate about helping people to build and diagnose scalable web application problems and problems developers face across the full-stack.
LinkedIn