Python을 사용하여 Pandas 데이터 프레임을 Google 시트로 내보내기
Google 스프레드시트는 Google에서 제공하는 온라인 웹 기반 스프레드시트 프로그램입니다. 사용자가 스프레드시트를 생성 및 수정하고 온라인으로 데이터를 공유할 수 있는 실시간 애플리케이션입니다.
대부분의 조직에서는 여러 사용자에게 단일 스프레드시트에서 동시에 작업하도록 요청합니다. 이 공동 작업은 문서의 특정 사용자가 수행한 모든 업데이트를 추적합니다.
Pandas 데이터 프레임을 2차원 데이터 구조, 즉 2차원 배열과 유사하지만 레이블이 지정된 축이 있는 행과 열이 있는 테이블로 사용할 수 있습니다.
Google 스프레드시트로 내보낼 Pandas 데이터 프레임이 있는 경우 이 자습서에서 설명하는 것처럼 Python을 사용하여 수행할 수 있습니다.
Python을 사용하여 Pandas 데이터 프레임을 Google 시트로 내보내기
Pandas 데이터 프레임을 Google 시트로 내보내려면 아래 나열된 세 단계를 따라야 합니다.
- Google API 콘솔과 프로젝트를 동기화합니다.
- Google 시트 API에 액세스합니다.
- Pandas 데이터 프레임을 Google 시트로 내보냅니다.
-
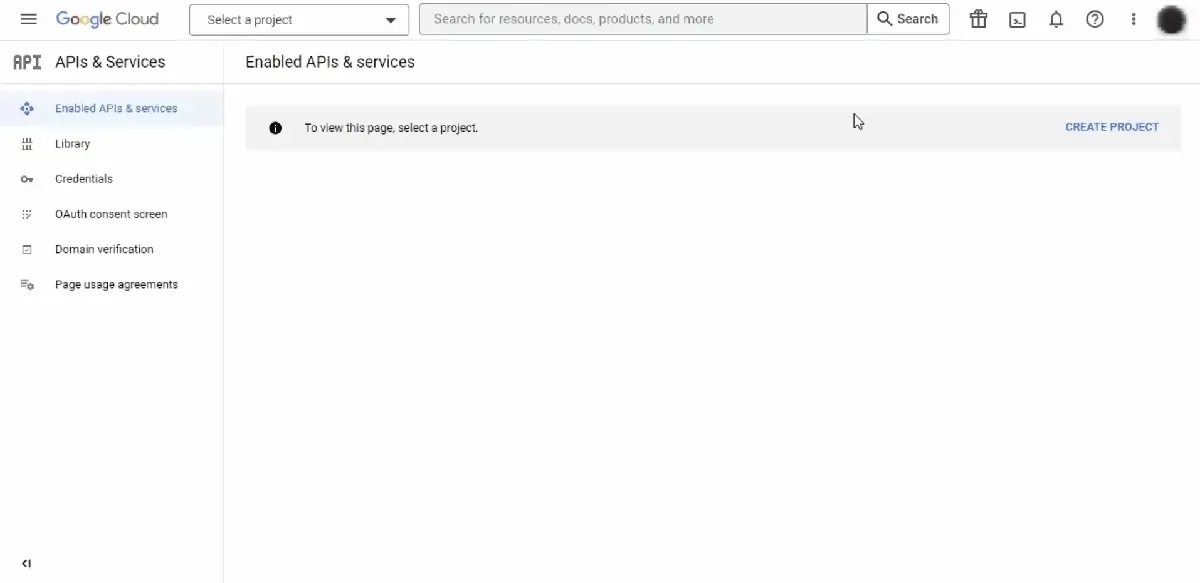
Google API 콘솔과 프로젝트를 동기화합니다.
프로젝트를 Google API 콘솔과 동기화하려면 먼저 Google Cloud Console을 통해 프로젝트를 생성해야 합니다.
자격 증명을 생성하려면 검색창에서 검색하여 아래 두 API를 활성화해야 합니다.
- 구글 드라이브 API
- 구글 시트 API
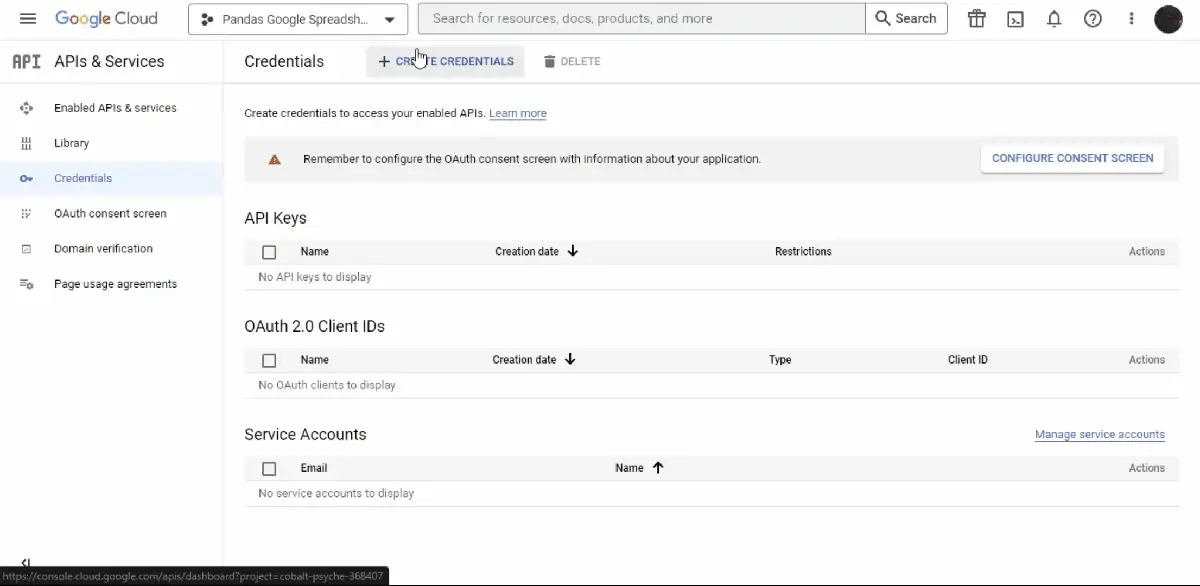
이제 자격 증명을 만드는 방법은 무엇입니까? 이를 위해서는 다음 단계를 따라야 합니다.
자격 증명 만들기를 클릭합니다.서비스 계정을 선택하고서비스 계정 이름을 입력한 다음완료를 누릅니다(나머지 정보는 선택 사항임).- 생성되면 클릭하고
키탭으로 이동하여 JSON 형식의 키를 다운로드합니다.
다운로드한 JSON 파일 콘텐츠(
service_account.json파일에 저장됨)는 다음과 같습니다.{ "type": "service_account", "project_id": "some-project-id", "private_key_id": "eb...25", "private_key": "-----BEGIN PRIVATE KEY-----\nNrDyLw...jINQh/9\n-----END PRIVATE KEY-----\n", "client_email": "123...999-yourclientemail@projectid.iam.gserviceaccount.com", "client_id": "473...hd.apps.googleusercontent.com", ... } -
Google 시트 API에 액세스합니다.
아래 Python 라이브러리를 설치하여 Google 스프레드시트와 연결하고 상호작용하세요.
지스프레드
PS C:\> pip install gspreadoauth2client
PS C:\> pip install oauth2client다운받은 API를 이용하여 Google Sheets를 연결하는 코드를 통해
클라이언트를 생성해 봅시다.예제 코드(
demo.py에 저장됨):import gspread from oauth2client.service_account import ServiceAccountCredentials def create_connection(service_file): client = None scope = [ "https://www.googleapis.com/auth/drive", "https://www.googleapis.com/auth/drive.file", ] try: credentials = ServiceAccountCredentials.from_json_keyfile_name( service_file, scope ) client = gspread.authorize(credentials) print("Connection established successfully...") except Exception as e: print(e) return client service = "service_account.json" # downloaded Credential file in JSON format client = create_connection(service)먼저
gspread를 가져오고 Python 패키지outh2client에서service_account.py파일에 저장된ServiceAccountCredentials클래스를 가져왔습니다.create_connection()함수는클라이언트를 Google 스프레드시트에 연결합니다. 자격 증명 키가 저장되는 인수로service_file을 사용합니다.service_account.json을demo.py와 동일한 디렉토리에 유지하거나service변수에 경로를 저장하는 것을 잊지 마십시오. 이 함수 내에서ServiceAccountCredentials.from_json_keyfile_name()을 사용하여credentials를 생성합니다.그런 다음
gspread.authorize()에credentials를 제공하여 진위 여부를 확인하고service_file에 저장된 키가 유효한 경우클라이언트를 생성합니다.오류가 있는 경우 이 기능은 프로그램을 중단하지 않고
예외를 인쇄합니다. -
Pandas 데이터 프레임을 생성된 Google 시트로 내보냅니다.
Pandas 데이터 프레임을 Google 시트로 내보내려면 먼저 만들어야 합니다. 구글 시트를 생성하는 코드를 작성해 봅시다.
예제 코드(
demo.py에 저장됨):def create_google_sheet(client, sheet_name): google_sheet = None try: google_sheet = client.create(sheet_name) google_sheet.share( "@gmail.com", # enter the email you want to create a google sheet on perm_type="user", role="writer", ) print("Google Sheet created successfully...") except Exception as e: print(e) return google_sheet service = "service_account.json" # downloaded Credential file in JSON format client = create_connection(service) sheet_name = "50_Startups" # google sheet name of your choice google_sheet = create_google_sheet(client, sheet_name)create_google_sheet함수는 이미 생성된client및sheet_name을 인수로 사용하고client.create()함수를 사용하여 Google 시트를 생성합니다.이 Google 시트는 다운로드한 API를 사용하여 빌드된
클라이언트에서 생성됩니다. 따라서google_sheet.share()함수를 사용하여 쓰기 권한을 부여하여 서비스 계정을 만들 때 사용한 이메일과 공유해야 합니다.여기서 마지막 단계는 데이터를 Google 스프레드시트로 내보내는 것입니다. 이렇게 하려면 다음을 사용하여 Python 라이브러리
pandas를 설치해야 합니다.PS C:\> pip install pandas최종적으로 Pandas 데이터 프레임을 Google 시트로 내보내는 코드를 실행해 보겠습니다.
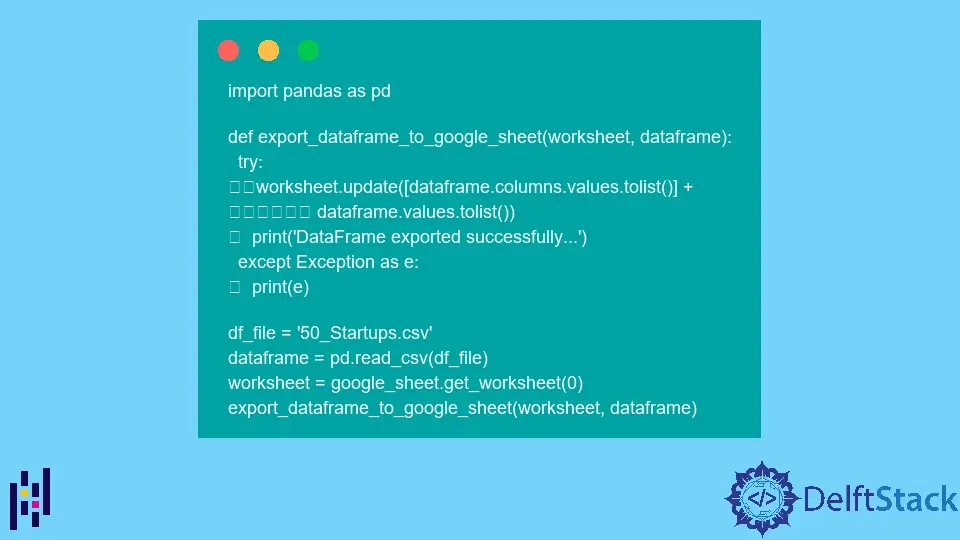
예제 코드(
demo.py에 저장됨):import pandas as pd def export_dataframe_to_google_sheet(worksheet, dataframe): try: worksheet.update( [dataframe.columns.values.tolist()] + dataframe.values.tolist() ) print("DataFrame exported successfully...") except Exception as e: print(e) df_file = "50_Startups.csv" dataframe = pd.read_csv(df_file) worksheet = google_sheet.get_worksheet(0) export_dataframe_to_google_sheet(worksheet, dataframe)
기본적으로 Google 시트에 이미 구축된 하나의 워크시트가 있습니다. 색인을 google_sheet.get_worksheet(0)로 사용하여 google_sheet에서 액세스할 수 있습니다.
그런 다음 export_dataframe_to_google_sheet() 함수를 사용하여 데이터 프레임을 내보냅니다. 단순히 데이터 프레임을 나열하고 Google 시트로 내보냅니다.
이제 Python 파일 demo.py를 다음과 같이 실행합니다.
PS C:\> python demo.py
출력(콘솔에 인쇄됨):

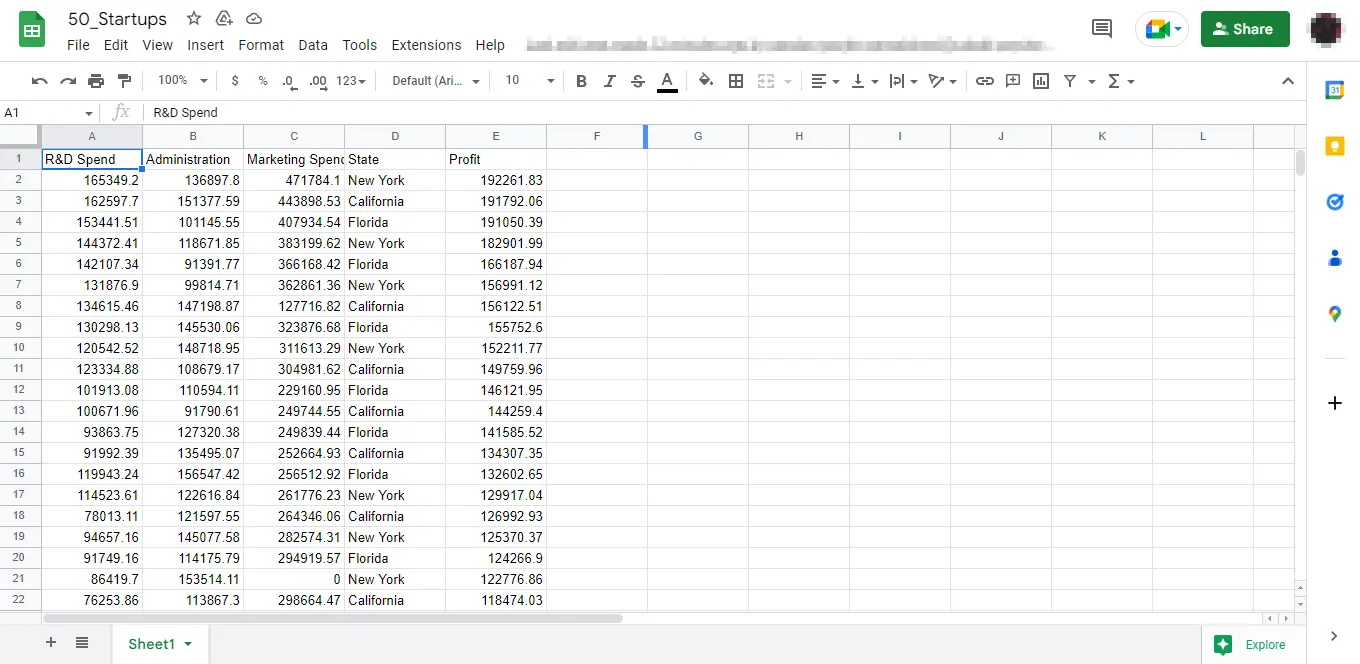
Google 시트로 내보낸 데이터 프레임은 다음과 같습니다.