HOWTO · jQuery
jQuery를 사용하여 호버에 도구 설명 메시지 표시
이 튜토리얼은 jQuery-UI에서 툴팁을 사용하여 jQuery를 사용하여 호버에 툴팁 메시지를 표시하는 방법을 보여줍니다.
도구 설명은 새 테마를 추가하고 사용자 정의를 허용하는 데 사용되는 jQuery-UI의 위젯입니다. 이 튜토리얼은 jQuery-UI 툴팁을 사용하는 방법을 보여줍니다.
jQuery-UI 툴팁
jQuery의 툴팁은 사용자 정의를 허용하고 새 테마를 만드는 데 사용됩니다. 도구 설명은 모든 요소에 첨부됩니다. 그것들을 표시하기 위해 툴팁으로 사용될 제목 속성을 추가합니다.
해당 요소 위로 마우스를 가져가면 title 속성이 있는 도구 설명이 표시됩니다. jQuery-UI는 모든 요소에 툴팁을 추가할 수 있는 tooltip() 메서드를 제공합니다.
tooltip() 메서드는 기본적으로 도구 설명을 표시하거나 숨길 때 페이드 애니메이션을 제공합니다.
이 메서드의 구문은 다음과 같습니다.
Method 1:
$(selector, context).tooltip (options)

Method 2:
$(selector, context).tooltip ("action", [params])
tooltip() 메서드를 사용하는 두 가지 방법이 있습니다.
jQuery를 사용하여 마우스 오버 시 도구 설명 메시지를 표시하려면 options 매개변수와 함께 tooltip() 메서드를 사용하십시오.
options 매개변수가 있는 첫 번째 방법은 도구 설명의 동작과 모양을 지정하는 데 사용됩니다. options 매개변수는 여러 번 삽입할 수 있으며 여러 유형이 있습니다.
아래 표는 옵션 유형을 보여줍니다.
| 옵션 | 설명 |
|---|---|
content |
이 옵션은 title 속성을 반환하는 함수의 기본값으로 도구 설명의 내용을 나타냅니다. |
disabled |
이 옵션은 true 또는 false 값으로 도구 설명을 비활성화하는 데 사용됩니다. |
hide |
이 옵션은 숨길 때 툴팁의 애니메이션을 나타냅니다. 값은 true 또는 false입니다. |
show |
이 옵션은 툴팁을 표시하는 동안의 애니메이션을 나타냅니다. 값은 true 또는 false입니다. |
track |
이 옵션은 도구 설명으로 작업할 때 마우스를 추적합니다. 기본값은 false입니다. |
items |
이 옵션은 툴팁을 표시할 항목을 선택하는 데 사용됩니다. 기본값은 제목입니다. |
position |
이 옵션은 툴팁의 위치를 결정하는 데 사용됩니다. 기본값은 제목 속성을 반환하는 함수입니다. |
tooltip class |
이 옵션은 툴팁에 추가할 수 있는 클래스를 나타냅니다. 경고 또는 오류를 나타낼 수 있습니다. 이 옵션의 기본값은 null입니다. |
먼저 매개변수가 없는 간단한 tooltip() 예제를 시도해 보겠습니다. tooltip() 메서드가 작동할 수 있도록 jQuery-UI를 가져와야 합니다.
예를 참조하십시오.
<!doctype html>
<html lang = "en">
    <head>
        <meta charset = "utf-8">
        <title>jQuery Tooltip</title>

        <script src = "https://code.jquery.com/jquery-1.10.2.js"></script>
        <script src = "https://code.jquery.com/ui/1.10.4/jquery-ui.js"></script>
        <link href = "https://code.jquery.com/ui/1.10.4/themes/ui-lightness/jquery-ui.css" rel = "stylesheet">
        <script>
            $(function() {
                $("#Demotooltip1").tooltip();
                $("#Demotooltip2").tooltip();
            });
        </script>
    </head>

    <body>
        Type Something: <input id = "Demotooltip1" title = "Please Type Something">
        <p><label id = "Demotooltip2" title = "This is tooltip Demo"> Hover Here to See Tooltip </label></p>
    </body>
</html>
위의 코드는 텍스트 입력과 레이블에 대한 툴팁을 보여줍니다. 출력 참조:

이제 content, disabled 및 track 옵션을 사용하여 예제를 시도해 보겠습니다.
<!doctype html>
<html lang = "en">
    <head>
        <meta charset = "utf-8">
        <title>jQuery Tooltip </title>
        <link href = "https://code.jquery.com/ui/1.10.4/themes/ui-lightness/jquery-ui.css" rel = "stylesheet">
        <script src = "https://code.jquery.com/jquery-1.10.2.js"></script>
        <script src = "https://code.jquery.com/ui/1.10.4/jquery-ui.js"></script>


        <script>
            $(function() {
                $( "#Demotooltip1" ).tooltip({
                    content: "Tooltip from Content",
                    track:true
                }),
                $( "#Demotooltip2" ).tooltip({
                    disabled: true
                });
            });
        </script>
    </head>

    <body>
        Type Something: <input id = "Demotooltip1" title = "Original">
        <br><br>
        Disabled Tooltip: <input id = "Demotooltip2" title = "Demotooltip">
    </body>
</html>
위의 코드는 content, track 및 disabled 옵션을 사용하는 방법을 보여줍니다. 출력 참조:
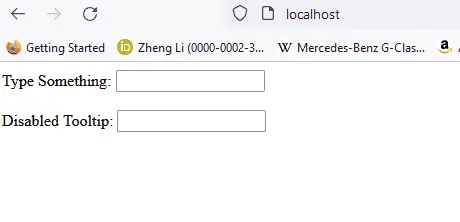
position 옵션을 사용하여 한 가지 더 예를 들어 보겠습니다. 예를 참조하십시오.
<!doctype html>
<html lang = "en">
    <head>
        <meta charset = "utf-8">
        <title>jQuery Tooltip</title>
        <link href = "https://code.jquery.com/ui/1.10.4/themes/ui-lightness/jquery-ui.css" rel = "stylesheet">
        <script src = "https://code.jquery.com/jquery-1.10.2.js"></script>
        <script src = "https://code.jquery.com/ui/1.10.4/jquery-ui.js"></script>

        <style>
            body {
                margin-top: 50px;
            }

            .ui-tooltip-content::after, .ui-tooltip-content::before {
                position: absolute;
                content: "";
                display: block;
                left: 100px;
                border-style: solid;

            }
            .ui-tooltip-content::before {
                bottom: -5px;
                border-width: 5px 5px 0;
                border-color: #AAA transparent;
            }
            .ui-tooltip-content::after {
                bottom: -7px;
                border-width: 10px 10px 0;
                border-color: white transparent;
            }
        </style>

        <script>
            $(function() {
                $( "#Demotooltip" ).tooltip({
                    position: {
                        my: "center bottom",
                        at: "center top-10",
                        collision: "none"
                    }
                });
            });
        </script>
    </head>

   <body>
    Type Something: <input id = "Demotooltip" title = "Please Type Something.">
   </body>
</html>
위의 코드는 툴팁에 팁을 추가하는 position 옵션의 데모를 보여줍니다. 출력 참조:

마찬가지로 위의 표에 설명된 목적으로 다른 옵션을 사용할 수 있습니다. 이제 방법 2를 보자.
jQuery를 사용하여 마우스를 가져갈 때 도구 설명 메시지를 표시하려면 actions 매개변수와 함께 tooltip() 메서드를 사용하십시오.
$ (selector, context).tooltip ("action", [params]) 메서드는 예를 들어 도구 설명 비활성화와 같은 요소에 대한 작업을 수행합니다. action은 첫 번째 인수의 문자열을 나타내며 params는 지정된 작업을 기반으로 제공됩니다.
여러 유형의 actions가 있으며 아래 표에 나와 있습니다.
| 동작 | 설명 |
|---|---|
close |
이 작업은 도구 설명을 닫는 데 사용됩니다. 인수가 없습니다. |
destroy |
이 작업은 도구 설명을 완전히 제거합니다. 인수가 없습니다. |
disable |
이 작업은 도구 설명을 비활성화합니다. 인수가 없습니다. |
enable |
이 작업은 도구 설명을 활성화합니다. 인수가 없습니다. |
open |
이 작업은 도구 설명을 프로그래밍 방식으로 엽니다. 인수가 없습니다. |
option() |
이 작업은 현재 도구 설명 옵션 해시를 나타내는 키-값 쌍을 가져옵니다. |
option(Options) |
이 작업은 도구 설명에 대한 옵션을 설정하는 데 사용됩니다. |
option(OptionName) |
이 작업은 OptionName의 값을 가져오는 것입니다. 다른 인수가 없습니다. |
option(OptionName, value) |
이 작업은 주어진 값에 따라 OptionName 값을 설정합니다. |
widget |
이 작업은 원래 요소를 포함하는 jQuery 객체를 반환합니다. 인수가 없습니다. |
버튼을 누르고 다른 버튼을 누를 때 도구 설명을 닫아 도구 설명을 열어 두는 열기 및 닫기 작업에 대한 간단한 예를 시도해 보겠습니다. 예를 참조하십시오.
<!doctype html>
<html lang = "en">
    <head>
        <meta charset = "utf-8">
        <title>jQuery Tooltip</title>
        <link href = "https://code.jquery.com/ui/1.10.4/themes/ui-lightness/jquery-ui.css"
         rel = "stylesheet">
        <script src = "https://code.jquery.com/jquery-1.10.2.js"></script>
        <script src = "https://code.jquery.com/ui/1.10.4/jquery-ui.js"></script>

        <script>
            $(function() {
                $("#Demotooltip").tooltip({
                //the 'of' keyword will be used to link the tooltip to the specified input
                    position: { of: '#DemoInput', my: 'left center', at: 'left center' },
                }),
                $('#DemoButton1').click(function () {
                    $('#Demotooltip').tooltip("open");
                });
                $('#DemoButton2').click(function () {
                    $('#Demotooltip').tooltip("close");
                });
            });
        </script>
    </head>

    <body >
        <label id = "Demotooltip" title = "Open and Close"></label>
        <input id = "DemoInput" type = "text"  size = "20" />
        <input id = "DemoButton1" type = "submit" value = "Click to Show" />
        <input id = "DemoButton2" type = "submit" value = "Click to Hide" />
    </body>
</html>
위의 코드는 버튼 클릭 시 툴팁을 열고 닫습니다. 출력 참조:


이제 widget 작업에 대한 예를 시도해 보겠습니다. widget 메소드는 jQuery-UI의 인스턴스를 가져오는 데 사용됩니다.
예를 참조하십시오.
<!DOCTYPE html>
<html lang="en">
<head>
    <meta charset="utf-8" />
    <link href= "https://code.jquery.com/ui/1.10.4/themes/ui-lightness/jquery-ui.css" rel="stylesheet"/>
    <script src= "https://code.jquery.com/jquery-1.10.2.js"> </script>
    <script src= "https://code.jquery.com/ui/1.10.4/jquery-ui.js"> </script>


    <script>
        $(function () {
            $("#Demo2").tooltip({
                track: true,
            });
            $("#Demo1").click(function () {
            var a = $("#Demo2").tooltip("widget");
                console.log(a);
            });
        });
    </script>
</head>

<body>
    <h1 style="color: lightblue">DELFTSTACK</h1>
    <input id="Demo1" type="submit" name="delftstack" value="click" />
    <span id="Demo2" title="delftstack"> Click Me</span>
</body>
</html>
위의 코드는 widget 메소드를 사용하여 jQuery-UI의 인스턴스를 가져옵니다. 출력 참조:
마찬가지로 다른 작업도 표에 설명된 목적으로 사용할 수 있습니다.